I’ve built dozens of grape trellises, and getting these ten steps right makes a significant difference. First, match your trellis system to your pruning method—cane or spur. Map row spacing carefully, then set end posts four feet deep with solid bracing before the concrete cures. Space line posts every twenty feet, string heavy-gauge wire at fruiting height, and train the trunk straight up. Tie down canes, skip fruit in year one, and prune dormant wood each winter. Each step has important details that require attention.
Pick a Trellis System for Your Pruning Method
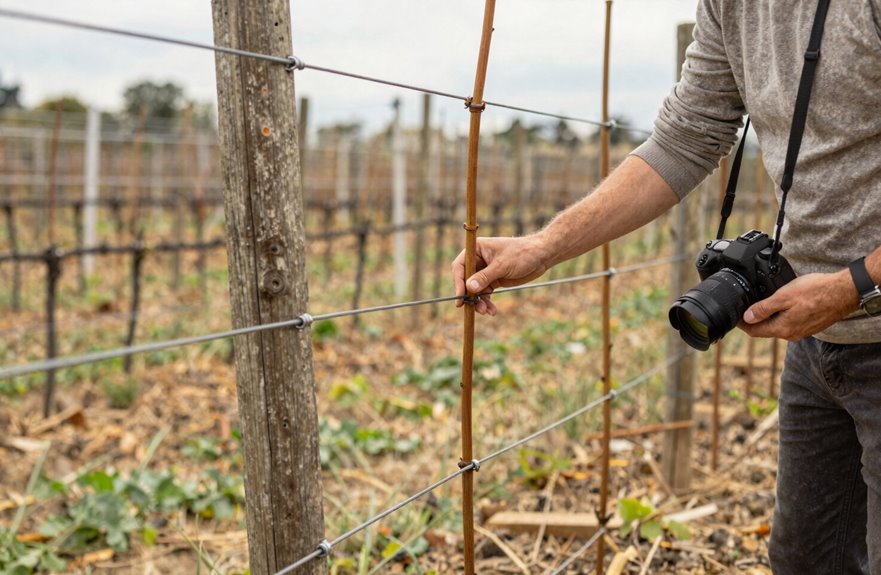
How do you match a trellis to your pruning style? I start by knowing my vine’s needs. American and hybrid varieties prefer cane pruning; European types favor spur pruning. When I’m uncertain, I opt for cane pruning since it is forgiving and straightforward.
I build cordon systems around my chosen method. For bi-lateral high cordon, I set the top wire first, train my cordon to 5–6 feet, then space fruiting spurs with two- to three-bud canes every 4–6 inches. I cap buds near 40 for balance. I select renewal spurs from pencil-thin, well-lit canes with normal bud spacing, keeping one shoot each. Early on, I skip summer pruning and secure four canes to horizontal training wires to establish my trunk. Last year’s fruiting canes become tomorrow’s renewal growth. I always plan ahead with my community of growers.
Map Your Row Spacing and Post Locations
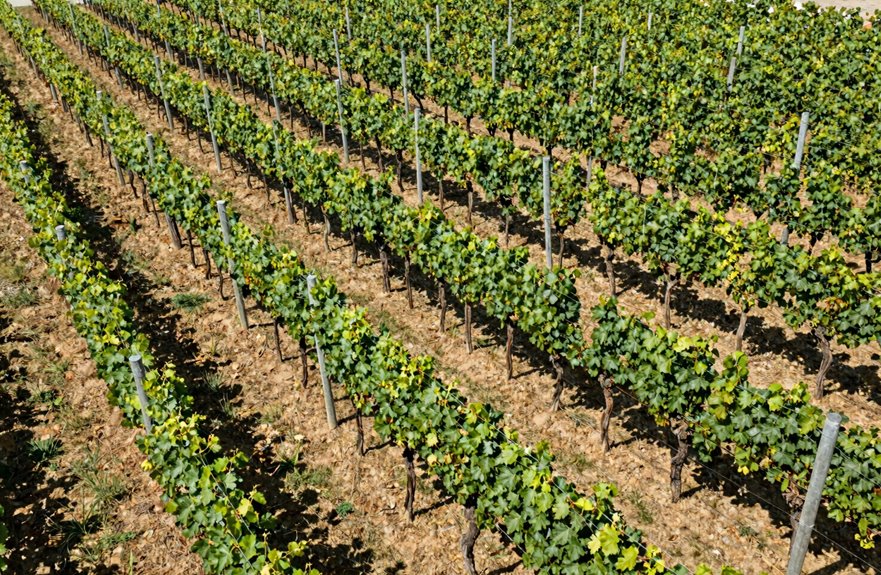
Once I’ve settled on my trellis system, I focus on the ground itself. I map my row spacing carefully, knowing proper spacing prevents girding and gives roots room to thrive. I drive stakes at each end of my planned row and stretch twine tight between them; this straight line becomes my guide.
I mark post locations every 8 feet, starting about 2 feet from the trunk. For shorter trellises, I space my end posts 10 feet apart; for longer runs, 20 to 25 feet works better. I dig holes 2 feet deep and 12 inches wide, adding crushed gravel for drainage. I set 6x8x12 posts, brace with scrap 2x4s, and pour concrete to anchor them. I tie knots in twine across three posts at 7 feet, checking level for the final trellis height.
Set End Posts Four Feet Deep and Brace Them Well
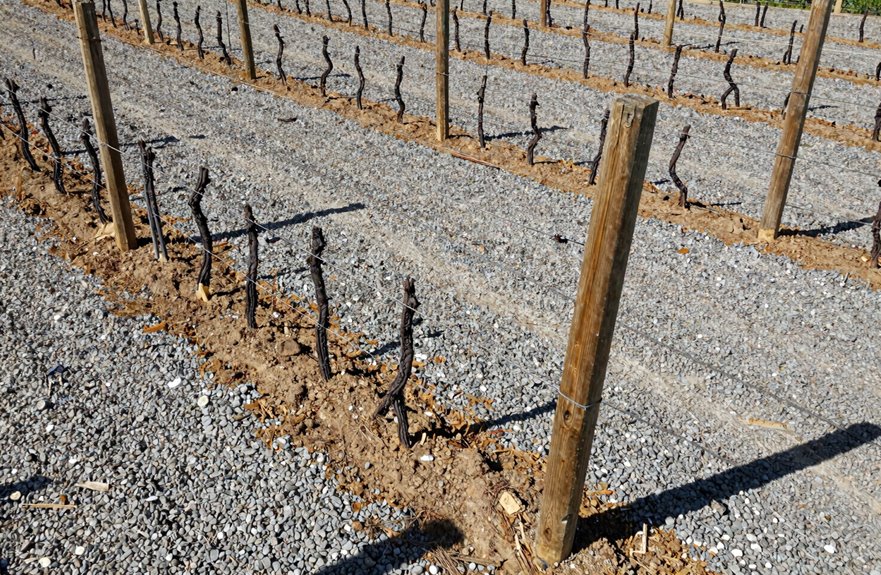
Because the end posts bear the full tension of the trellis wires and the weight of mature vines, I bury mine four feet deep, which is double the depth I use for the line posts. This burial depth anchors everything when wire tension pulls hard at harvest. I set my anchor braces before the concrete cures, using H-braces or slant braces to counteract outward forces. After the concrete cures, I check trellis height again. Settling occurs, and uneven posts mean uneven wire tension.
| Factor | My Standard |
|---|---|
| Burial depth | 4 feet minimum |
| Bracing style | H-brace or slant brace |
| Post material | Treated wood or steel |
| Concrete cure | 24–48 hours before tension |
| Final check | Level and plumb verified |
We are building something that lasts together.
Space Line Posts Every Twenty Feet to Prevent Sag
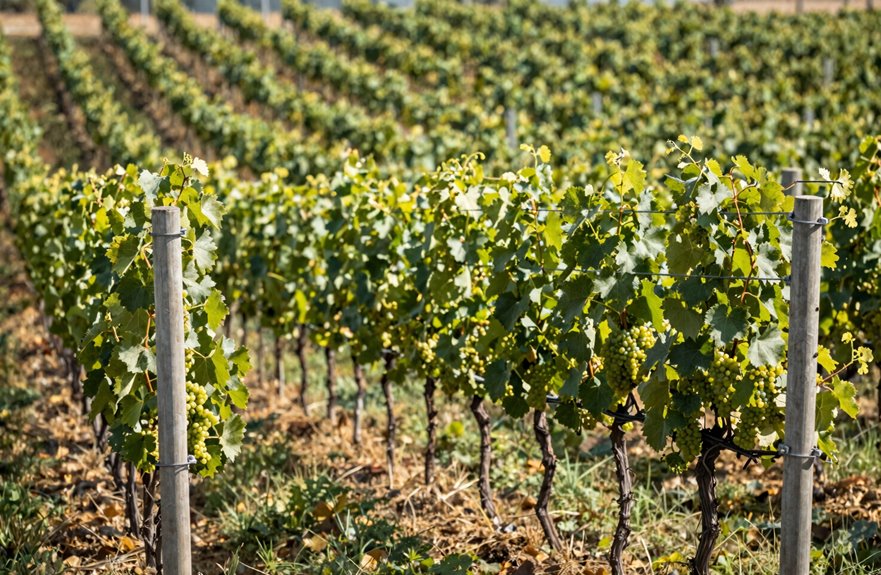
With the end posts set deep and braced, I turn to the line posts that carry the trellis between them. I space these line posts every twenty feet to prevent trellis sag from creeping into my rows. This spacing distributes the load evenly, keeping wire tensioning consistent across the entire run.
Line posts spaced every twenty feet keep wire tension consistent and prevent trellis sag from creeping into the rows.
Here are the reasons twenty-foot spacing is beneficial for your vineyard:
- It matches standard long-span designs and readily available materials.
- It keeps fruiting wood within easy reach for pruning and harvest.
- It simplifies vineyard maintenance by reducing weak points.
Without proper spacing between end posts, sagging wires can become a recurring issue. Getting this distance right from the start saves countless hours of adjustments later. Your trellis becomes the reliable backbone your vines need.
String Heavy-Gauge Wire at Fruiting and Catch Heights
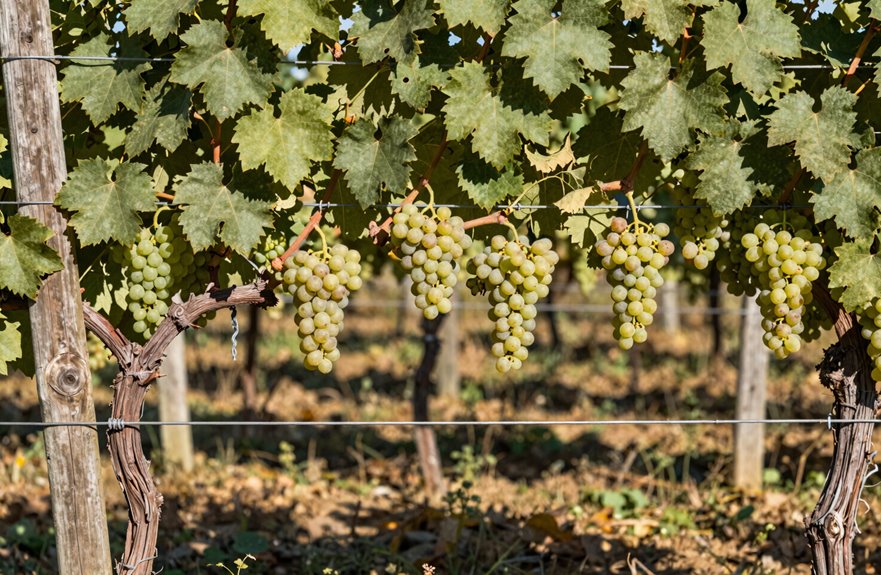
I select No. 9 or 10 gauge wire to handle the heavy fruiting load without stretching or sagging. I string this wire at 5–6 feet above ground for ergonomic harvesting and solid fruiting wood placement. A second catch wire is added higher up to train shoots upward and maintain an organized canopy.
Optimal Wire Gauge Selection
How do I know I’m stringing the right wire for my grape vines? I’ve learned that wire gauge significantly impacts load capacity. My fruiting wire must support considerable weight as clusters mature. I always choose 9 to 10 gauge for that bottom line; it’s thick enough to handle the harvest without sagging.
My catch wire sits above, guiding shoots upward in vertical systems. Both require proper tensioning with turnbuckles to stay taut season after season. Galvanized wire resists rust, though some growers prefer plastic-coated stainless steel in wet climates.
Here’s what I prioritize when selecting wire:
- Heavier gauge (9–11) for maximum strength where fruit hangs
- Galvanized wire for durability against moisture and time
- Proper tensioning hardware to maintain straight, reliable lines
Proper Height Positioning
Where should those wires go once you’ve picked the right gauge? Let’s look at proper positioning.
For your trellis, I set the main fruiting wire at 5 to 6 feet high, which allows easy access to clusters without strain. If you’re using cane pruning, this height helps manage renewal wood effectively. I add an upper wire about 12 inches above for catch wires in vertical shoot systems, guiding shoots upward for efficient thinning.
In two-wire setups, I place the lower wire at 2 to 3 feet to support renewal spurs, while the upper wire is designated for fruiting. I use 9–11 gauge wire to prevent sag under heavy crops. After freeze-thaw cycles, I re-tighten everything to maintain proper height, ensuring your vines remain healthy throughout the seasons.
Add Turnbuckles to Keep Wire Tight Year After Year
Why let sagging wires ruin your harvest when a simple turnbuckle can solve the problem? Turnbuckles keep my trellis system performing season after season.
Here are the essential points:
- Install eye screws or hooks at your end posts for solid post anchoring.
- Choose 2–4 inch turnbuckles, with 3 inches typical when fully tightened.
- Hand-tighten initially, then re-tighten after freeze/thaw cycles.
I maintain wire height around 5–6 feet for my grape vines, and proper wire tension prevents sagging under heavy fruit loads. Without this step, your trellis may fail when you need it most. Regular maintenance means checking turnbuckles yearly and tightening them as your vines mature. This effort preserves structural support and contributes to a thriving vineyard alongside fellow growers who have mastered the craft.
Train the Trunk Straight Up to the First Wire
When should you start shaping your vine’s future? I begin trunk straight up training immediately after planting, securing selected canes to guide my vertical trunk toward the first wire. This early wire training establishes the backbone of my entire training system.
I keep my grape trellis lines tight and monitor growth weekly, pinching only after my vine reaches that first wire. If I’m running late in the season, I continue vertical alignment into year two without concern. During these critical months, I strip away every fruiting cluster to prioritize root development and proper vineyard establishment. I often leave an insurance cane against spring frost, as protecting new growth is vital for every careful grower. The precision applied now yields benefits for decades.
Tie Down Canes or Cordons for Your System
Once my trunk reaches that first wire, I establish the horizontal framework that defines my chosen training system. I tie down canes or cordons to the trellis wires using breathable strips; old t-shirt fabric works perfectly to keep growth horizontal without girdling. This prevents vertical breakage while I train my vine’s permanent structure.
For cane pruning, I secure basal fruiting canes with 4–6 buds on the bottom and 3–5 above, pruning excess during dormancy. If I’m building a bilateral high cordon, I space two- to three-bud spurs every 4–6 inches, capping buds around 40 per mature vine.
- I add renewal spurs—one shoot per cane—to ensure next year’s production.
- I select pencil-thin, well-lit canes with evenly spaced buds for consistency.
- I prioritize airflow and sunlight by loosely weaving growth and avoiding crowding, balancing vegetative and reproductive growth throughout.
Pinch Off Fruit Clusters in Year One
I’ll pinch off every fruit cluster I spot in year one because I’m prioritizing root system development over immediate harvests. This approach redirects energy toward building strong trunks and healthy canes that will support future vigor and structure. This early sacrifice establishes a foundation for long-term productivity, allowing me to create the permanent framework my vines need for decades of reliable fruiting.
Root System Development
Pinch off every fruit cluster you spot during year one. This action forces the vine to focus its energy on root development instead of draining early carbon reserves into shoots and immature grapes. It may be tempting to let those first clusters grow, but the emphasis is on establishing a strong foundation.
Here’s how we set our vines up for decades of harvests:
- Select four strong canes and secure them to your trellis wires, keeping bottom canes with four to six buds and top canes with three to five buds.
- Establish the trunk now, even if top-trunk reach waits until February or March.
- Skip summer pruning entirely that first year; let those roots dig deep.
Different training systems require patience with pruning. Delaying fruiting wood formation strengthens trunk development and ensures your future canes emerge from power, not desperation.
Vigor and Structure
Strong roots mean nothing without disciplined energy management above ground. In year one, I am pinching off every fruit cluster I find; yes, every single one. It may be painful, but we are building something together here, and that energy belongs underground, forging the foundation we will depend on for decades.
My trellis design demands vertical training from the start. I am guiding shoots upward along the wire trellis and practicing careful shoot positioning that will become second nature. I favor cane pruning for these early years, selecting renewal canes that will mature into productive one-year-old wood. I will not touch summer pruning; it is too stressful when roots are fragile. Instead, I am establishing structure through strategic cuts, ensuring my vine learns its place in our shared system before we ask it to produce.
Long-Term Productivity
Patience pays dividends when you’re growing grapes for the long haul. Pinching off every fruit cluster in year one builds the foundation for decades of harvests. You’re not losing a crop; you’re investing in what comes next.
During establishment, I focus on the following:
- I direct all energy downward, building roots instead of ripening fruit.
- I train vigorous shoots straight up my trellis wire, securing them to posts until they reach the top cordon.
- I avoid summer pruning completely, allowing canes to run wild to thicken my vine’s trunk.
Once dormancy hits, I prune deliberately. I keep bottom canes at 4–6 buds, top canes at 3–5 buds, and select renewal spurs that will carry next season’s production. Following this process leads to a mature vine that produces forty balanced buds and years of abundant clusters.
Prune Dormant Wood and Check Hardware Each Winter
Winter is the time I focus on dormant pruning and hardware checks before the growing season begins. I perform my dormant pruning from late February through early March, keeping bottom canes at four to six pruning buds and top canes at three to five. For renewal spurs, I retain one basal shoot per cane during the second season, capping mature plants at forty buds to protect food reserves and prevent winter injury. My hardware check includes tightening wires across the trellis system and securing turnbuckles, eye screws, and joints.
| Task | Timing | Purpose |
|---|---|---|
| Dormant pruning | Late Feb–early Mar | Shape vine, control buds |
| Renewal spurs | Second season | Ensure future growth |
| Wires tightening | Winter inspection | Support heavy crops |
| Trellis system check | Annually | Prevent collapse |
This winter inspection is essential for keeping our vines healthy and productive.