I build my shed ramp by first calculating the slope; I aim for a 1:5.4 rise-to-run ratio, which gives me about 10.5 degrees for smooth mower access. I level a gravel base and install a pressure-treated 2×8 ledger board 3/8 to 1/2 inch below the door. Then, I notch and secure 2×6 joists 16 to 24 inches apart. I top it with 2×6 deck boards spaced 1/4 inch apart, bevel the last edge, and load-test with my mower before sealing everything for weather protection. Follow along as I detail each step to ensure your ramp is sturdy and functional.
Will a Shed Ramp Work for Your Height and Slope?
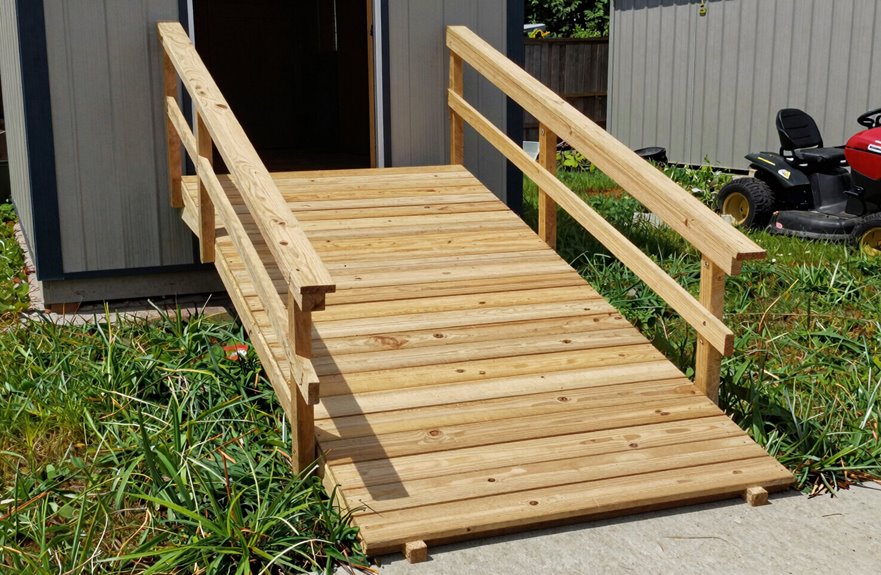
Before you start cutting lumber, you’ll need to determine if a ramp works for your specific situation. Ramp slope is crucial; you don’t want your mower scraping or struggling. Aim for slopes between 1:4 and 1:8; a 1:5.4 ratio generally works well for most setups. Ground slope can significantly affect your plans. I once encountered an 8-inch front-to-back slope and had to level the shed first, which changed my ramp height and length calculations.
I attach a ledger board beneath the door with 3/8 to 1/2 inch clearance; this anchors everything. My typical frame uses four 2×6 joists spaced about 22 inches apart for proper deck width support. Make sure to account for the deck rise to ensure a smooth transition from ramp to shed.
Calculate the Exact Angle Your Riding Mower Needs
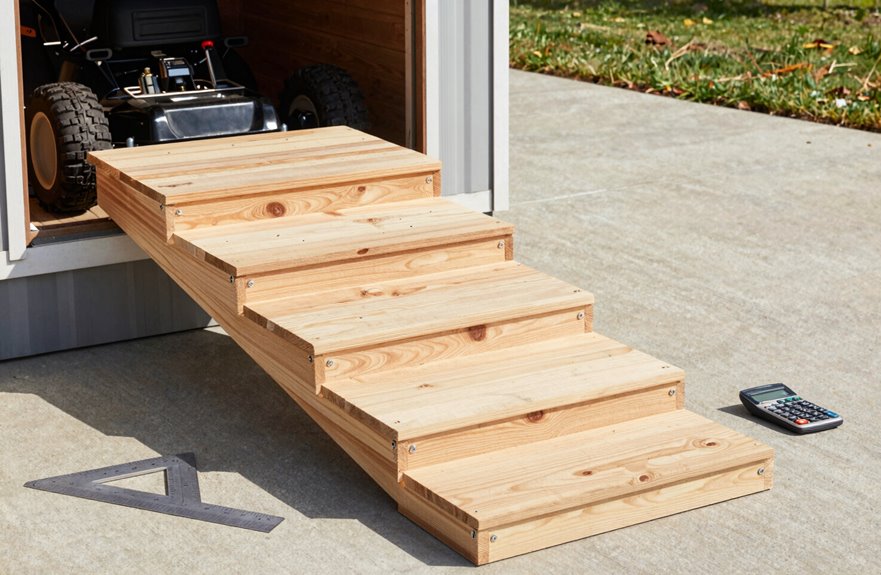
How steep is too steep when you’re rolling hundreds of pounds of machine up a ramp? A ramp slope between 1:4 and 1:8 rise-to-run is manageable for most riding mowers. For my setup, I calculated the exact angle by measuring my shed’s rise first. With an 18-inch rise and a 1:5.4 ratio, I aimed for roughly 10.5 degrees. This angle balances traction and control. The ramp length directly affects this angle; longer runs create gentler slopes. I always double-check mowing clearance at the threshold to ensure the deck won’t scrape. Getting this calculation right helps you create ramps that function effectively season after season.
Pick Pressure-Treated Lumber Built for Ramp Loads
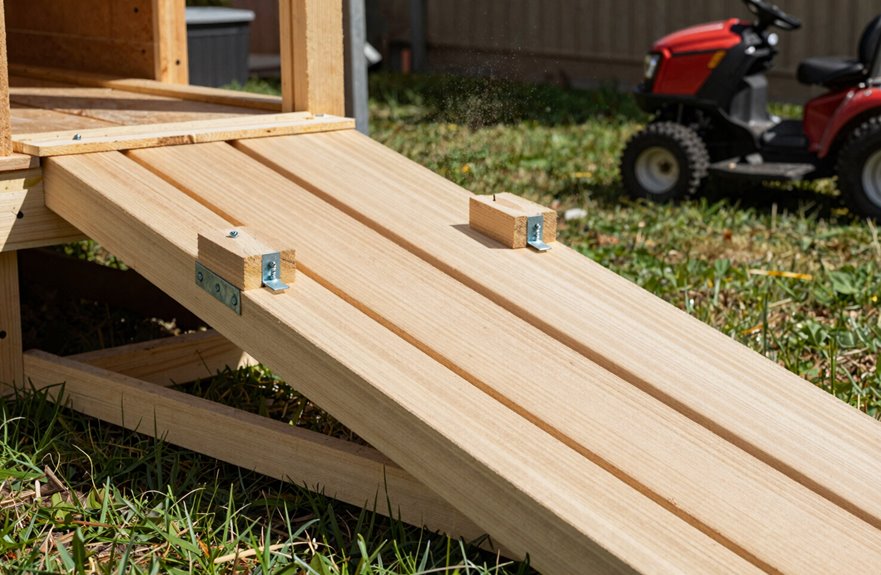
With the angle set, I’m ready to pick lumber that can handle the load. I choose pressure-treated lumber because it’s built specifically for ramp loads and offers exterior durability. For my riding mower, I’ll use 2×6 deck boards with 6×6 or 4×4 framing; this combination provides the load-bearing support needed without guesswork.
When cutting these boards, I seal the ends to block moisture from attacking the grain. This small step helps protect my investment. I can also stain or seal the finished ramp to match my shed, enhancing its appearance.
Every few years, I will reseal and inspect for cracks or loose fasteners. This maintenance ensures my ramp remains strong and reliable throughout the seasons.
Level a Gravel Base Before You Frame Anything
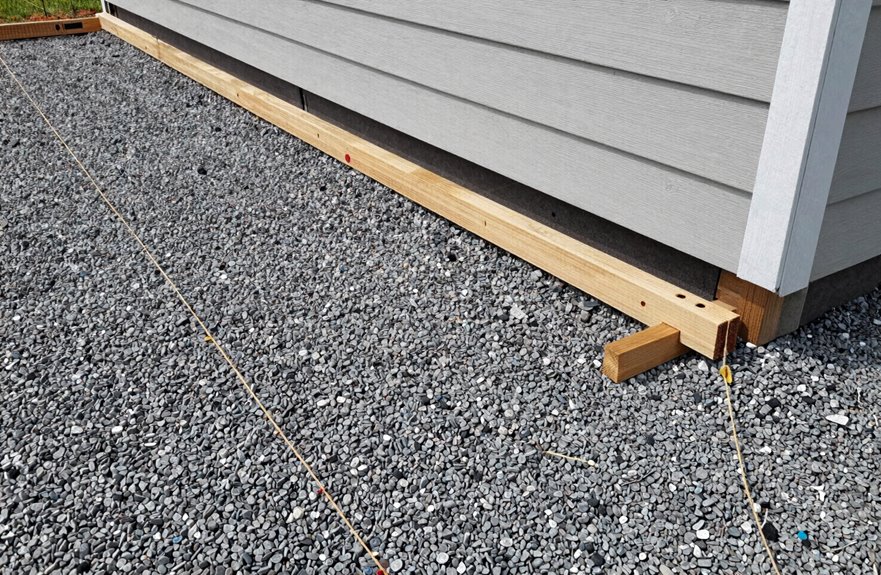
I start every ramp build by spreading four cubic yards of crushed gravel to create a flat, draining base that won’t shift under the 6×6 frame. I will show you how to check gravel depth requirements to ensure full support under the entire joist footprint without wasting material. Then I will walk you through slope correction methods I use to account for grade changes, such as an 8-inch drop. Getting the base level now ensures that your ledger and ramp joists align properly with the ground later.
Gravel Depth Requirements
Where should you begin when the ground beneath your shed slopes eight inches from front to back? I mark my ramp footprint, then excavate shallow trenches so my joists rest on compacted gravel. I spread roughly four cubic yards of crushed gravel evenly beneath the entire ramp area. Without this level foundation, my ramp shifts and my mower suffers.
I compact and level that gravel repeatedly. I check with boards and levels throughout. Proper drainage prevents settlement under load, and we are building something durable together.
| Gravel Depth | What It Protects | How It Feels |
|---|---|---|
| 4-6 inches | Your mower’s engine | Like you’re finally home |
| Compacted tight | Years of weekends | Like belonging somewhere |
| Perfectly level | Every load you haul | Like you built it right |
Slope Correction Methods
How do you bridge an eight-inch drop without throwing everything off level? Slope correction isn’t as intimidating as it sounds.
I start by grading that 8-inch front-to-back slope until it’s level relative to the shed. This adjustment in my ramp design keeps the shed true after framing. I dump 4 cubic yards of crushed gravel, level it, and compact it hard. Then I center the shed, pull it within 1/2 inch of the front 6×6, and attach my ledger board with 3/8 to 1/2 inch door clearance.
Key checkpoints I never skip:
- Verify grading achieves true level before any framing begins.
- Confirm rise-to-run ratio hits at least 1:4 (I prefer 1:5.4 for mowers).
- Double-check ramp alignment matches the corrected threshold height exactly.
Install the Ledger Board With ½ Inch Door Clearance
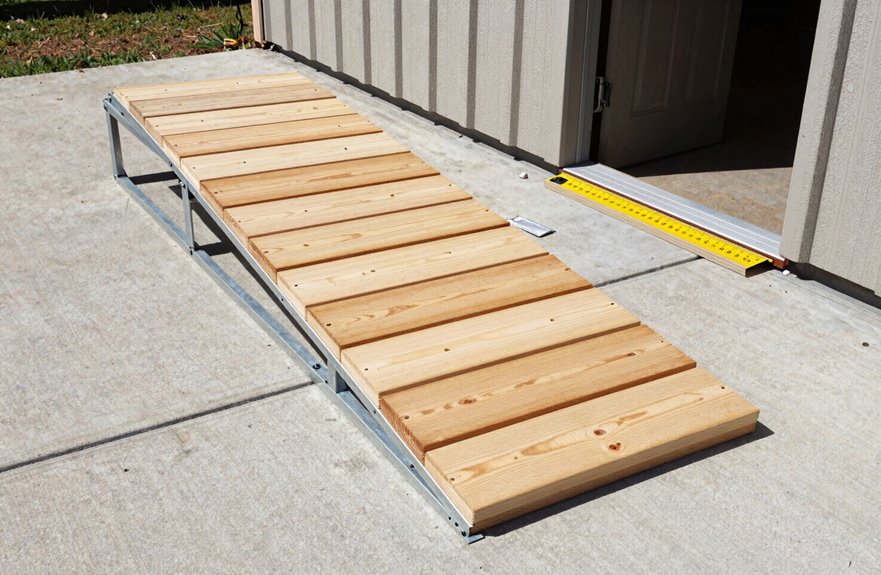
I position the ledger board so it sits ⅜ to ½ inch below the shed door, cutting it from pressure-treated 2×8 to match the door width for proper clearance and drainage. I align the top edge with my desired deck height, keeping it just under the shed floor to control bumps and avoid door interference. I then secure it to the sill plate with 3-inch lag bolts, checking for levelness before proceeding.
Ledger Board Positioning
Because the ledger board serves as the anchor point where your ramp meets the shed, it’s essential to position it accurately before proceeding. Here’s how we can achieve that.
I rest my ledger board on the 6×6 supports for proper alignment. I align the top edge precisely with my intended deck height, taking into account both deck rise and ramp angle for a smooth transition. We’ll check the following:
- Verify the ledger sits level using a bubble level or straightedge cross-check.
- Confirm you’ve achieved the necessary 3/8 to 1/2 inch door clearance by trimming from a 2×8 if needed.
- Double-check alignment before securing it to the shed sill plate.
Once I’m satisfied, I anchor it solidly with 3-inch lag bolts to ensure a strong foundation.
Door Clearance Gap
Why does that small gap under the door matter so much? It protects everything we build together. I install the ledger with 3/8 to ½ inch clearance beneath the door, allowing for drainage and a smooth ramp transition. I cut that 2×8 ledger down so it rests level on my 6×6 supports, creating consistent space between the board’s top and the door sill. This gap prevents water trapping and allows my ramp to crest naturally without bumping or binding. The deck rise and ledger height directly influence how my ramp meets the floor. If this is done incorrectly, I risk losing valuable clearance. I confirm level now, preserving that gap before moving forward.
Lag Bolt Attachment
With the clearance gap now set and verified, I am ready to fasten the ledger board permanently. I cut the ledger to match my door width—24 or 26 inches—and position it just below the shed threshold to ensure the critical offset for a smooth ramp transition.
Before drilling, I am checking the following:
- Level ledger — no twist or tilt that could affect my ramp incline
- Solid contact — the board rests flush against the shed framing
- Drainage gap — that 3/8 to 1/2 inch space prevents water pooling
I drive 3-inch lag bolts through the ledger into the sill plate, spacing them every 12 inches. This ledger attachment secures my shed threshold clearance while supporting the planned 1:6 ramp incline. When I finish, there is no wobble; I have a solid foundation ready for the deck boards.
Notch Joists So They Sit Flat on the Ground
How do you keep a ramp from rocking on uneven ground? I have found that notching the joists effectively addresses this issue. Instead of relying on joist hangers, I cut notches directly into the joists so they sit flush against both the ground and the ledger. This ensures the ramp frame has solid and even contact from the start.
Notching each joist also lowers the overall ramp height without compromising the structure. This alignment allows the deck top to match perfectly with the clearance gap under the shed door. I space the joists 16 to 24 inches apart and fasten them to the ledger with outdoor-rated hardware. This technique provides stability and maintains a straightforward build that is accessible for anyone to execute.
Dig Footing Holes and Level Each Joist Precisely
Where should you break ground to create a ramp that won’t shift or settle? I’m digging footing holes where my ramp joists and end piece will anchor, correcting for that 8-inch front-to-back slope so everything aligns with my level shed base.
Level precision requires patience. I lay boards across holes, check with my level, and adjust depth until the frame sits true along every plane. Here’s how I ensure I’m building something solid:
Level precision requires patience: lay, check, adjust, repeat—until the frame sits true along every plane.
- Measure hole depth against each joist’s notched profile.
- Place temporary boards and check both width and length with a level.
- Verify the finished frame won’t rock or twist under load.
I complete end-piece digging at all four 2×6 bottom ends to maintain square geometry. Finally, I confirm shed ramp clearance remains at 3/8 to 1/2 inch beneath my door, ensuring no binding or catching for a smooth ride.
Secure Joists to the Ledger Board With the Right Fasteners
My footing holes are dug and level, so I’m ready to lock the frame together starting at the shed. I’ve attached the ledger board to my shed’s sill plate using 3-inch lag bolts, which serves as a solid anchor point.
Next, I’m angling the ends of my four 2×6 joists so they’ll sit flush against that ledger board. Spacing them 22 inches apart provides the sturdy substructure needed for heavy loads. I’m toe-screwing each joist into the ledger board with decking screws, then adding my cross-piece at the bottom to keep everything square while I check level one more time.
These fasteners are essential for building a structure that can support our mowers and withstand seasonal changes.
Space and Screw Down Deck Boards for Drainage
I cut each deck board to the full ramp width and lay them with a ¼-inch gap between slats so water runs off instead of pooling. I drive two screws into every joist to lock the boards flat and prevent warping over time. I also bevel the last board’s edge to ensure my mower rolls on smoothly without catching.
Deck Board Spacing
Once you’ve secured the frame and joists, it’s time to lay the deck boards that will support your riding mower. I cut my 2×6 deck boards to the full ramp width of 72 inches, ensuring attention to every detail.
Here’s what I’ve learned about proper spacing:
- Leave 1/4-inch gaps between deck boards for drainage.
- Pre-drill holes before driving screws to prevent splitting.
- Snap a final chalk line to maintain consistent spacing from end to end.
I fasten each board with galvanized screws into the joists for a flush finish. On the last board, I bevel the edge to ensure a smooth roll for the mowers, eliminating potential snags. This approach results in a well-constructed and functional ramp.
Screw Installation Pattern
With the boards spaced and ready, my focus is on fastening them down so water flows through while everything remains secure. My screw installation pattern starts at the top, securing each board flush against the ledger. I cut every board to the full ramp width to ensure clean and consistent edges across the entire ramp surface.
I am using galvanized deck screws, pre-drilling when needed to prevent splitting. Two screws per board end hit the joists squarely; I marked those locations earlier to avoid guessing. That quarter-inch gap between boards allows rainwater to escape instead of pooling.
I check level as I progress, making adjustments before the final tightening. For the last board, I bevel the edge to ensure wheels roll smoothly off. This pattern maintains a solid and safe build, prepared for years of use.
Load Test With Your Mower, Then Seal the Wood
Why guess whether your ramp can handle the job when a quick test provides clarity? I roll my riding mower onto the ramp and drive slowly up and down, listening for creaks and watching for flex. Load testing confirms my ramp’s strength before I commit to full use.
I built the framework with pressure-treated lumber to resist rot and insects, but untreated wood won’t endure the seasons. Here’s how I secure my efforts:
- Let pressure-treated lumber dry fully before sealing.
- Check for shrinkage gaps and tighten screws after the first month.
- Apply a quality sealant or stain to the deck and joists.
I reapply that sealant or stain every few years. This routine keeps our ramps sturdy and ensures that our mowers operate safely for years to come.