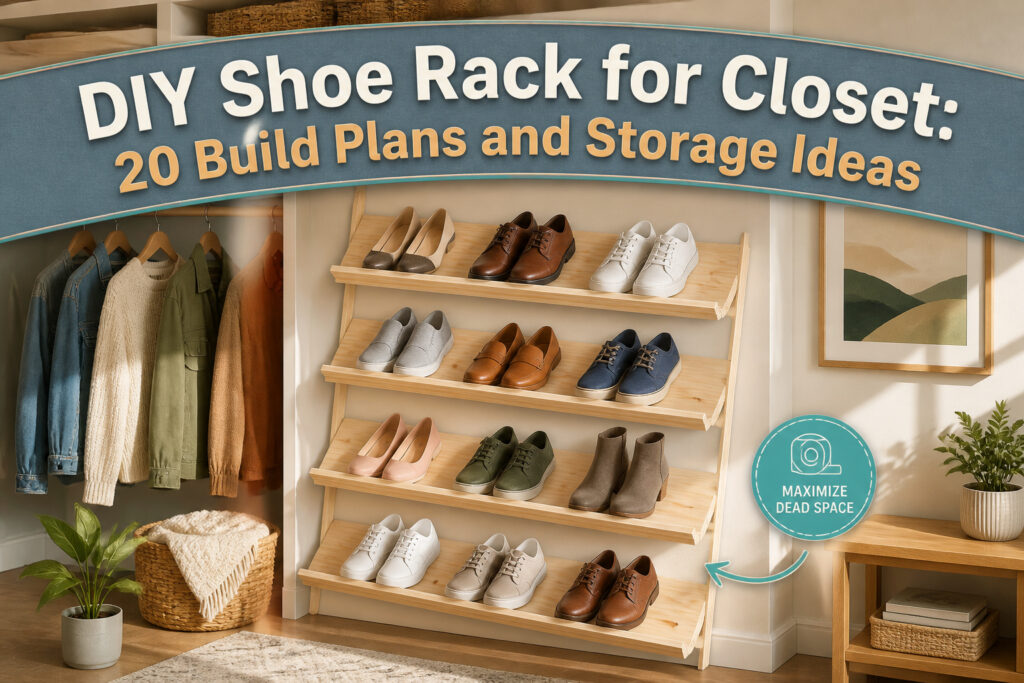
A DIY shoe rack for closet builds starts with knowing which design actually matches your space, not your Pinterest board. Most of these twenty plans fail if you skip the one measurement that matters: the gap between your hanging rod and the side wall, often dead space a 38-inch tilted board can claim without a single new hole in drywall. The single 1×3 wall rack proves it, using gravity and a strip of quarter round to hold three or four pairs where floor racks never fit.
One Board Wall Shoe Rack
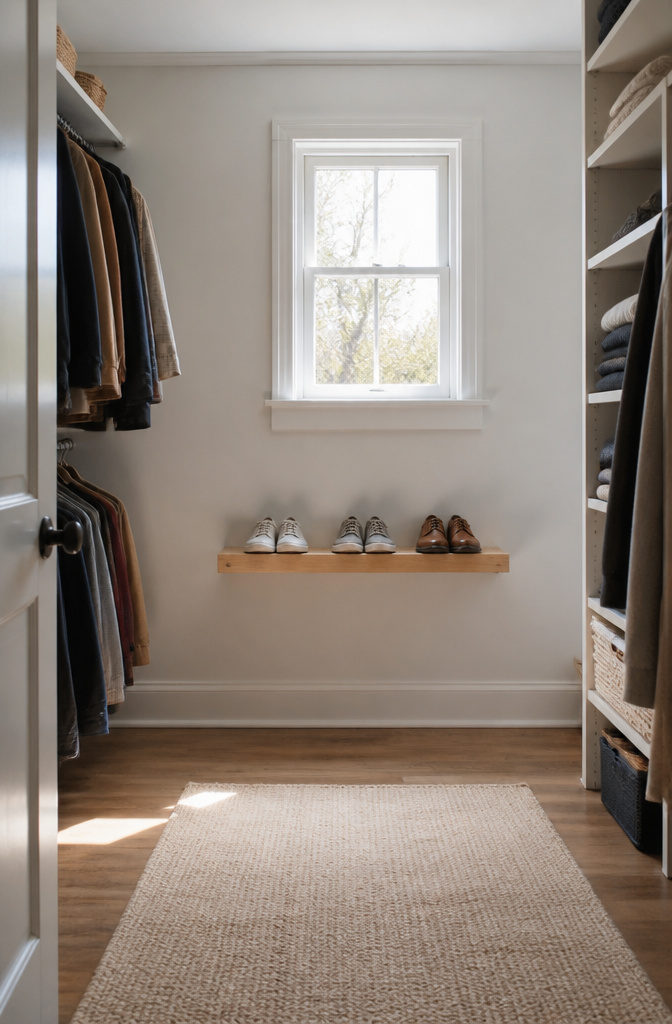
A single 1×3 board, eight feet long, can hold three or four pairs of shoes against a closet wall without stealing floor space. The trick is tilting the board so gravity does the holding, then adding a strip of quarter round across the front edge to keep the toes from sliding off. The finished piece runs 38 inches by 13 1/2 inches, a footprint that fits the narrow gap beside most hanging rods.
The cut list stays short. One 1×3 gives you the backboard and enough scrap for two small cleats. Quarter round, cut to the same length as the board, nails along that front lip. Two 1/2-by-2-by-4-inch blocks screw to the rear; they catch on the closet system’s side pegs so the shelf stays put when you angle it. Sand the edges before paint, since raw quarter round splinters fast under a shoe sole.
This setup works because it borrows the same tilt logic as the metal shelves already in the closet, just at a scale that squeezes into dead wall space. For renters, the small cleats mean no new holes in drywall, and the whole thing lifts out if you ever need the rod back.
Quick Two-Tier Shoe Rack
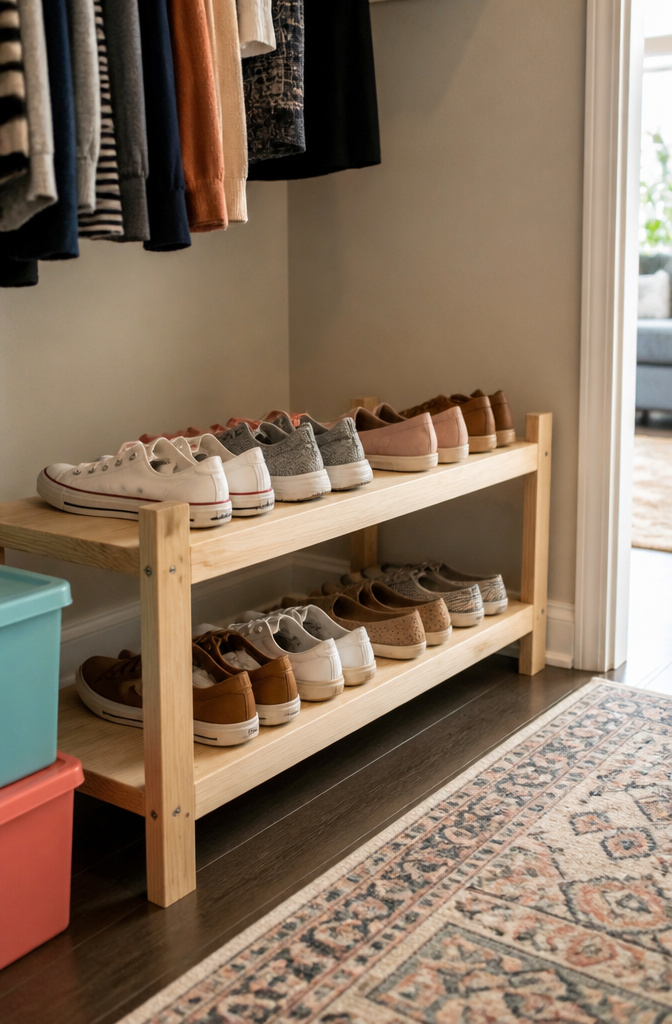
A quick two-tier shoe rack built from one 2×2 and two 1×3 boards keeps the material list short enough that even a first project feels manageable. Pocket hole joinery holds the frame square, though brad nailing works if that is what you already own. The 5-inch shelf spacing fits most sneakers and flats without wasting height, and the whole unit sits comfortably on a standard closet floor without blocking the door swing.
The back gets a small stabilizer block, roughly a half-inch by two inches, nailed to the rear edge to keep the rack from sliding when the closet shelf above tilts. Check the fit against your existing pegs or wall before paint; a dry run saves the trouble of touching up scuffed corners later.
Simple 2×2 Shoe Rack
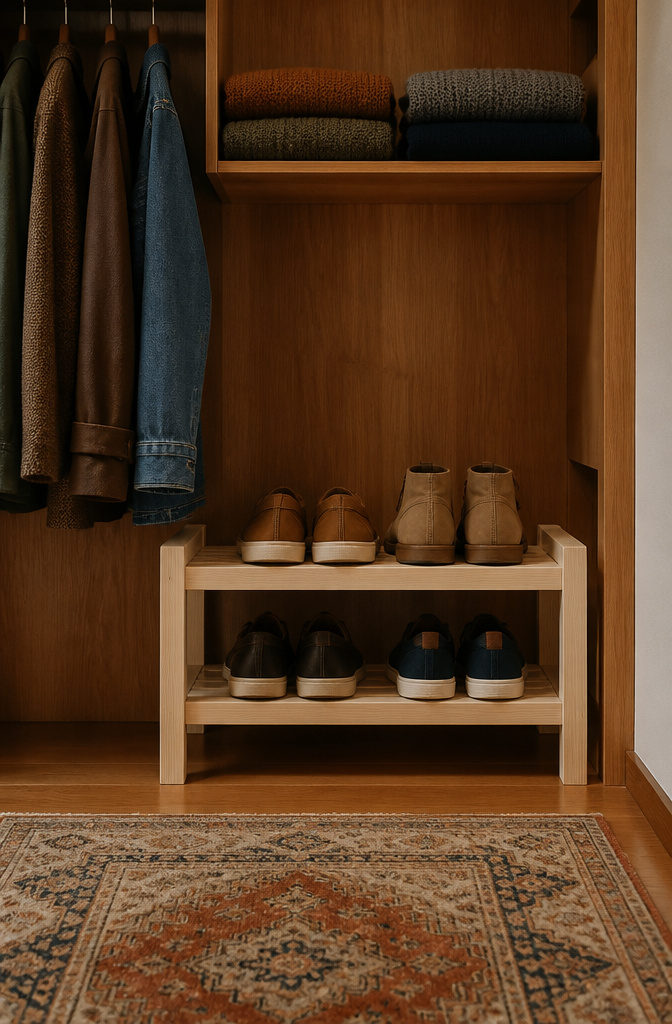
A 2×2 frame gives a shoe rack rigidity without the bulk of a 2×4 build, which matters when you are already fighting for inches in a narrow closet. The stock is thick enough to stay square under a full row of heels or boots, but it does not eat the shelf depth the way wider lumber would. I have seen builds where the frame itself stuck out farther than the shoes.
The real advantage is how cleanly the width adjusts. Measure your closet floor or the bay between existing shelves, then cut your horizontal 2x2s to that exact length. One builder I read about worked with a 38-inch span; another sized to 15 inches of depth specifically to keep a closet door from hitting the rack. The point is the number comes from your space, not from a plan. A home improvement store will cut the pieces to length if you do not want to handle a saw.
If you are anchoring to a wall, drill pilot holes and drive screws into the studs. Drywall alone will pull out once the rack loads up. A stud finder that marks the edges of each stud saves you from guessing the center. Build a bottom frame first if you want to add trim later; make that frame three-quarters of an inch wider than the rack body so the trim sits flush. A plywood skin across the frame top, tacked with brad nails and glue, finishes the shelf surface without the cost of full boards.
Double 2×2 Shoe Rack
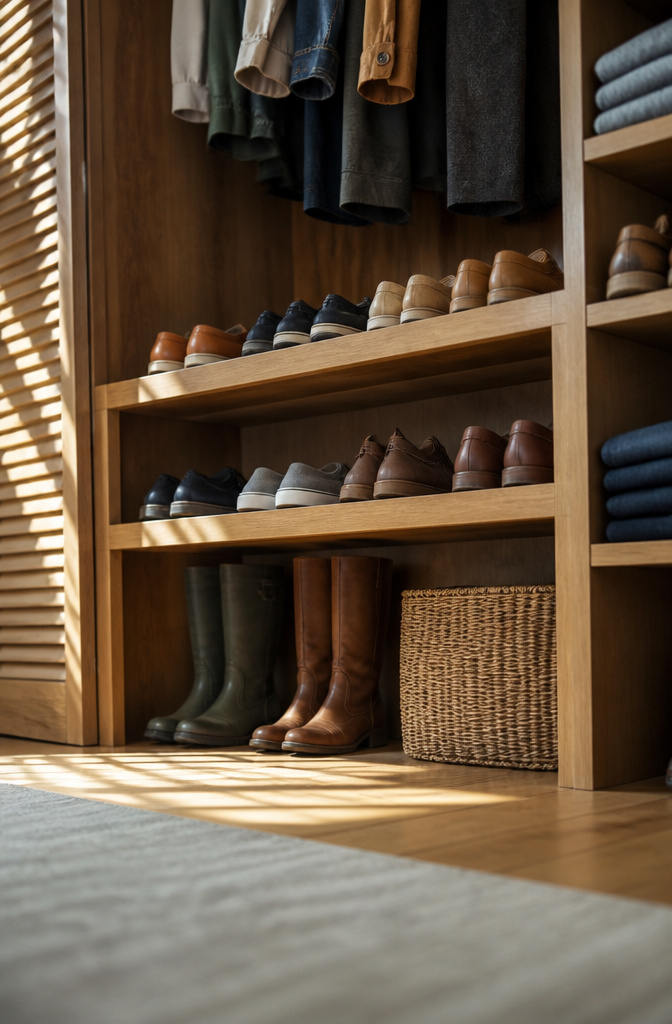
Two open shelves give you room for everyday pairs, but the real payoff is the gap underneath. Leave that lower space tall enough for boots standing upright or a flat storage box and you stop losing floor area to things that do not stack well.
The doubled 2×2 frame is what keeps this from wobbling when you load it. Running two parallel rails on each side, front and back, turns the whole thing into a shallow box instead of a ladder of sticks. Glue and screw the joints; the second rail catches any twist the first one misses.
I would build the shelves as fixed boards rather than slats. Shoes drop grit through gaps, and a solid surface means you can slide the whole rack out to sweep behind it without leaving trails. Paint or seal the wood before you load it, especially the underside, closet air is damp enough to swell raw pine over a season.
Stackable Shoe Racks
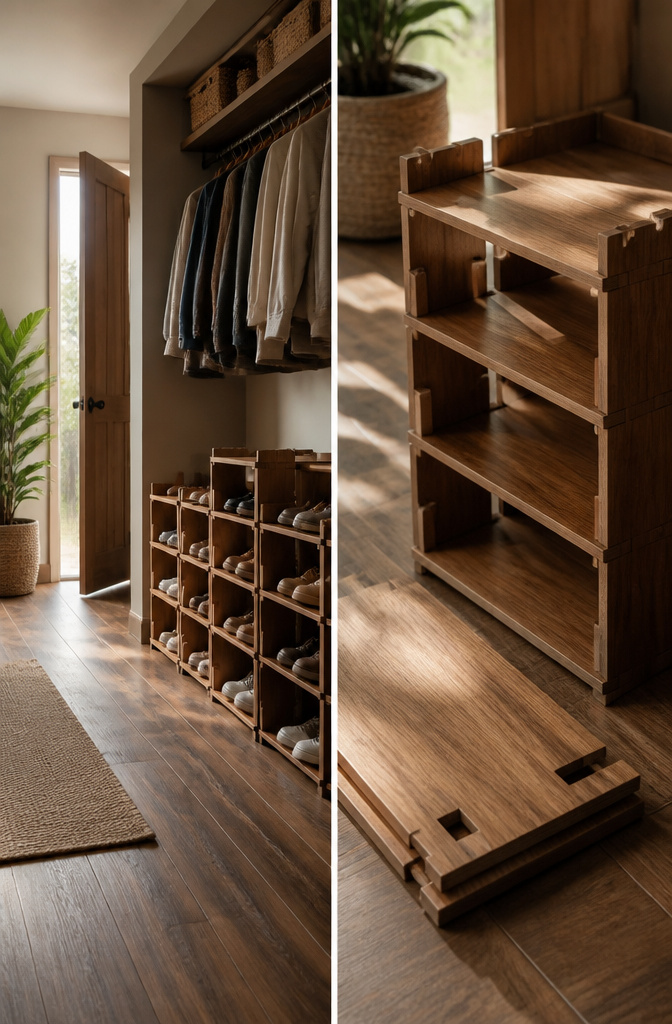
A stackable shoe rack starts with one unit and grows only when your closet demands it. Two identical frames side by side handle a modest collection; four stacked two-high fill a full wall without ever committing to that footprint from day one.
The modularity matters most for renters. When I moved from a studio to a one-bedroom last year, the same three units that lived under my hanging rod became a vertical column in the new walk-in. No new cuts, no new hardware. The locking mechanism is usually nothing fancier than dowels or interlocking corner posts that seat into the unit below. Gravity does the rest, though a dab of wood glue on the first assembly keeps the stack from wobbling when you bump it reaching for boots.
Build two units if you own fewer than a dozen pairs and want floor space for a laundry basket. Build four if you already buy shoes faster than you retire them. The identical dimensions mean a fourth unit added two years later slides in without a visible seam, and the whole thing still breaks down flat when the lease ends.
Z Tower Shoe Rack
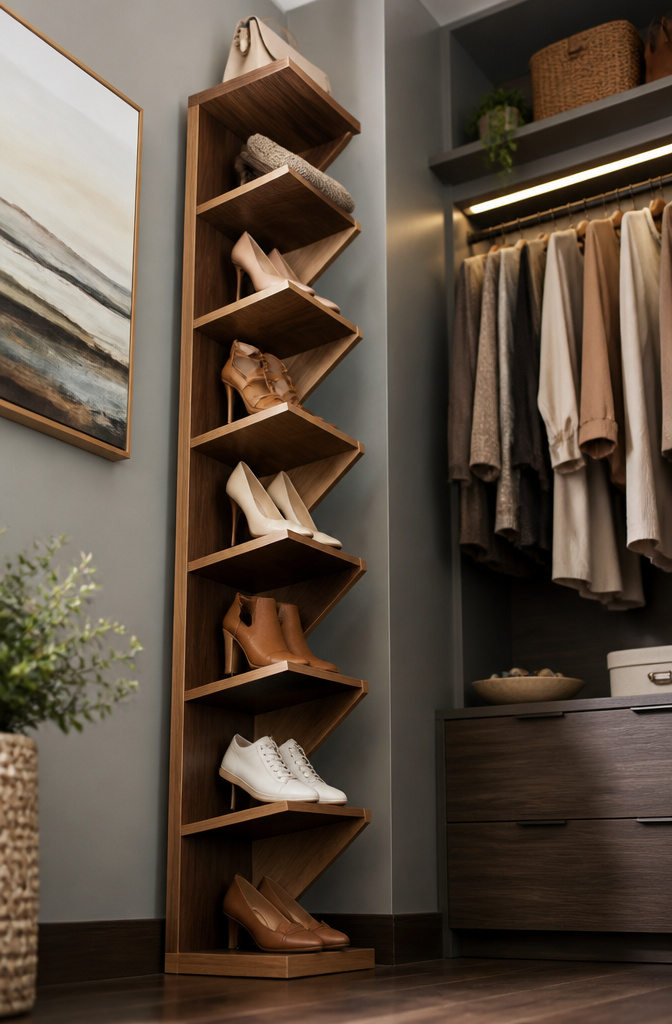
A 90-inch tower barely needs more floor space than the shoes themselves, yet it pulls the full closet height into service. The angled front shelf is the detail that keeps small flats and heels from sliding out the open front; gravity does the holding, so no lip or rail blocks the quick grab on a busy morning.
Plywood and common boards carry the load, and the build sits at an intermediate skill level: a saw and drill handle the cuts, with the angle itself set by ripping a bevel on the front edge of each shelf before fastening. The footprint stays narrow enough to tuck beside hanging clothes or behind a door swing that would waste the space otherwise.
Entryway gear lands on the upper shelves, since the tower’s height leaves room above shoe level for bags, hats, or the odd box. That dual use matters in a rental closet where one wall does the work of three.
Wall-Mounted Shoe Storage
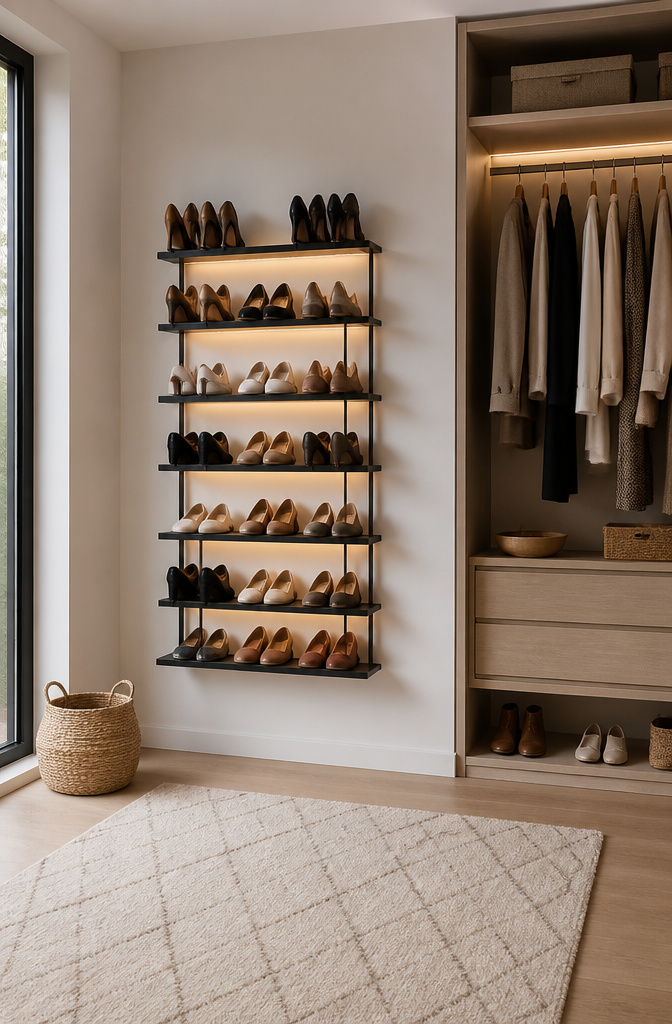
Wall-mounted racks free up the floor entirely, which matters in a closet where every square foot counts. The weight of shoes adds up fast, so mounting into studs beats drywall anchors every time; a stud finder locates the framing, and screws driven through the back braces bite into solid wood instead of crumbling the wall. For pairs stored heel-to-toe or stacked, the load spreads across more than one bracket, but wider shelves still want extra bracing along the back edge so the front does not sag.
Height placement is the part that trips people up. Shoes you reach for daily belong at hand level, not up where you need a step stool or down where you crouch. A 15-degree back cut on the support brackets lets the shelf sit flush to the wall while the front stays level, and that small angle keeps pairs from sliding when you stack them. I have seen builds where the maker only bracketed the ends, and the middle bowed within a month; the fix is an extra 1×2 running the back length, screwed to a stud at center.
Floating Shoe Display Rack
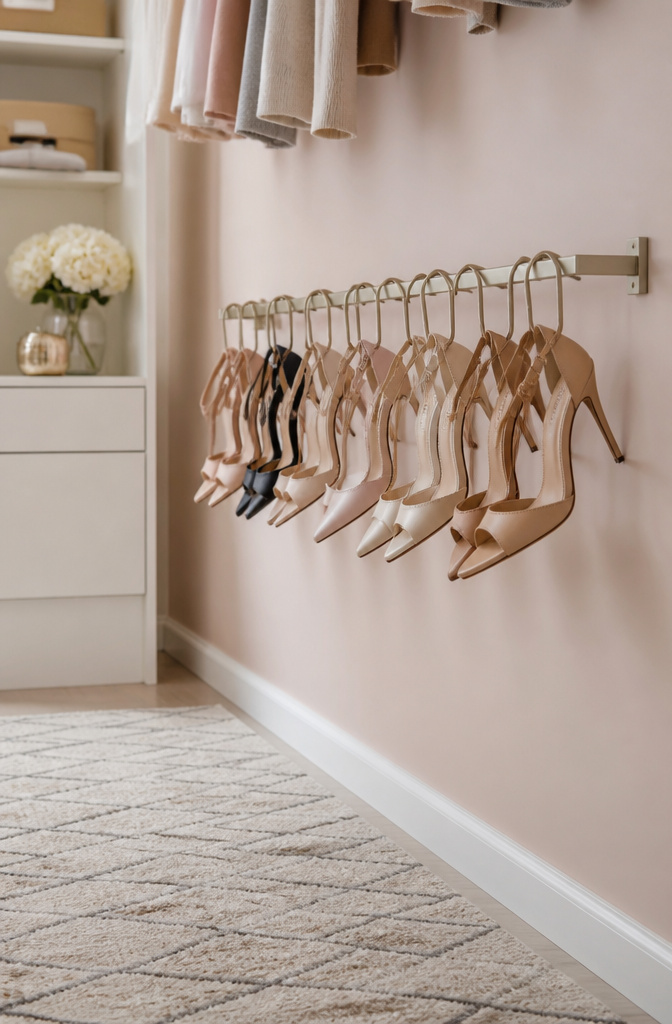
A floating rail turns the back wall of a closet into a gallery where heels hang by their straps like framed pieces. The mounting is straightforward: a metal or wood rail fastens to studs or, for lighter loads, into drywall anchors spaced every sixteen inches or so. Heels hook over the rail by their back straps, toes pointing down, which keeps the profile shallow and leaves floor space clear underneath for boots or a laundry basket.
What convinced me, reading through a dozen of these builds, is how the rail becomes architecture instead of furniture. There is no box to build, no shelf to dust, just a line that holds the shape of the shoe. Wood rails warm up a dressing area; metal reads more boutique. Either way, the pair you want sits at eye level, and the closet starts to feel intentional rather than stuffed. The limit is the heel itself: flats, sneakers, and most men’s shoes need a different home, so this works best when you already know your collection skews toward heels and you want them visible.
Pallet Shoe Rack
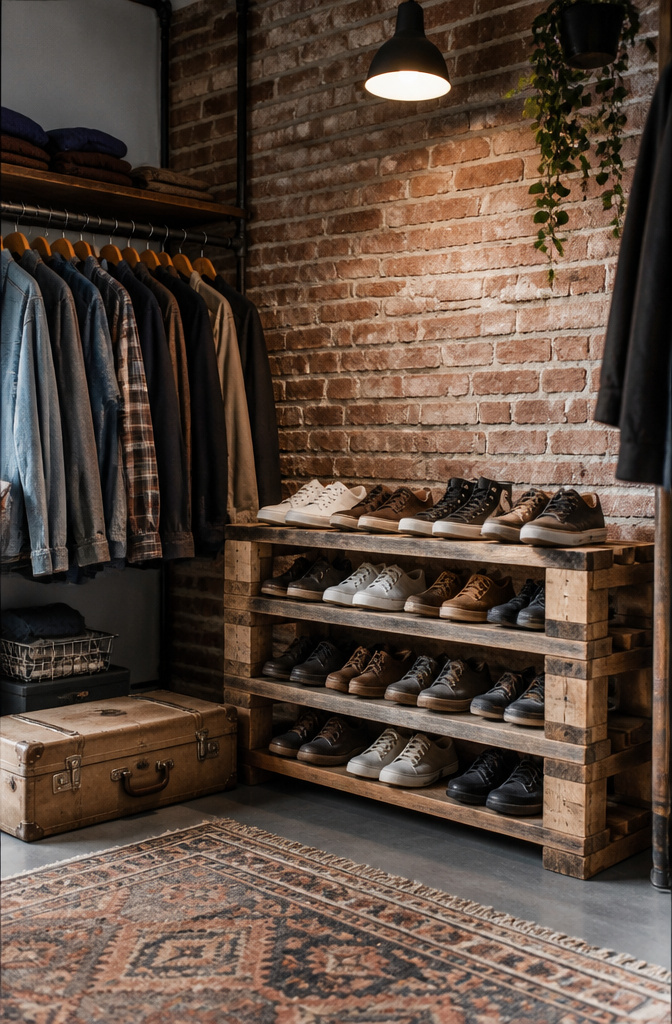
A pallet shoe rack only works if the wood is actually worth reclaiming. Most pallets are built from low-grade pine or oak, full of spiral-shank nails that chew up pry bars and splinter the boards when you force them. The safe move is a reciprocating saw with a demolition blade, cutting through the nails between the deck boards and the stringers rather than fighting each pull. What you lose in length you gain in usable lumber.
Nail removal comes next, and the heads are usually buried or sheared off. A cat’s paw or rolling head pry bar gets under the stubs; pliers finish the job. Sanding takes longer than the build itself, starting around 80 grit to knock down the grime and mill glaze, stepping up only if you want a smoother hand. The rougher you leave it, the more honest the rustic look, though that honesty collects dust in a closet and can snag finer fabrics.
This style belongs in an entry mudroom or a garage corner where the beat-up character reads as intentional. Inside a finished closet, the same boards look like you ran out of money, not ideas. If your closet has white painted trim and recessed lights, the mismatch fights you every morning.
Shoe Storage Console Table
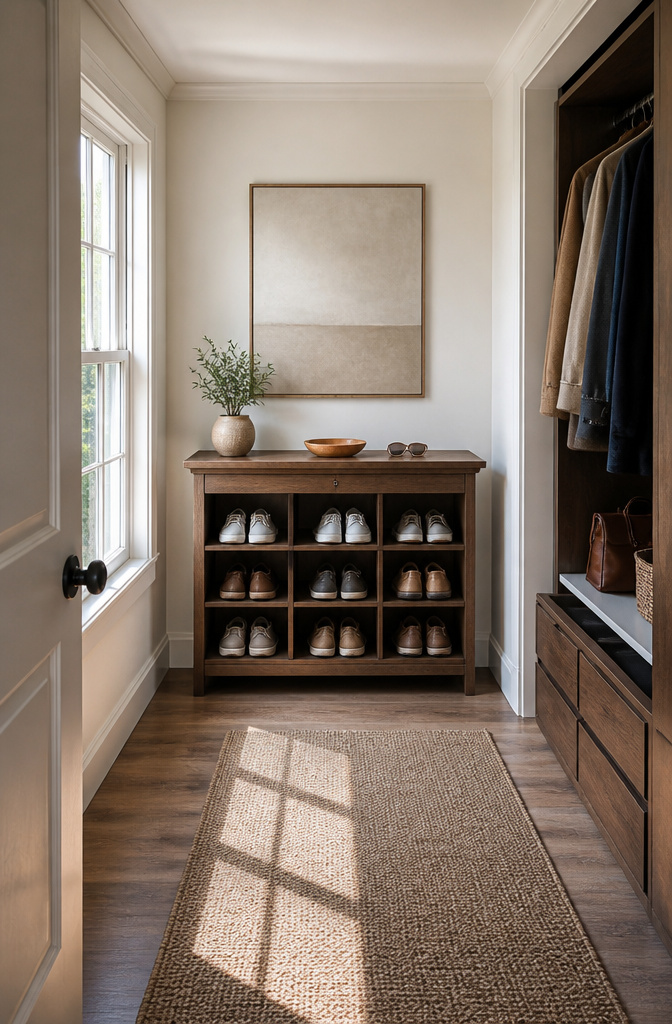
A console table with shoe storage underneath sounds like the best of both worlds until you live with it. The shelf depth that actually holds adult shoes, even angled, eats the leg room you need for a chair or for leaning in to tie laces. I have seen builds where the tabletop sits at a normal 30 inches but the shoe bay underneath projects forward like a drawer, and that works only if the piece sits in an open entry where the overhang does not block a closet door track.
In a closet, this format makes more sense as a landing strip just inside the door, not deep in the hanging clothes. You set down a bag, drop your keys, kick off shoes into the cubby below. The tabletop stays shallow, maybe 12 inches front to back, because the shoes store perpendicular to the wall rather than parallel. That shallow depth is the difference between a surface you use and one that collects laundry.
For an entry hall, the same build wants the opposite choice: deeper shoe shelves, a narrower tabletop strip along the back edge for mail and sunglasses. The tradeoff is real. You are building either a table that happens to hold shoes, or a shoe rack wearing a table costume, and the dimensions decide which one you get.
Shoe Rack Bench
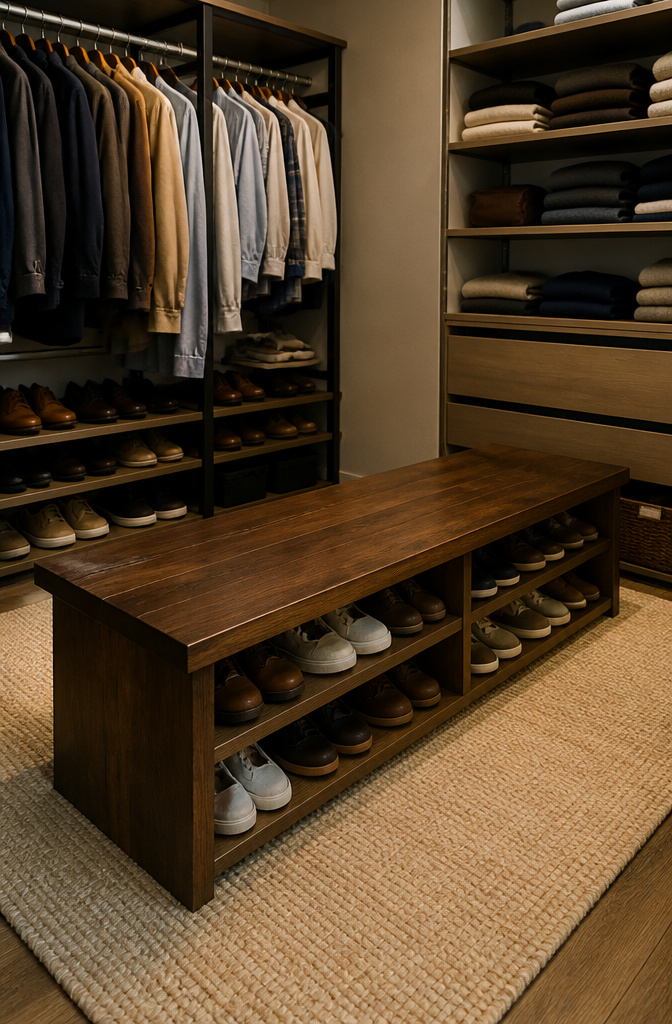
A bench with open shoe shelves underneath turns a closet’s dead center into a working spot. The seat needs to land around 18 inches high for most adults to sit comfortably while pulling on boots or lacing up running shoes. That height lets your thighs stay parallel to the floor without your knees crowding your chest.
The top board takes the real load. A 2-inch nominal thickness, actual 1½ inches, keeps the seat from bouncing or bowing after a year of daily use. Thinner stock flexes; you feel it every time you drop onto the bench with an armful of laundry. For a closet center, this footprint works because it faces both directions. Shoes slide in from either side, so one partner’s sneakers face left while the other’s face right, and neither pile blocks the walkway.
I would keep the total depth to about 16 inches. That leaves enough shelf depth for men’s size 12s without the bench jutting so far that shirts on the back wall brush your shoulders as you sit. If your closet rod hangs at the standard 66 inches, the bench back stays clear of long coats by a safe margin.
Shoe Storage Tower with Cubbies
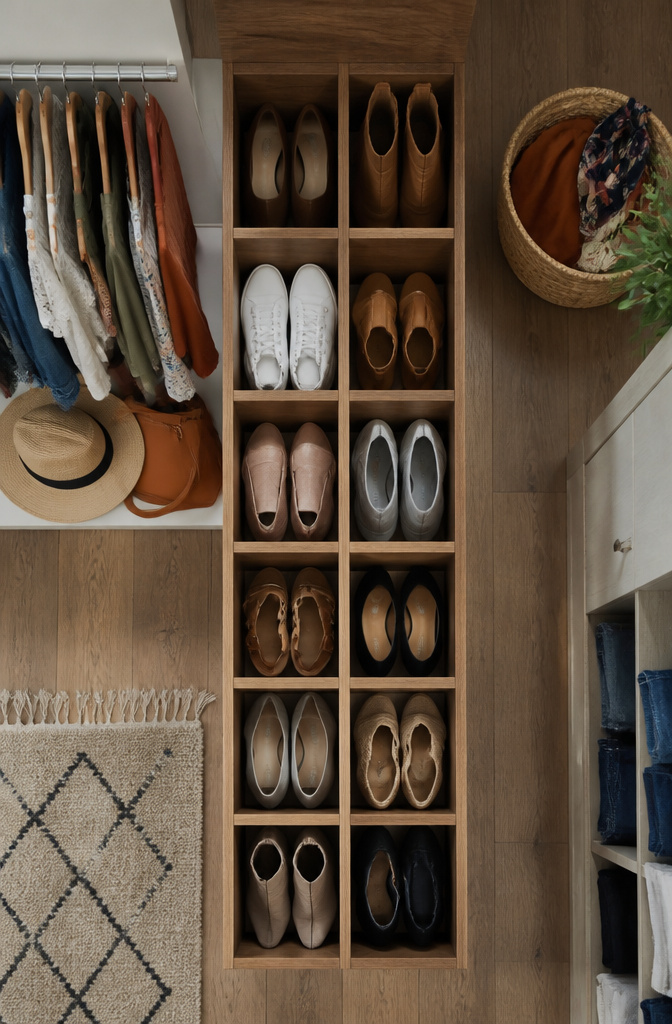
A cubby tower keeps pairs upright and separated, which matters more than it sounds when you are digging for one shoe in a stack of ten. Men’s sneakers need a 15-inch depth to sit flat without the toe jamming the back panel; women’s flats and low heels fit a 13-inch cubby without wasted space behind them. The 46-inch-wide slim bin design holds shoes vertically, one per slot, and clears the whole row from the floor. That vertical orientation works best for sneakers and low boots; tall heels or men’s size 13s will fight the slot and lean awkwardly. Cubbies beat open shelves when you own more than six pairs and actually wear them, because the divider does the organizing for you. Open shelves invite the pile; cubies enforce the single pair. The tradeoff is rigidity: a cubby built for women’s sizing will not forgive a men’s shoe later, so measure the largest pair in the house before you cut a single board.
Floor-to-Ceiling Shoe Shelf
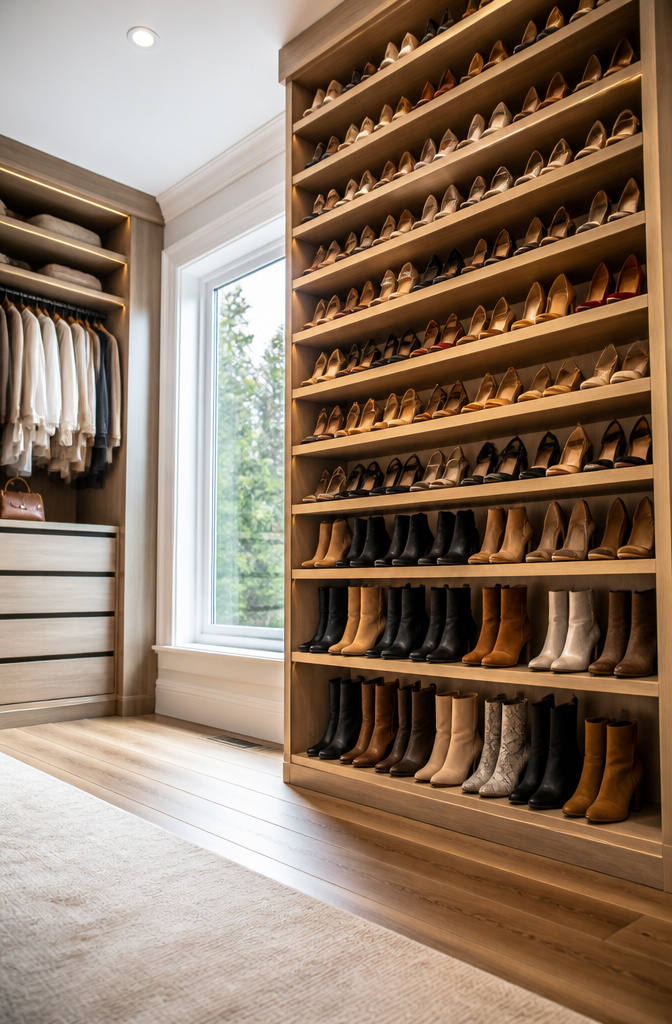
A floor-to-ceiling shoe shelf swallows the vertical space most closets leave half-empty. The fixed uprights run from a base platform to a top plate, with braces at the back that give you solid wood to drive wall screws through. I have seen builds where the uprights themselves carry dado grooves for shelf pins, and others where angled brackets get screwed to the sides at whatever height you need. The bracket method is faster and forgives a closet floor that is not quite level; a shim under one corner fixes the tilt before you tack the shelf to the bracket with brad nails.
What keeps a tall unit from wobbling is screwing those back braces into wall studs, not drywall. A few construction screws into the studs and the whole assembly locks solid. For the shelf spacing, a 5-inch scrap of plywood used as a spacer beats a tape measure after the first bracket is set. The angled brackets sit with their back end against the wall, so the shelf tilts slightly forward and shoes stay put without a front lip.
Shoe Dresser
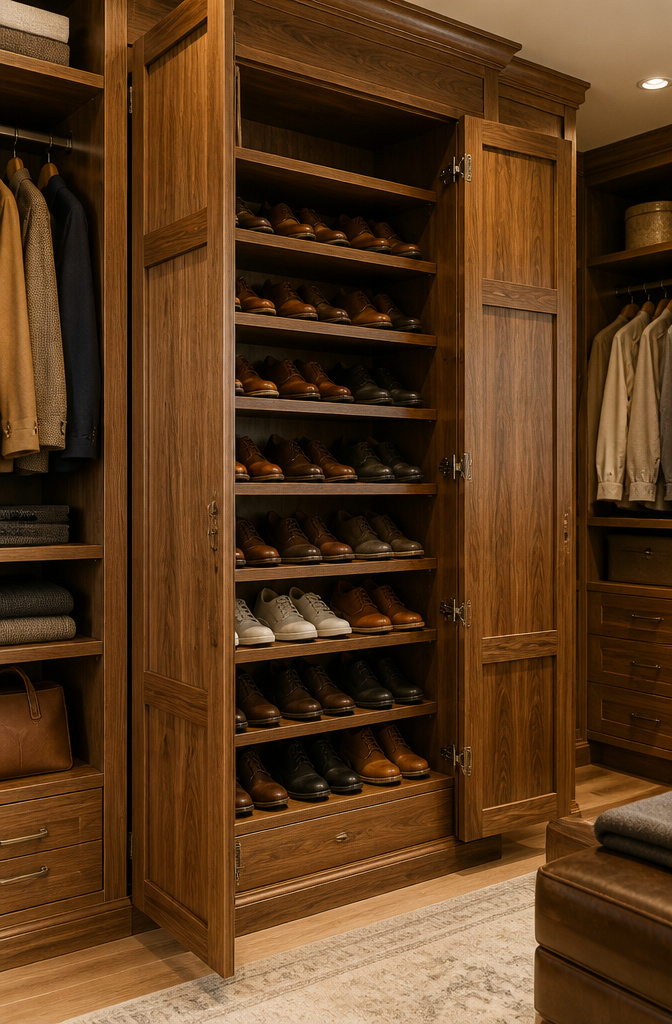
A shoe dresser reads as furniture because it borrows the proportions of a bedside table or small credenza, not the wire grids and open slats we usually accept in closet storage. The pair of doors matters most here: flat panels painted to match trim disappear into a wall of built-ins, while shaker-style rails and stiles turn the same box into a standalone piece you would not mind passing in a hallway. I would skip louvered doors unless you already own a router and a lot of patience; simple slab doors with a narrow gap at the bottom solve ventilation without the fuss.
Leather needs that air gap more than canvas or synthetic uppers. Trapped humidity stiffens soles and eventually lifts them from the welt, something you notice six months after you thought the project was finished. I have seen builds that add a small vent behind the toe kick or leave the back panel off entirely, which works if the dresser sits against a closet wall rather than floating in a room.
The cost jumps when you start thinking like a furniture maker. Hardwood face frames, soft-close hinges, and a finished top surface push a weekend project toward a full week and a higher lumber bill. For a renter, a plywood carcass with hardwood edging on the doors hits the same visual note at roughly a third of the material cost, and the edging takes a router round-over almost as cleanly as solid stock.
Master Closet Shoe Cubbies
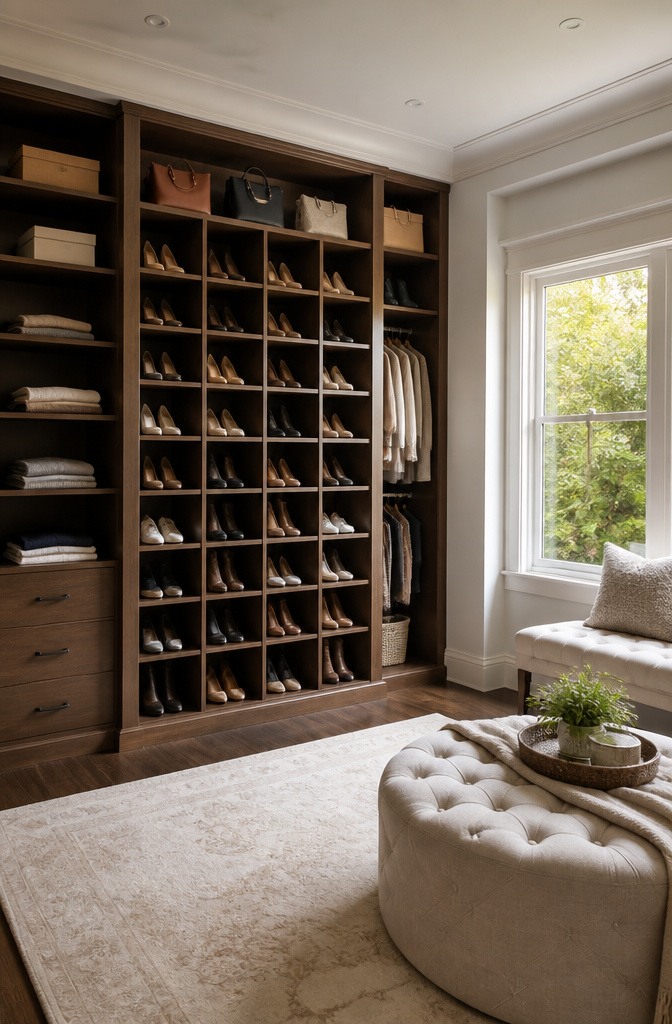
Built-in cubbies change how a closet actually functions because they force a decision about every item. A slanted shelf with a ¾-inch lip keeps sneakers from sliding, while straight shelves let you stack flip-flops three pairs deep. The lip matters more than the angle: without it, shoes migrate to the back wall and the front row becomes a toe-crushing mess.
Standalone units slide under rods and around drawers, but they waste the vertical gaps that built-ins fill. A 46-inch wall bin mounted flat to the back panel holds shoes upright and clears the entire floor run, something a rolling cube on casters never manages. The tradeoff is permanence. Rented closets need the flexibility to move out, and built-in cubbies only pay off if you stay long enough to enjoy the fit. If the timeline is two years or less, a slim vertical bin screwed to a single stud removes clean with a putty knife.
Wall-Mounted Boot Rack
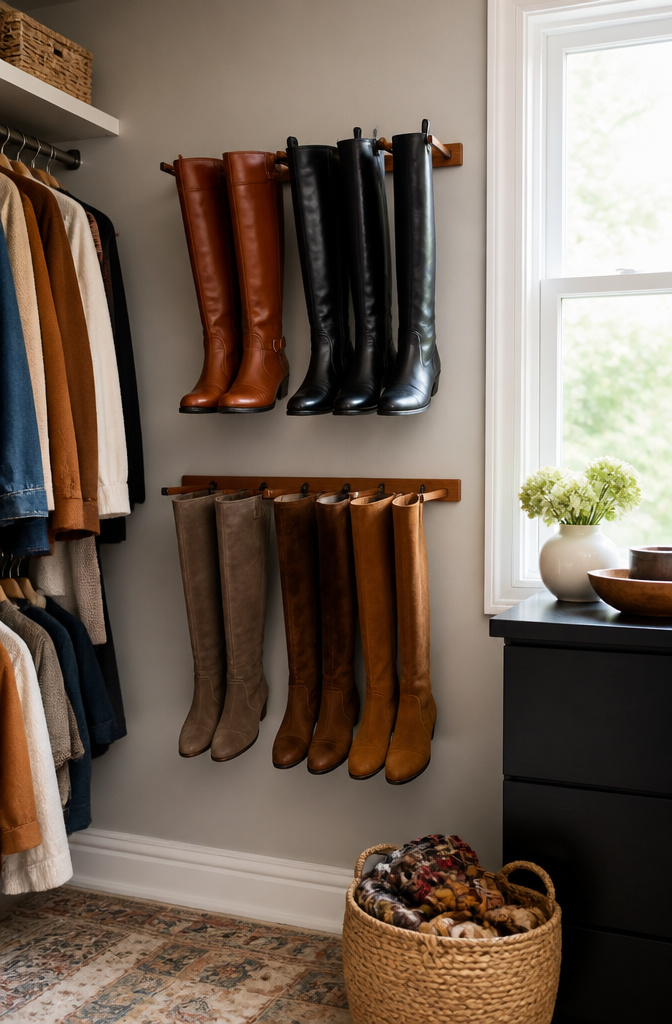
Tall boots collapse on standard shelves the way a folding chair collapses under a tall guest. The shaft creases, the ankle sags, and by spring the leather has a permanent slouch you cannot pull out. Floor storage is worse: boots eat the full height of a closet floor, one pair blocking three pairs of flats behind them, and anything tucked into the shaft, balled-up scarves or the other boot’s mate, turns into a damp surprise.
A wall-mounted rack solves this by hanging boots from their shafts. Leave at least 14 inches between tiers, enough for a knee-high shaft to hang straight without the toe curling up against the shelf above. The boot’s weight pulls the shaft smooth, the way a pants hanger keeps a crease. I have seen builds using simple closet rod brackets and dowels, or pegboard with heavy hooks spaced wide enough that pairs don’t knock together when you pull one free.
The wall placement matters more than the hardware. Set the bottom tier high enough that the toe clears the baseboard, and the top tier low enough that you can still reach the hook without a step stool. In a reach-in closet, that usually means three tiers at most, which still holds six to eight pairs in the footprint of one standing on the floor.
Narrow Vertical Shoe Shelf
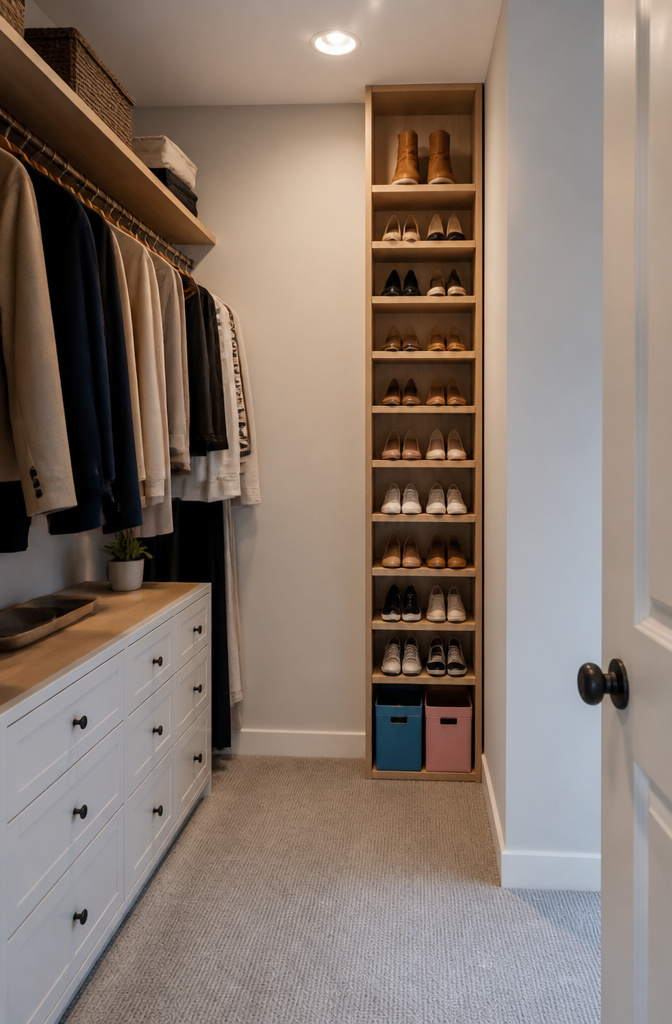
A 46-inch-wide slim bin can hold shoes vertically and still clear an entire row of floor space beside hanging clothes. That width is about the minimum that lets most adult shoes sit toe-to-heel without overhang, assuming the shelf depth matches the board stock the plan calls for.
The vertical approach trades floor spread for height. In a standard closet with a single rod, the gap between the rod and the side wall is often dead space anyway. A tall unit parked there keeps the traffic lane open and leaves room for a laundry basket or a step stool underneath. One version runs about 90 inches and angles the front edge so small shoes do not slide; another keeps the face flat and relies on the bin sides to hold pairs upright.
The catch is access. Rotating the whole unit, like a tall lazy Susan, makes every pair visible without pulling the shelf into the doorway. Fixed shelves are simpler to build but need you to reach past the front row to the back. For a weekend build with common boards and a saw, the fixed bin wins on time and cost. If your closet is deep enough to walk into, the rotating shelf earns its hardware.
Adjustable Vertical Shoe Shelves
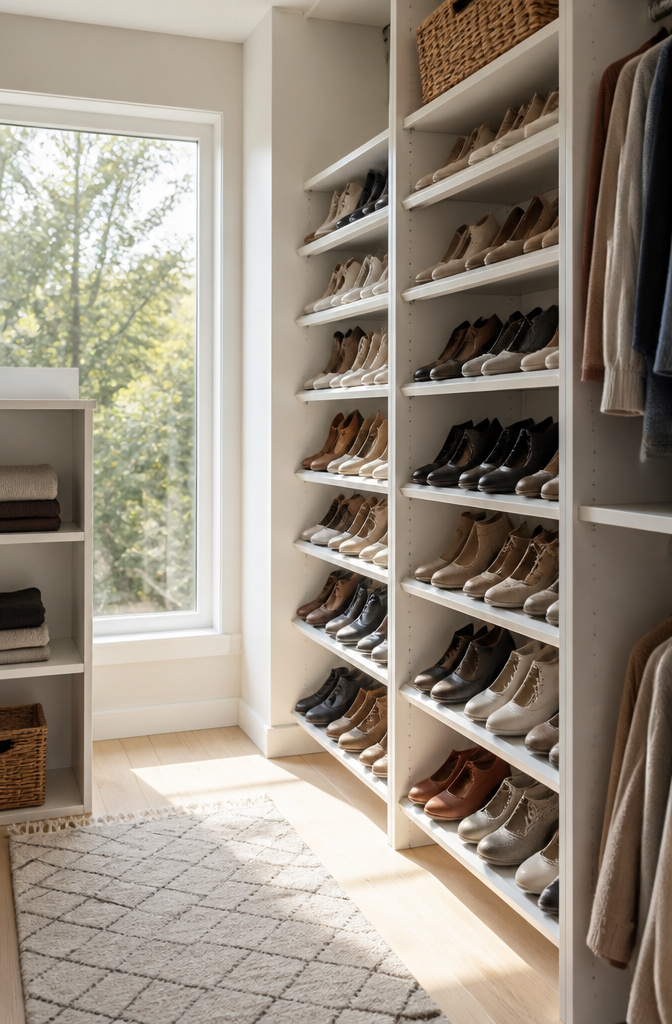
Pin-hole or cleat systems let you move shelves up or down in one-inch increments, which matters more than fixed spacing when your collection shifts between boots one season and flats the next. The sources I found both used offset pegs to angle the shelves, tilting the front edge higher so shoes sit visible and stay put with a small lip at the end. Straight shelves stack better for flip-flops and sandals you pile high; angled shelves win for sneakers or anything you want to scan at a glance.
¾-inch plywood holds up without sagging under a full row, and scrap pieces work fine for the lips and supports if you have them. The real payoff is leaving those last few slots empty, angled just enough to look like a display waiting for the next pair rather than a packed rack you have to purge every spring.
Crown Molding Heel Organizer
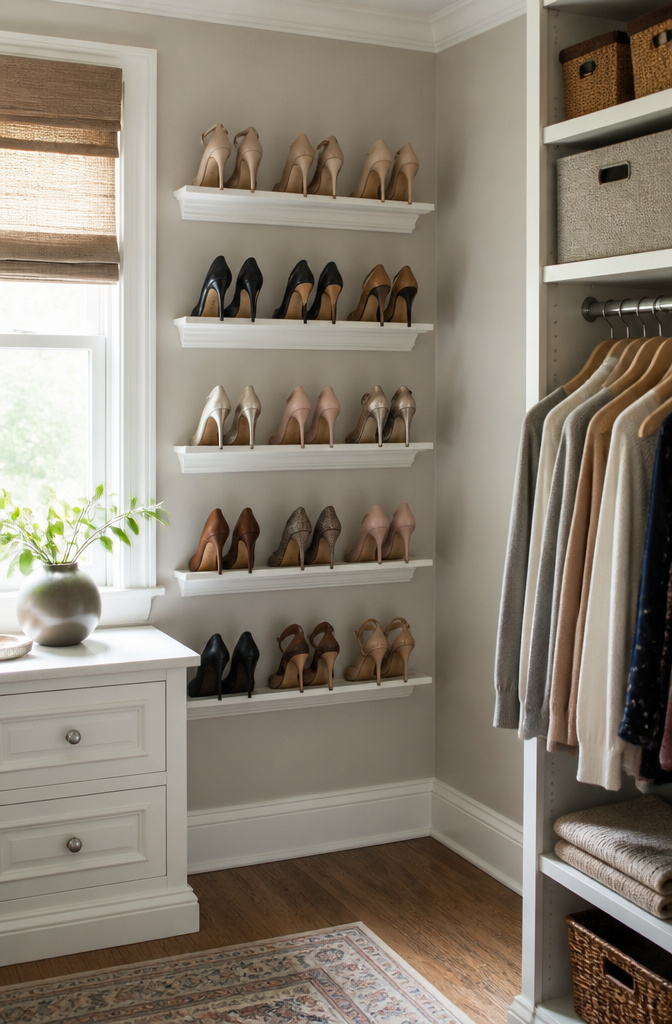
A strip of crown molding mounted at a downward angle turns an empty closet wall into heel storage without a single shelf. The angled mounting matters: tilt it back about 15 degrees so the heel cup catches behind the molding profile and the sole rests flat against the wall. Too shallow and shoes slide off; too steep and the toe box jams against the baseboard.
This only works where the wall space reads as intentional, not improvised. A narrow return wall beside a closet door, the dead space above a baseboard heater, or the panel between two built-in cabinet sides all frame the molding as deliberate trim that happens to hold shoes. Across an open stretch of drywall it looks like hardware you forgot to remove.
Paint helps. Match the molding to the wall color and it recedes; match it to existing trim and it belongs to the architecture. I have seen it done in glossy black against white wainscoting, and the contrast made the shoes look displayed rather than stored. The molding itself costs little more than a basic shelf board, but the install takes patience: finding studs at an angle, coping the corners clean, filling nail holes so the profile stays crisp.
1×12 Cubby Shoe Bench
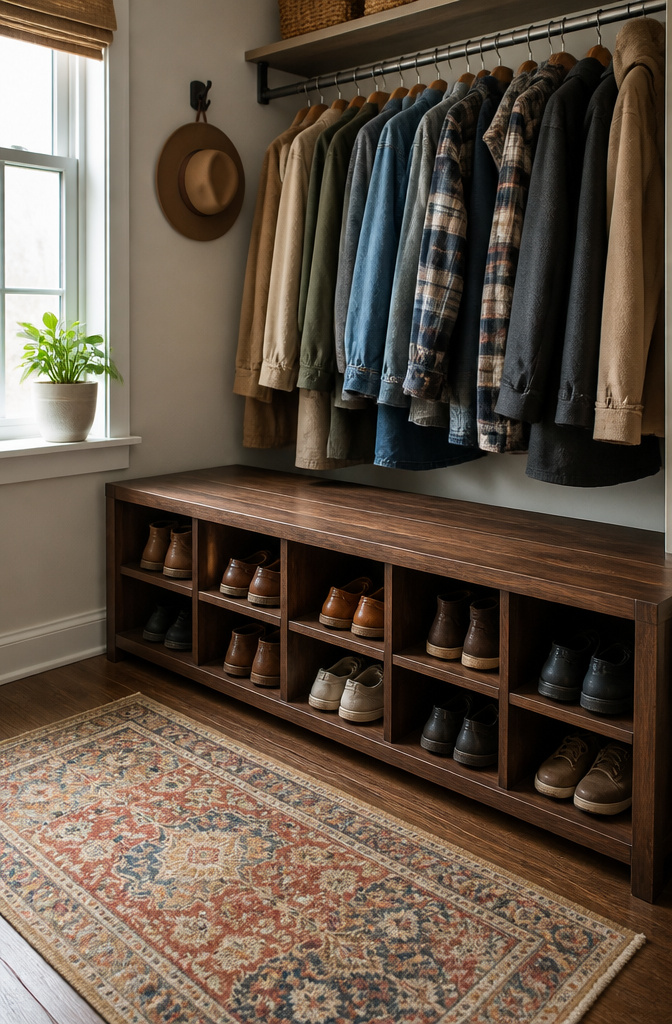
A bench with cubbies underneath solves two closet problems at once, especially in an entryway closet where you sit to lace up anyway. The 1×12 board, ripped to width or used full, gives you eleven and a quarter inches of depth, enough for a men’s size twelve to sit fully inside without the toe hanging past the front rail. Thinner stock, the 1×8 or 1×10 you see in a lot of beginner plans, leaves half the shoe in open air; the look is tidier with the deeper box, and the structure ends up sturdier because the vertical dividers have more meat where they meet the shelf below. I have watched thinner benches rack sideways once loaded with work boots; the 1×12 cubby, dadoed or just screwed through the face, resists that twist because the joint has more glue surface and the board itself does not flex as readily. The trade is weight. A full 1×12 bench in pine runs heavy enough that you will want to assemble it in the closet rather than carry it through a doorway finished. For a six-cubby bench, two across and three down, the math stays simple: three 1x12s cut to length for the horizontal shelves, two more ripped into uprights, plus a 1×4 back rail to keep the whole thing square. Paint grade pine keeps the cost down; poplar if you plan to stain and want fewer knots telegraphing through.
Frequently Asked Questions
What materials do I need to build a shoe rack?
Most plans in the article use common boards like 1x3s, 2x2s, and plywood. A basic wall rack needs one 1×3 board and quarter round, while a two-tier floor rack uses one 2×2 and two 1x3s. Wood glue and screws or brad nails hold the joints together.
How do I maximize space in my closet for shoes?
Go vertical and get off the floor. Wall-mounted racks, stackable units, and floor-to-ceiling towers pull height into service without eating the narrow footprint you need for walking and hanging clothes. A single 1×3 board angled on the wall holds three or four pairs in dead space beside a hanging rod.
What tools do I need for a DIY shoe rack?
A saw and drill handle most builds in the article. A brad nailer speeds up trim and lip work but is not required; screws and glue work for joints. A stud finder matters for anything wall-mounted, since drywall alone will not hold the weight of shoes long term.