
A summer kitchen design can run from a $5,000 compact grill run to a $75,000 entertainment hub built around bar seating and weatherproof AV. What separates the two is not ambition; it is how far your gas, water, and electrical lines have to travel, because utility runs eat a third of the budget before a single cabinet goes in.
1. Compact Patio Kitchen
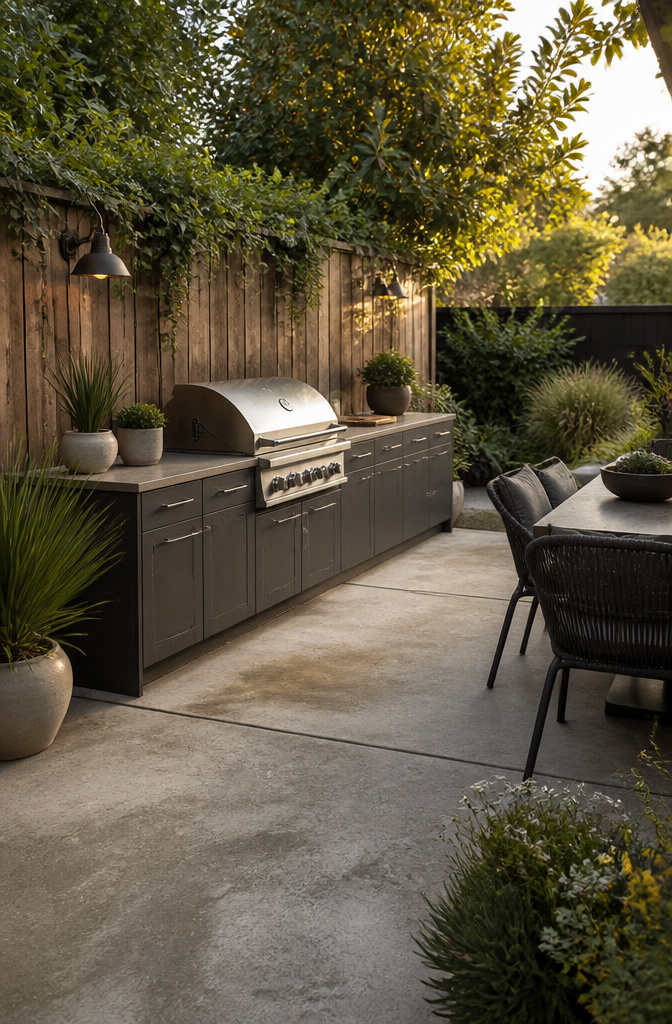
A compact patio kitchen is the smallest setup that still earns the name, built around a built-in grill with roughly six feet of counter for plating and nothing else. The run sits against a fence or exterior wall, which keeps the footprint narrow and leaves room for a dining set or a couple of chairs. Storage is usually just a base cabinet or two beneath the counter; the sink, side burners, and refrigerator all get cut.
I have watched this work on a 10-foot concrete pad where the owner ran a straight line of powder-coated cabinets along the back edge. Grill at center, eighteen inches of counter on each side, one drawer for utensils. That was the whole kitchen, and it was enough to cook for four without anyone feeling crowded.
Cost runs $5,000–$15,000, with material choice moving it up or down. NatureKast cabinetry and Dekton porcelain countertops push the top of that band but handle weather better than budget alternatives. Gas hookups add expense if the line has to travel far from the house, and any municipality will want permits and licensed work for plumbing, gas, or electrical. Skip the cover to keep the price low, though you will cook in sun and store a cover for the grill.
2. Full Outdoor Cooking Station
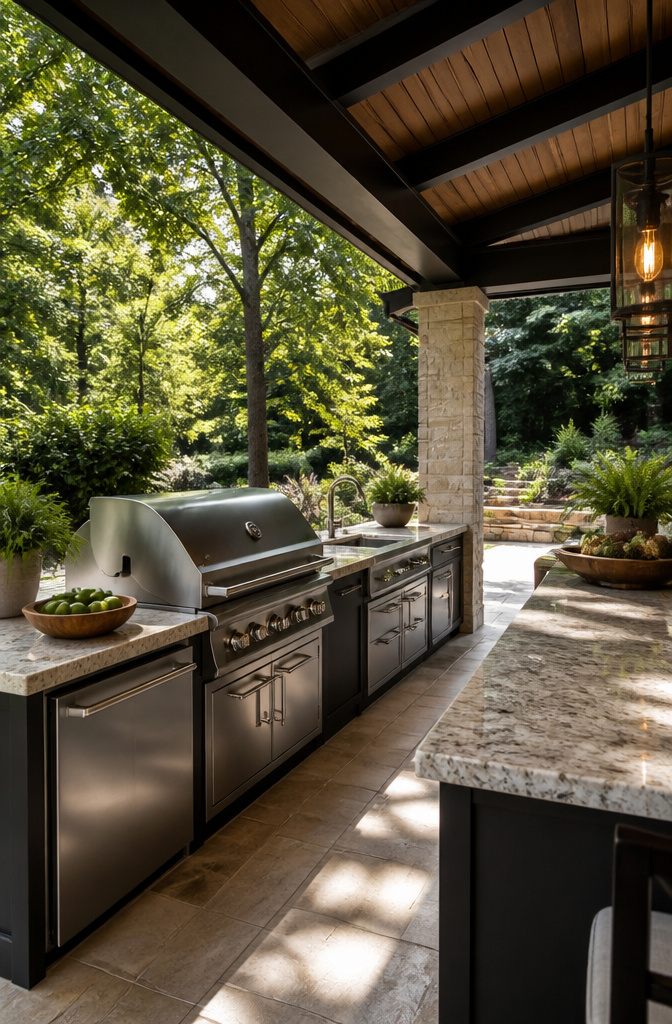
A full outdoor cooking station runs $15,000 to $40,000, and most people land in that middle range once plumbing and power get involved. The grill, side burners, and counter are the visible parts; the gas line, water line, and electrical run are what quietly eat the budget.
Order matters. Gas and water lines need to go in before any structure goes up, and electrical should be planned for the appliances you actually want rather than added later. I have seen people build the counter and then realize a refrigerator needs a dedicated circuit the patio never got.
Cabinetry and countertops rated for outdoor use cost more upfront than indoor-grade materials swapped outside, but they also outlast three replacements of the cheap stuff. A covered structure adds to the total, though it stretches the season and keeps the investment from weathering year-round.
The split where money goes: roughly a third to appliances, a third to utility runs and labor, and the rest to structure and finishes. Pull permits for the gas and plumbing work; most municipalities require licensed contractors for both, and the inspection protects resale value.
3. Integrated Entertainment Space
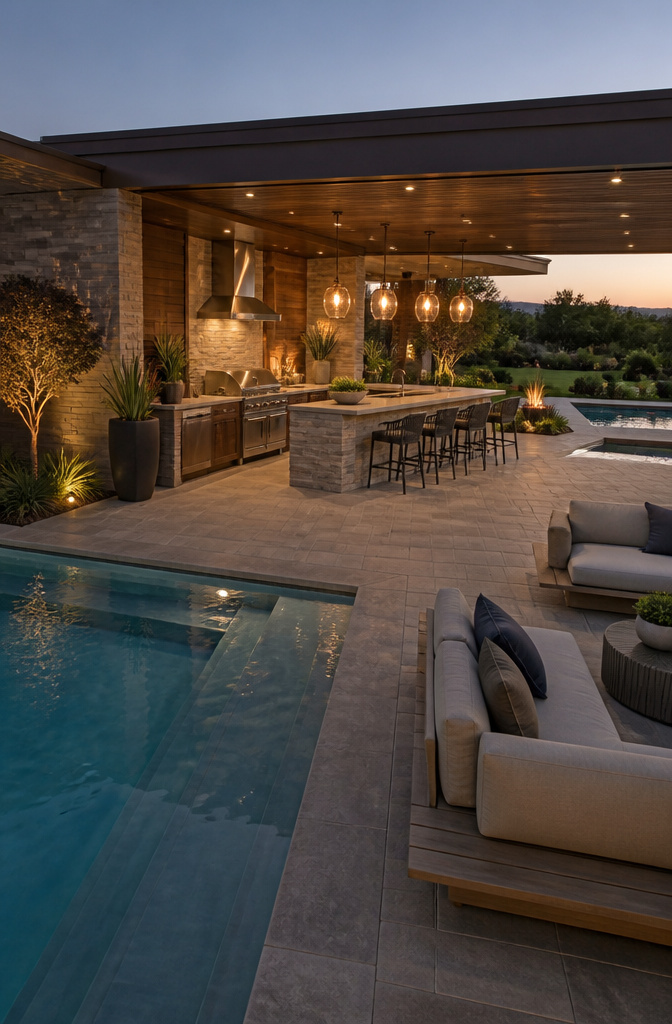
The most ambitious summer kitchen designs fold the cooking station into a full outdoor living room, combining the grill zone with bar seating, lounge furniture, and an outdoor TV or sound system. Budget runs $40,000–$75,000, and the money goes fast once you are running gas, electric, and weatherproof AV to the same footprint.
The L-shape is the layout that makes this work at human scale. One leg holds the grill and prep sink; the short return faces the view with bar-height counter and stools. That 90-degree corner does the heavy lifting, keeping cooking heat and smoke off the sofa without building a wall that kills conversation. Guests mingle at the bar while someone works the flame, and sight lines stay open.
Low lounge seating belongs farther out, past the bar zone, with a low table for plates and drinks. The mistake is putting the deep seating downwind of the grill. Smoke follows the cheapest path, and on still evenings it pools. I would rather run the cook line perpendicular to prevailing breeze and place the TV where the cook can glance at it without turning their back to guests.
4. U-shaped Layout
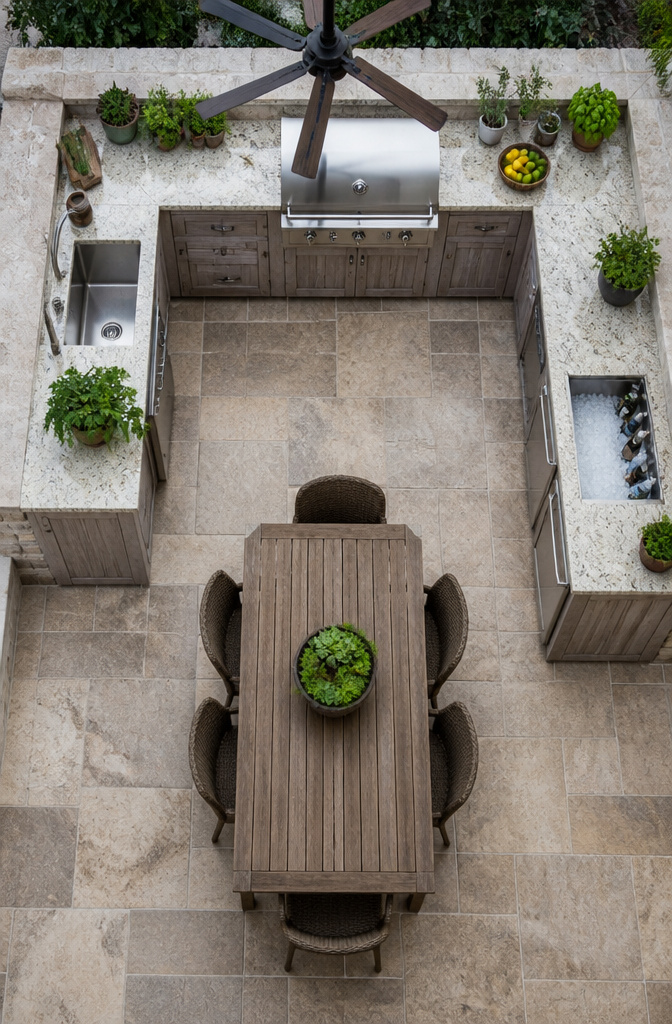
Three sides of counter wrap the cook so raw ingredients, plated food, and a handoff to guests all sit within a few steps. The U-shaped layout needs roughly 8–10 feet of wall or structure to pull this off without cramping the work triangle. Less than that, and the grill crowds the sink; more, and you are crossing a patio to grab tongs.
The grill belongs on the center run, venting outward so smoke drifts away from both the cook and anyone leaning on the outer bar ledge. That outer edge becomes a natural boundary, friends mingling with a drink while you stay inside the three walls. Opposite the grill, the sink keeps the hot and cold zones separate, and the third leg handles refrigeration or a beverage station without stealing prep space. In a covered summer kitchen, that open back side matters even more, letting heat and smoke escape instead of pooling under a roof or pergola. A ceiling fan overhead helps, but the real airflow comes from not boxing in that fourth wall.
5. L-shaped Layout
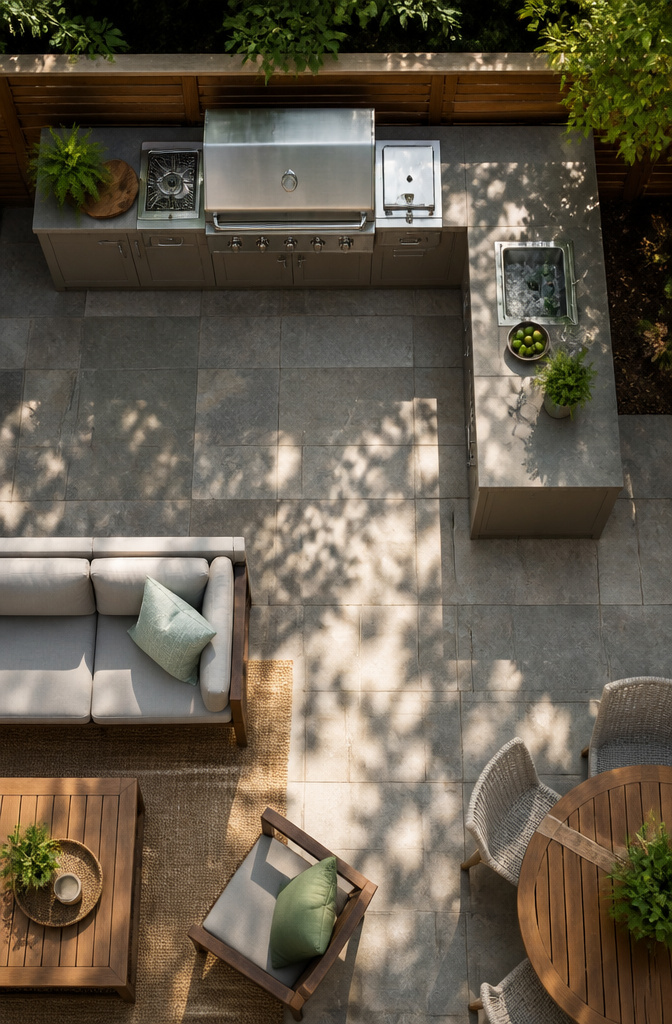
Two runs meeting at a corner give a summer kitchen its natural split between the work of cooking and the business of serving. One leg holds the grill and prep space; the other becomes the bar, the beverage station, or just a place to lean with a plate. The shape fits where a lot of yards actually are: pressed against an existing house wall and a fence line, using two boundaries so you do not eat patio space in every direction.
The 90-degree angle does the traffic management for you. Cooking heat stays on one leg; guests gather on the other without crossing through the work zone. That separation matters more than the square footage. I have watched layouts fail when the social leg faces the wrong way and the crowd drifts back toward the grill anyway. Face the return toward the seating area, not the property line, or you will spend every evening playing traffic cop with a spatula.
The short leg also takes additions without wrecking the main line. A pizza oven or a small smoker drops onto the return without stealing counter space from the grill side. Start with the cook leg against the wall, add the return as budget and weekends allow.
6. Linear Layout
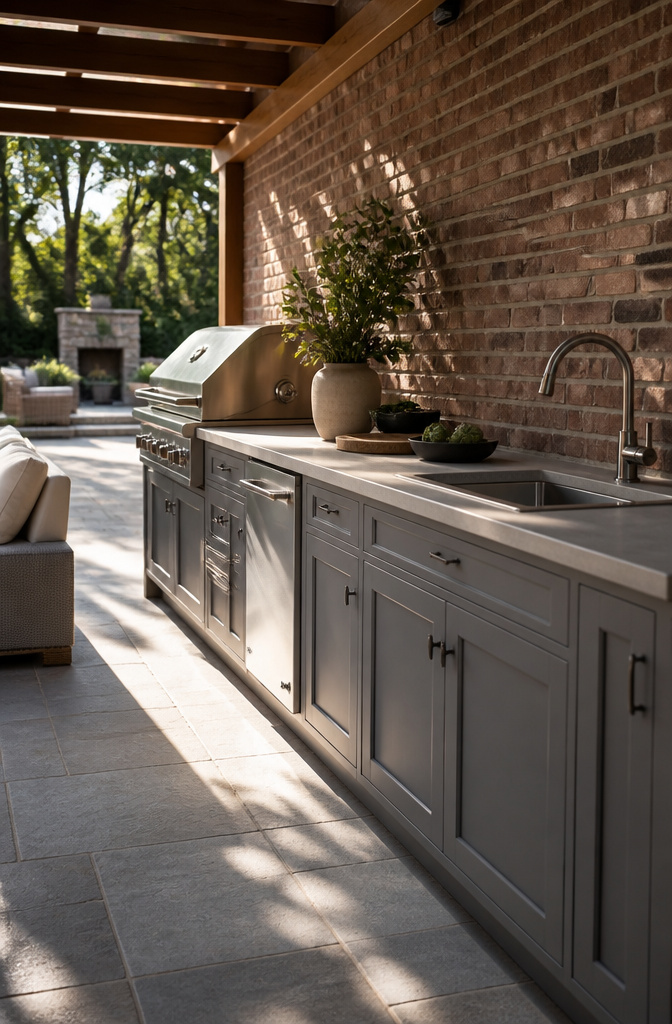
A single straight run of cabinets and appliances keeps a summer kitchen design honest about what narrow space can actually handle. Six to eight feet is the typical length, just enough room for a grill as the anchor, a stretch of counter for plating, and either a compact sink or refrigeration at the far end. Anything longer and you are either spending on footage you cannot reach comfortably or pretending you have room to turn around, which you do not.
This layout hugs a wall or fence line by nature, and that is where its real advantage sits. The single face leaves the rest of the patio or balcony open for a table, chairs, or the path people actually walk. In a townhouse terrace or a rooftop where every inch is spoken for, wrapping into an L or adding an island breaks the flow and crowds the seating. The straight run keeps cooking shoulder-to-shoulder, chop to flame to plate, with no wasted steps and no one squeezing behind you with a hot tray.
I have watched the mistake play out: squeezing a second cooking station, a pizza oven or a side burner, into a six-foot run that already holds a full grill. The projects that work keep the second option only when the run stretches closer to that eight-foot mark, and even then they stack vertically or alternate, not compete for the same counter. A bold red pizza oven paired with a built-in grill along powder-coated cabinets sounds like a lot, but the photo that stuck with me kept both low-profile and let the wall behind them do the visual lifting. The cooking happened; the deck stayed open.
7. Galley Layout
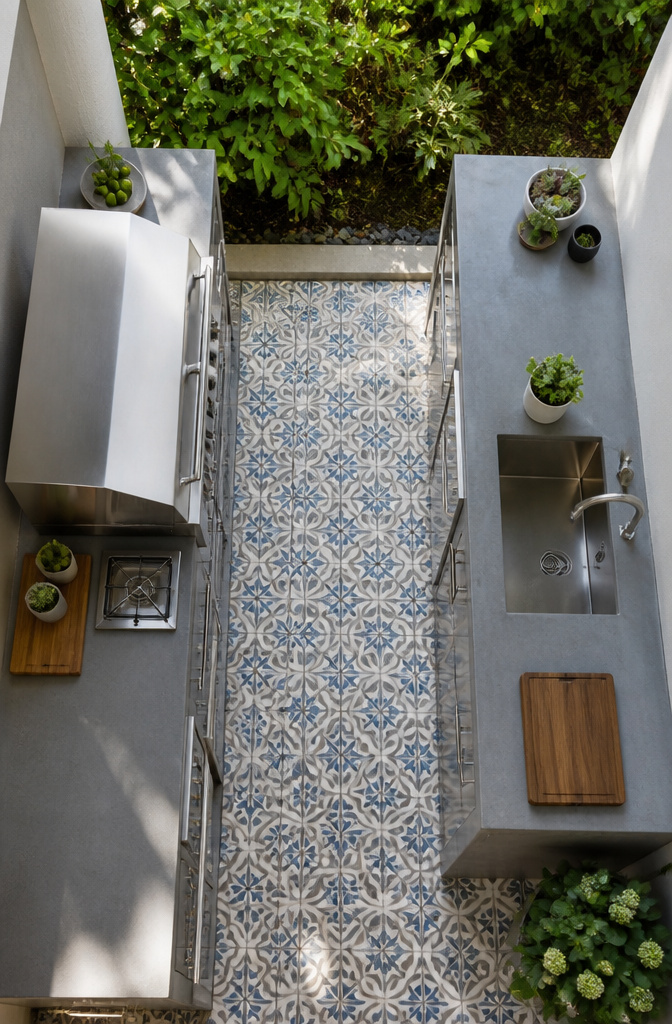
A galley layout lines up two parallel workstations with a walkway between them, the same setup you see in restaurant kitchens where the goal is moving fast without colliding. Grill and side burner run one wall; sink and cold prep face them across the aisle. That separation matters more outside than in, because wind pushes smoke and heat in directions you do not control. Keeping hot surfaces on the windward side and cold prep leeward cuts both drift and cross-contamination without any extra gadget.
The aisle wants to stay right at four feet. Wider than that and you are crossing too much ground every trip; narrower and two people cannot pass with a hot sheet pan between them. One cook working both sides stays efficient because every reach is a step and a pivot, not a walk around an island.
This layout turns side yards and covered verandas into full kitchens without demanding more deck width. Sight lines stay open down the center aisle, so whoever is at the grill stays in the conversation instead of facing a wall.
8. Island Layout
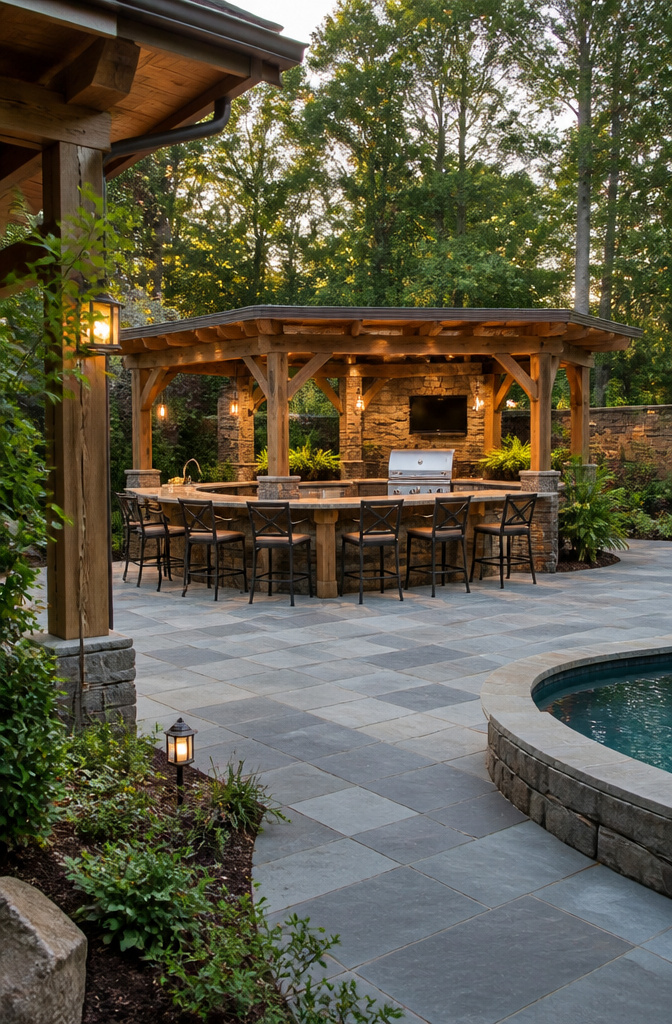
An island layout puts the cook at the center of the patio with guests on all four sides, which is the most social arrangement a summer kitchen design can take. The tradeoff is real: you need at least three feet of clearance on every side just for people to walk and pull up a stool, so the footprint grows fast. A 6-by-4-foot cooking core eats closer to 12 by 14 feet once circulation is honest.
That space is not wasted. The island becomes the patio’s focal point by default, the spot everyone circles back to. I would rather shrink the appliance list than shrink the approach paths; a grill with no elbow room turns the cook into a traffic cop.
Bar seating at the perimeter turns prep into part of the show. Guests face the cook, not each other, so conversation stays loose and inclusive. The 360-degree setup also keeps the hot zone open; people circulate around the work instead of cutting through it. Low seating elsewhere on the patio still matters for the actual meal, but the island stools handle the standing-around part that outdoor cooking is really about.
What a Summer Kitchen Actually Is
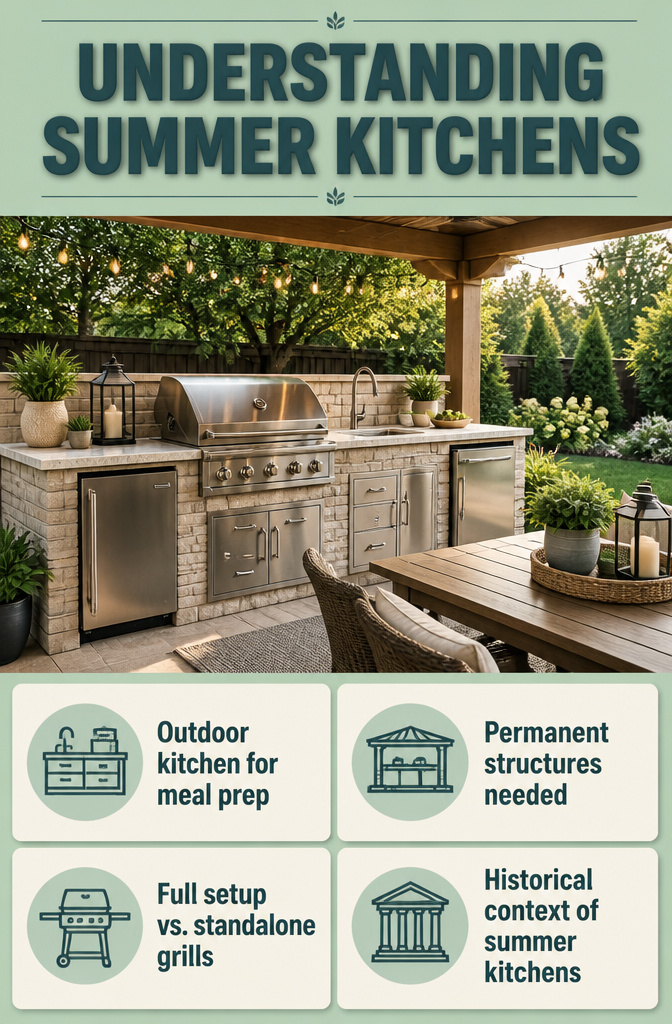
A summer kitchen is your indoor kitchen relocated to the backyard, built for full meal prep and entertaining without a single trip back inside. The term itself carries American history: before air conditioning, homes in warm climates used a detached kitchen structure during hot months to keep cooking heat out of the main house. That tradition has come full circle with today’s outdoor living movement.
The dividing line from a basic grill setup is permanence and integration. A standalone grill leaves you running inside for prep tools, refrigeration, serving dishes, and cleanup. A summer kitchen keeps everything within arm’s reach, so you can cook a full meal outside start to finish. Sink, refrigeration, and counter space are what separate the two. Without them, you are grilling. With them, you are working outdoors.
Cost Ranges and Where Money Goes
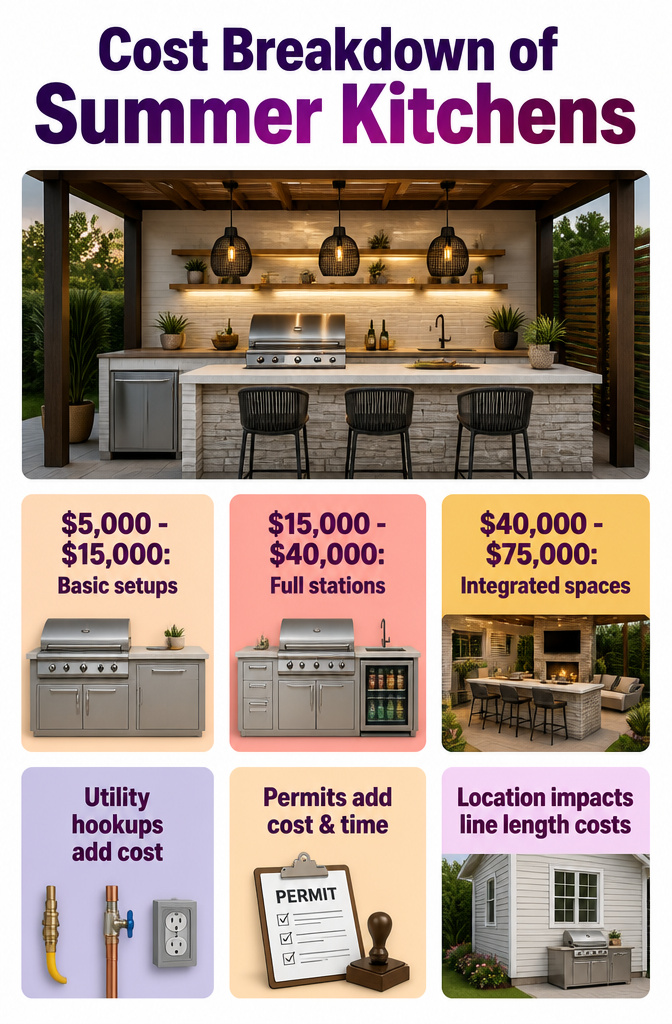
A summer kitchen design can land anywhere from $5,000 to $75,000, and the gap comes down to five things that stack fast. Gas and water lines, electrical runs, the structure itself, appliances, and finishes each pull the number up or down, usually in that order.
Compact patio setups sit at the low end, around $5,000 to $15,000. That gets you a built-in grill, a short stretch of counter, and basic storage. Step up to a full cooking station and you’re looking at $15,000 to $40,000, which adds side burners, refrigerator, sink, and some kind of cover like a pergola. The integrated entertainment spaces, $40,000 to $75,000, layer in bar seating, lounge areas, lighting, and AV.
Utility hookups are the silent budget killer. Running new gas, water, or electrical lines costs more the farther you are from existing connections. A perimeter placement against the house saves money on line length; a satellite location out in the yard does not.
Permits for gas, electrical, and plumbing are typically required in most municipalities and add both cost and time. Licensed contractors for those trades are not optional, and the permit process can stretch the timeline by weeks. Factor that in before you price the fun stuff.
Materials That Survive Outside
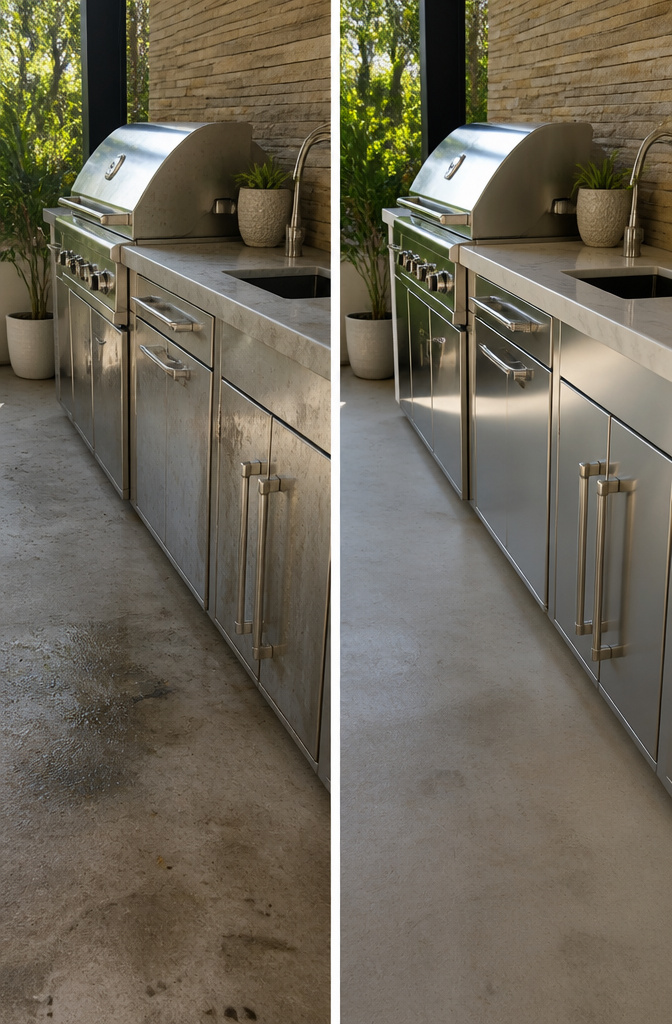
Standard cabinetry and countertop materials warp, swell, and fade fast outside. Three winters taught me that the hard way, and the replacements I chose afterward are the ones still in place.
Stainless steel cabinetry rated for outdoor use handles moisture and temperature swings without the rot that kills wood-based boxes. In coastal air, 316 marine-grade stainless resists salt corrosion better than the common 304 grade, though powder-coat finishes over either grade add a protective layer that also opens up color or wood-grain looks. NatureKast cabinetry is built specifically for this, designed to stay put year-round with minimal upkeep.
For countertops, Dekton porcelain holds up against UV and the freeze-thaw cycle that cracks lesser surfaces. I have seen laminate bubble and quartz discolor after two seasons; the porcelain has not. It is not the cheapest option, but replacing a failed counter twice costs more than doing it once with the right material.
Layout and Traffic Flow
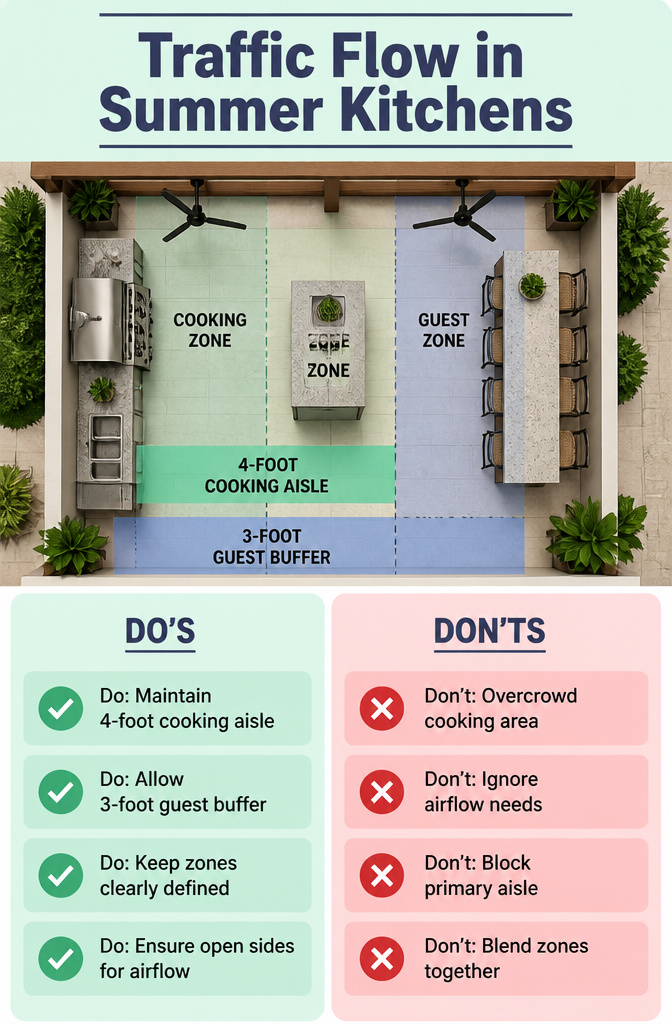
A summer kitchen lives or dies on whether three people can move through it without a collision. The cooking zone, prep zone, and guest zone each need enough room to function, and the usual rule is a 4-foot aisle for the cook and a 3-foot buffer for anyone just passing through. When those two distances collapse into the same strip, you end up with someone holding a hot sheet pan while another guest leans across to grab a drink.
Covered structures make this tighter. A roof or pergola traps heat and smoke that open sky would carry away, so ceiling fans and open sides matter as much as the floor plan. Without that airflow, the cook stays in the hottest part of the space and guests drift away to the yard.
Winterizing and Off-Season Care
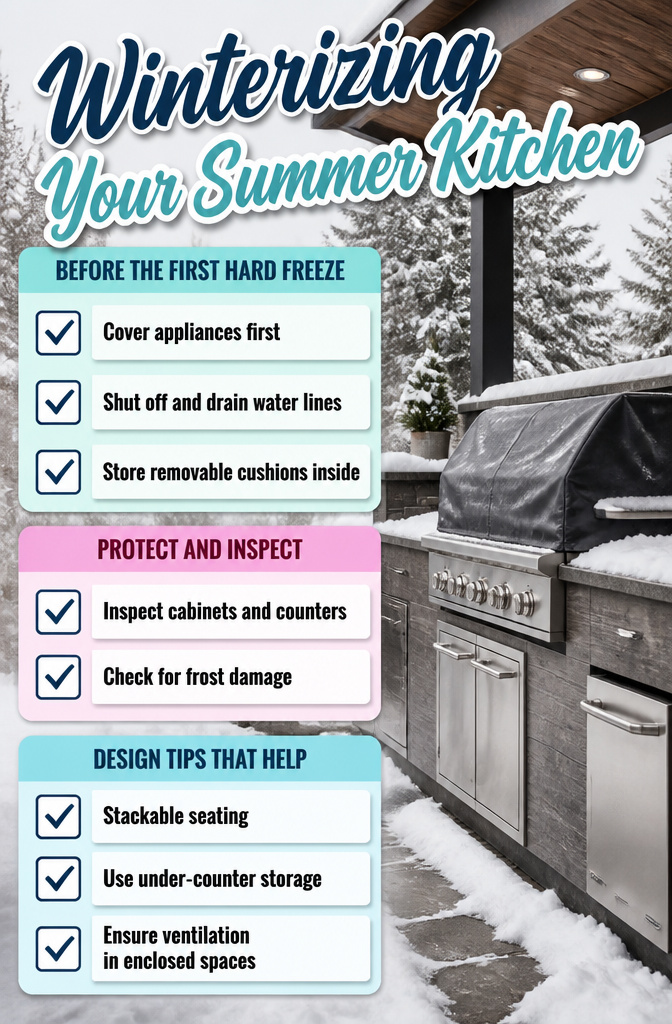
Weatherproof covers go on the appliances first, then the water lines get shut off and drained before the first hard freeze. Removable cushions, grill tools, the bag of charcoal you opened in July, all of it comes inside. The cabinets and counters, if you chose the right materials, stay put. NatureKast cabinetry, Dekton porcelain, stainless appliances: they are built for this, year-round, with minimal fuss.
The afternoon jobs are the covers, the drain, the walk back and forth with armloads of stuff. The weekend job is the inspection you should have done in October and the crack you find in April. I skipped the drain-down one year, trusted a cover I had bought cheap, and paid for a faucet body that split wide open. Now I calendar it, same weekend as the garage heater check, because the thing I will forget is the thing that will cost me.
Stackable seating makes the storage easier; under-counter space keeps the June retrieval simple. A roof or partial cover over the summer kitchen helps in both directions, summer rain and winter snow, though any enclosed option needs ventilation clear enough that you are not trapping moisture with the warmth.
Frequently Asked Questions
What is a summer kitchen?
A summer kitchen is an outdoor cooking space built for full meal prep and entertaining without going back inside. It traces back to American homes before air conditioning, when families used detached kitchens during hot months to keep cooking heat out of the main house. The dividing line from a basic grill setup is permanence: a sink, refrigeration, and counter space let you cook start to finish outdoors.
How much does a summer kitchen cost?
Summer kitchen designs run from $5,000 to $75,000 depending on scale and features. A compact patio setup with a built-in grill and short counter lands at $5,000–$15,000. A full cooking station with sink, refrigerator, and cover typically hits $15,000–$40,000. Integrated entertainment spaces with bar seating, lounge areas, and AV stretch to $40,000–$75,000. Utility hookups are the hidden driver, costing more the farther you run gas, water, or electrical lines from existing connections.
What materials are best for outdoor kitchens?
Stainless steel cabinetry rated for outdoor use handles moisture and temperature swings without the rot that destroys wood-based boxes. In coastal air, 316 marine-grade stainless resists salt corrosion better than standard 304; powder-coat finishes over either grade add protection and color options. For countertops, Dekton porcelain survives UV exposure and freeze-thaw cycles that crack or discolor lesser surfaces like laminate or quartz. The upfront cost is higher, but replacing failed materials twice costs more than doing it once right.
Do I need a permit to build a summer kitchen?
Yes, permits are typically required for gas lines, electrical hookups, plumbing, and permanent structures in most municipalities. Licensed contractors for those trades are mandatory, not optional, and the inspection process protects resale value. Permits add both cost and time, sometimes stretching the timeline by weeks, so factor them in before pricing appliances and finishes.
How do I winterize my summer kitchen?
Cover appliances first, then shut off and drain water lines before the first hard freeze. Remove cushions, grill tools, charcoal, and any other loose items to store indoors. Cabinets and counters built from outdoor-rated materials like NatureKast and Dekton can stay put year-round. Calendar the drain-down so it does not slip, a split faucet body from one skipped winter is an expensive reminder.