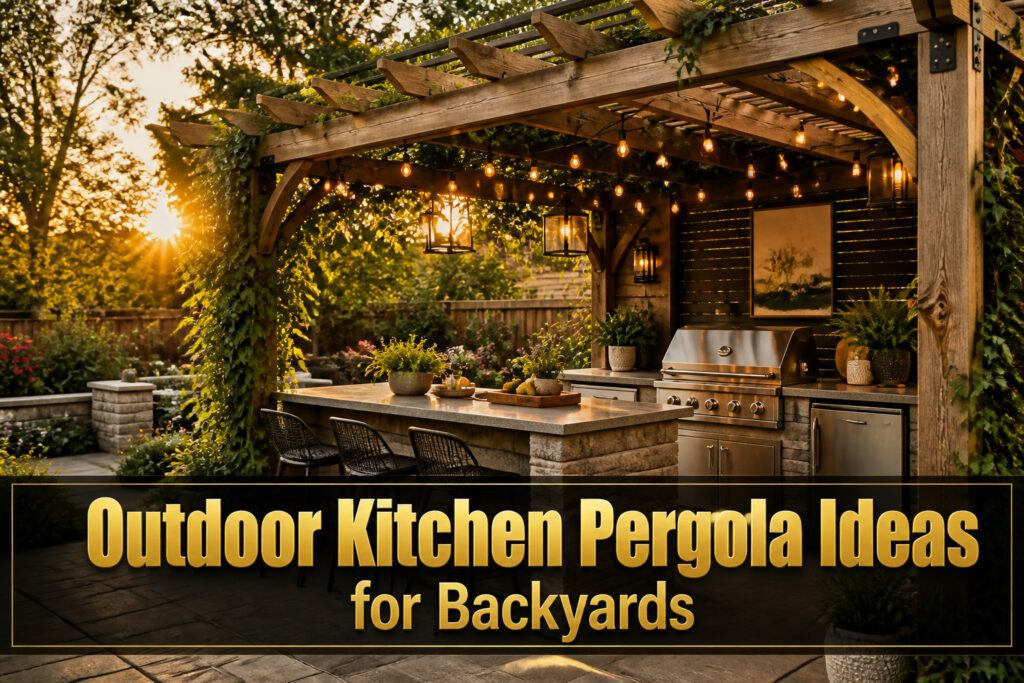
Outdoor kitchen pergola ideas span from a $400 cedar kit you stand in an afternoon to a $2,800 automated louvered roof you will wish you bought when the mid-July sun hits. What separates them is not budget but how much of the year you actually cook outside, which turns on whether you measured the 3 p.m. shadow before cutting anything.
1. Cozy Corners for Intimate Settings
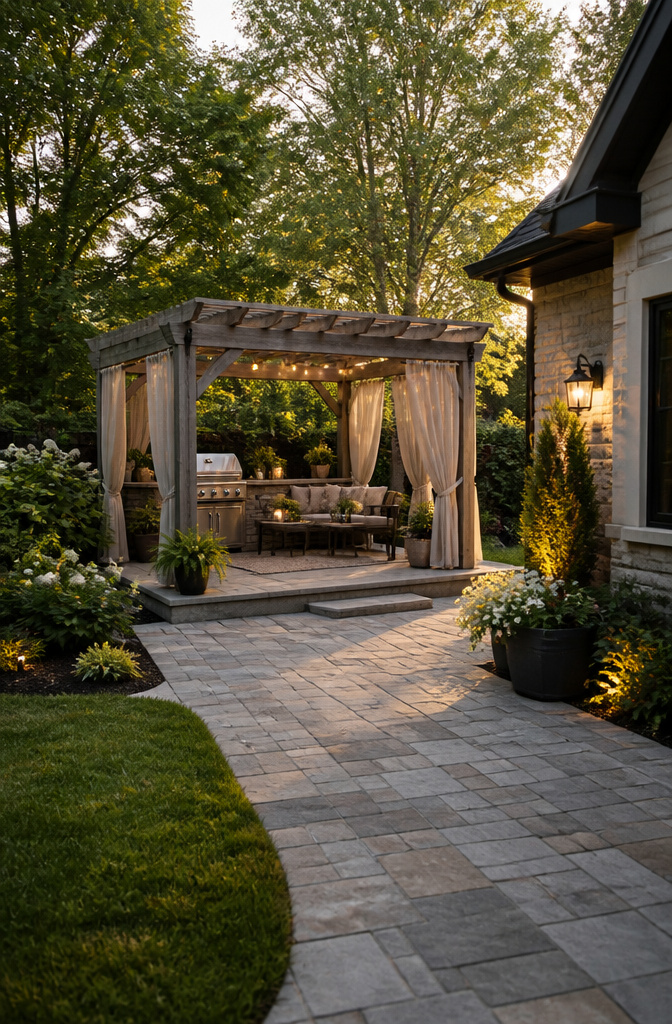
A 10-by-10 foot footprint keeps the grill within arm’s reach of seating without turning the space into a hallway you constantly cross. I hung curtains on the two open sides of mine to block the neighbor’s view, and that single move changed how often we actually used the space. Privacy made it feel like a room instead of a stage.
String lights at two heights keep the area from feeling like a cave after dark. One strand runs along the beam edges overhead for ambient wash, and a lower loop at about seven feet puts light on faces without the glare of a single overhead bulb.
A $400 cedar kit from a big-box store can frame this size without custom cuts, which matters when your tool collection stops at a drill and a miter saw. The boards arrive notched, the hardware is bagged, and you can stand the frame in an afternoon. Cedar weathers to gray in about two seasons unless you stain it, but even gray holds up better than the pressure-treated pine kits that cost half as much and start checking within a year.
2. Grand Designs for Larger Gatherings
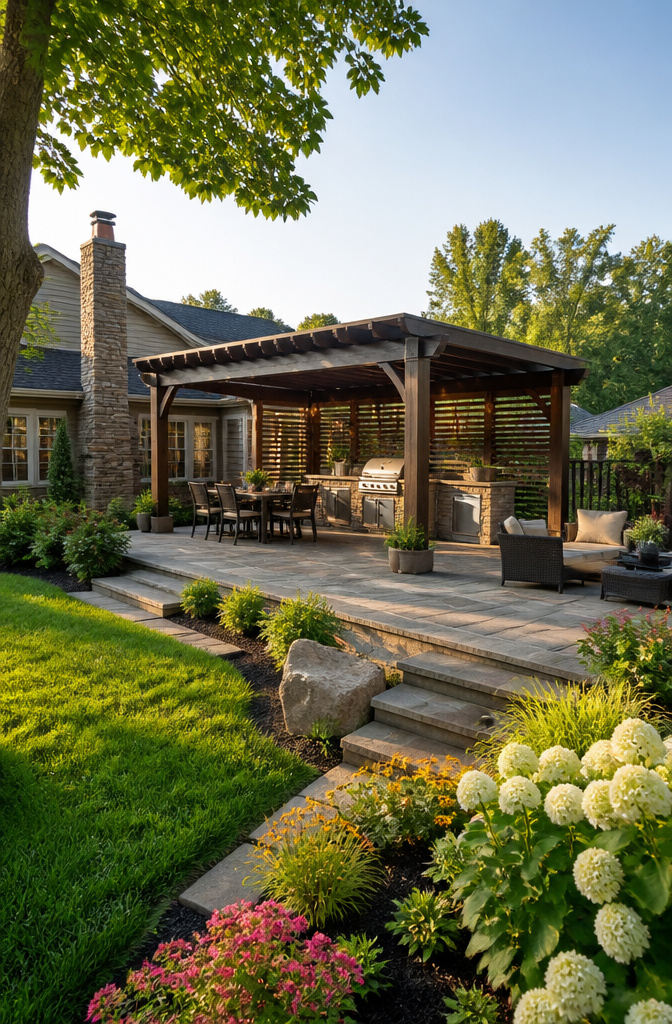
A pergola built for real cooking and real guests needs more width than the footprint suggests. A 12-by-16-foot frame left my 6-foot grill island in full sun and the bar seating completely exposed, so the following spring I bolted a second kit to the beam ends to extend the roof line. Two extra posts at the outer corners carried the new span without my having to double the post count across the whole structure.
That mistake taught me the rule: anchor the cooking station with two posts set tight to the grill island, then run a beam extension to cover the dining area. The extension hangs off the main beam with metal brackets, so the dining zone gets shade while the post grid stays open enough for traffic. Eight people seated at a counter need about 24 inches of shoulder room each, which means a 16-foot beam covers two sides if you keep the grill at the third. The kits ship with pre-cut beams and the bracket hardware, and you add the extension in a weekend without pouring new footings. Shade matters more than square footage; measure the shadow at 3 p.m. before you cut anything.
3. Unique and Unusual Pergola Styles
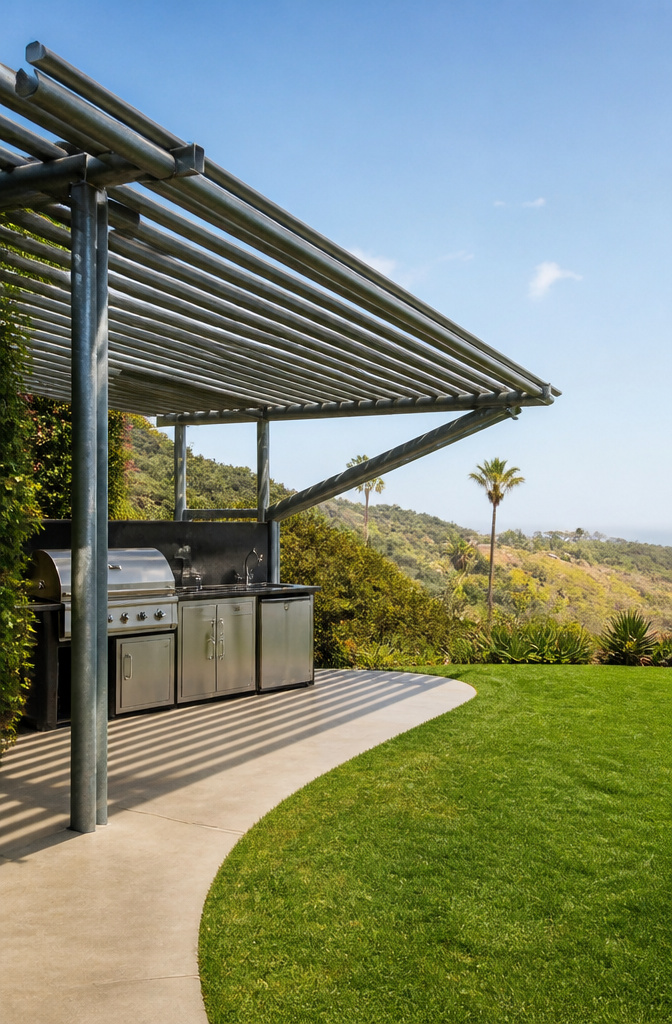
Triangular pergolas solve the corner-lot problem that rectangular frames exaggerate. I watched one go up on a wedge-shaped yard in South Carolina: the builder anchored the right angle to the house, ran two beams to a single post at the property line, and gained a full cooking triangle without swallowing the remaining grass. The grill sat on the long hypotenuse side; prep space tucked under each return. Round or hexagonal pergolas force you to rethink grill placement entirely, but the payoff is traffic flow that no boxy layout matches. A friend in Galveston skipped wood kits entirely and built his frame from galvanized pipe fittings. Three coastal winters of salt spray and he has not replaced a single joint. The industrial look is not for every backyard, though it pairs surprisingly well with stainless appliances. For a softer curve, arched-top vinyl kits now run cheaper than straight-beam cedar in most regions, and the arch sheds rainwater faster than a flat beam while still letting breeze through. The catch with any non-rectangular kit is confirming the footprint before you pour footings: manufacturers list the span at the widest point, not the usable interior, and a 12-foot arch may leave you 10 feet of real shelter underneath.
4. Modern and Minimalist Designs
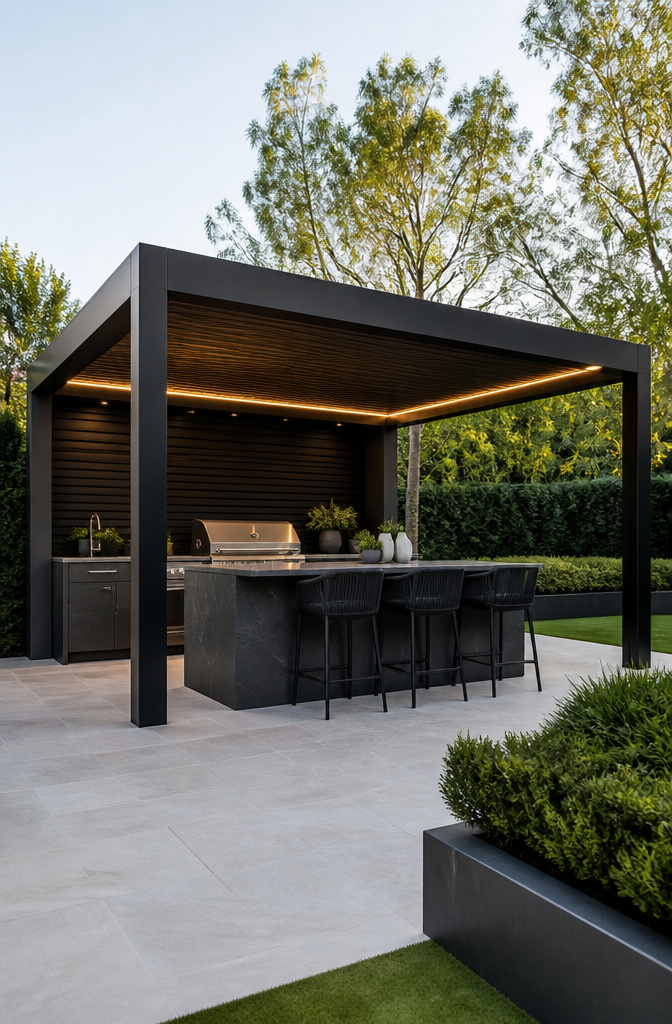
Flat roofs and hidden hardware read as structure, not ornament, which is exactly what a small yard needs. Aluminum frames with dark wood finishes give that refined look without the maintenance guilt, and the material itself is rust-resistant and low-maintenance by nature. The louvered aluminum roof I priced at $2,800 would have let me angle slats shut against mid-afternoon sun; instead I bought the $900 manual kit. On 95-degree days I still regret it, because fixed slats just bake the space underneath.
Cable railings keep sight lines open so the pergola does not wall off the yard, and recessed LED strips tucked into the beams put light where you need it without hanging fixtures that fight the clean lines. The hardware stays invisible, the roof stays flat, and the whole thing sits back visually while still defining the kitchen zone. That is the trade: spend for the moving roof now, or spend the summer ducking inside.
5. Rustic and Traditional Styles
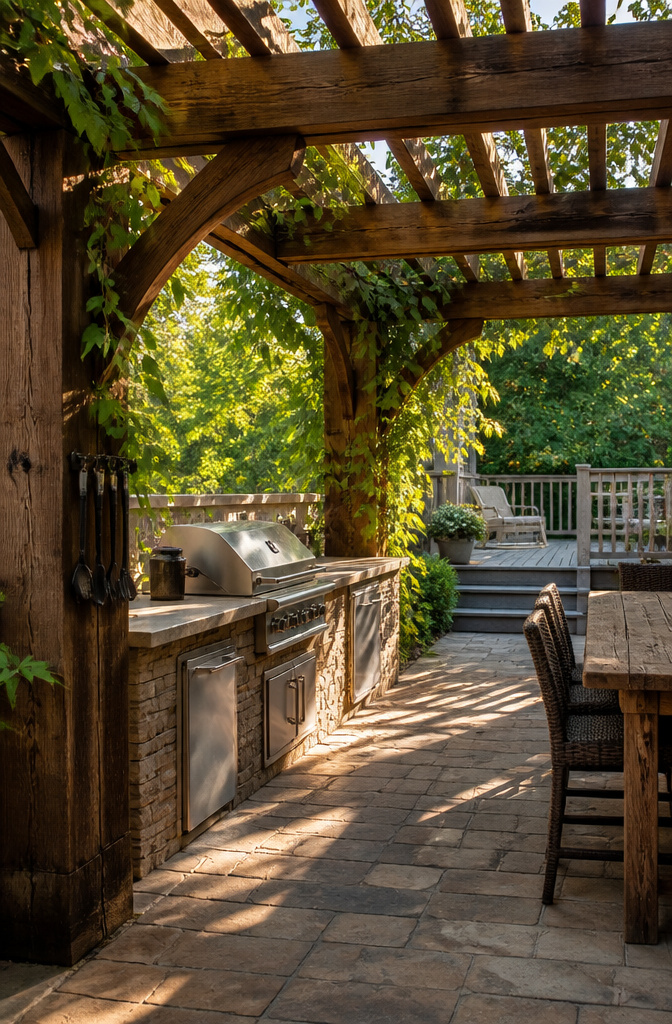
Rough-sawn timber with curved braces and a natural stain ages alongside a house instead of announcing itself as an afterthought. For my first build, I went with pressure-treated 6×6 posts instead of cedar because the lumberyard price difference was about $180. That savings cost me two full weekends brushing stain into every check and grain to get the color close to the existing deck. The posts took it differently than cedar would have, drinking more on the ends and leaving faint lap marks where I overlapped wet edges. It worked, but four days of staining is the real price of that $180.
Vinyl has come along since then. The embossed grain on modern boards can pass from ten feet away on a sunny afternoon, and the color stays even where rain hits it hardest. Walk up close, though, and the repeating pattern every eighteen inches or so still reads like wallpaper. For a pergola overhead where no one studies the grain, that tradeoff might hold. For posts at eye level beside a grill, my eye catches it every time.
6. Enclosed Pergola Options for All-Weather Use
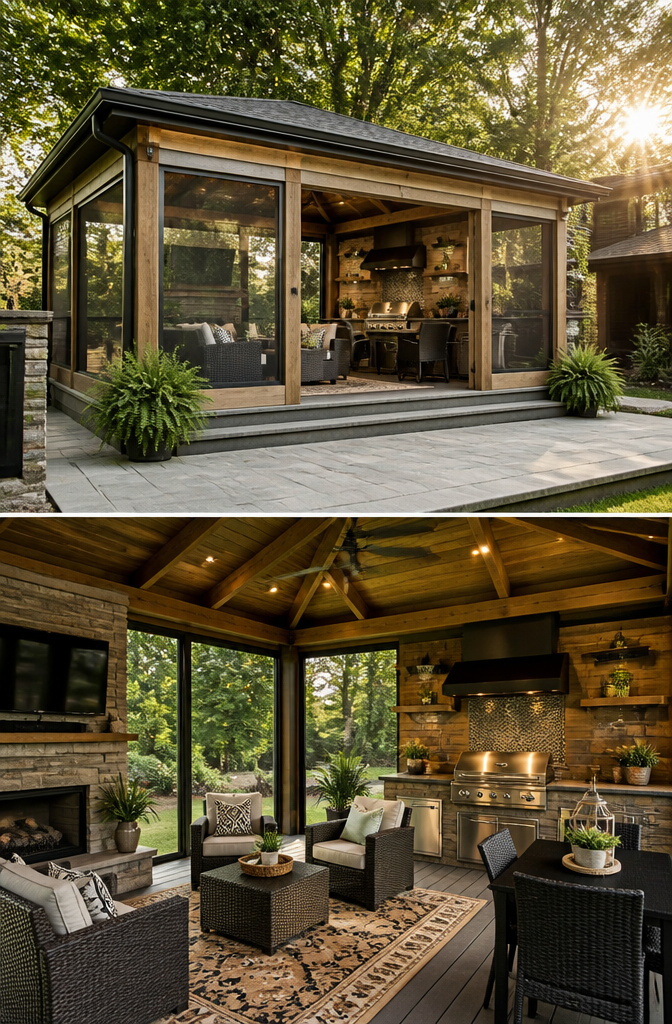
Retractable screens, clear vinyl panels, and louvered walls can turn an open pergola into a three-season room, but the hardware you hang them on matters more than the fabric itself. I learned that in October when I installed roll-down shades on my own pergola and watched the mounting brackets corrode over a single winter. The replacement marine-grade hardware cost three times as much and has stayed solid for four years now, which is the only reason I still trust the setup.
A south-facing enclosed pergola becomes a greenhouse in July. Without roof vents or a fan, the trapped heat will chase you out of a space you built to spend time in. Automated louvered roofs adjust for sun and rain, and they pair well with side screens, but the direction your pergola faces decides whether you need active ventilation or just decent airflow. Windy, exposed spots or areas that swing too hot or too cold will cut the number of weeks you actually use the kitchen, so plan the transition from house to pergola as carefully as you would the cooking layout inside it.
7. Pergolas With Integrated Lighting and Entertainment
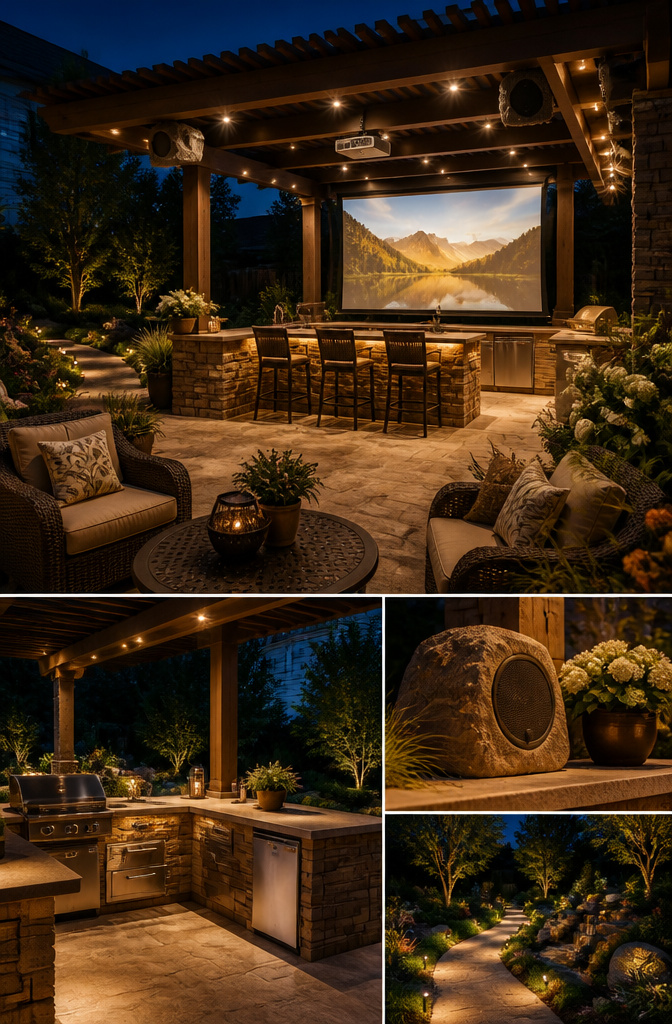
Running electricity to a pergola after the concrete cures means trenching through whatever you just finished, so the 20-amp circuit went in before the pour. An electrician ran it to a post base, and that single decision is why I still have dry feet and no extension cords snaking across the patio when the grill, string lights, and phone charger all want power at once.
The speakers sit in faux rock enclosures that match the landscaping. Bluetooth keeps the wiring simple, though the rocks need to face the seating area, not the fence, or the sound dies in the open air.
A projector screen rolls down from the front beam when we want movie nights. I skipped the outdoor TV after watching two friends replace rain-damaged sets in under three years. The screen folds away dry, and the projector lives indoors unless we’re using it.
Wood, Vinyl, and Metal: What Lasts
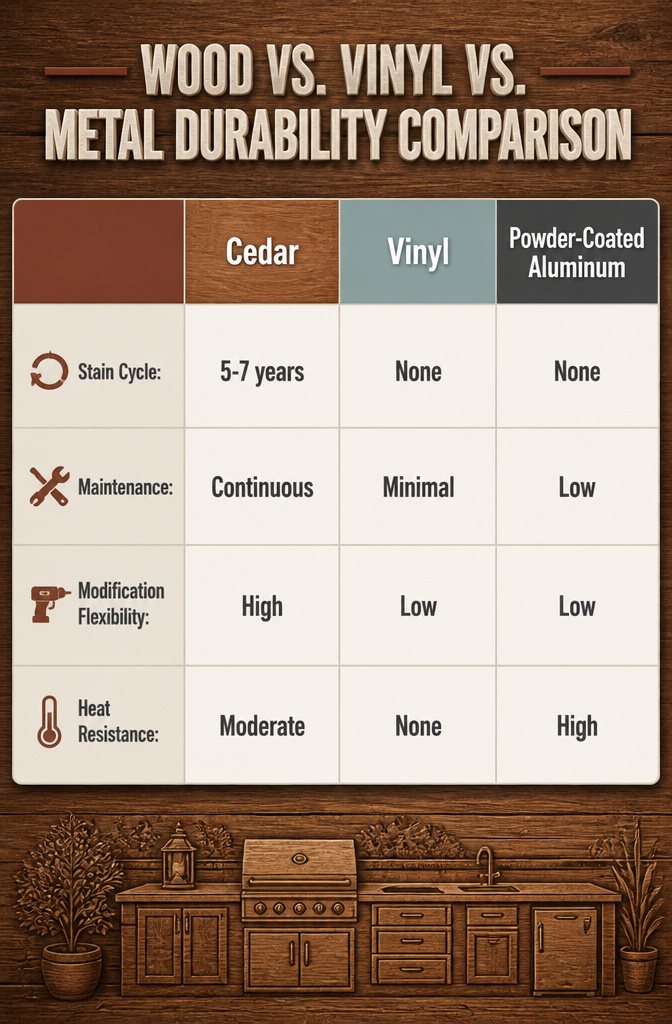
Cedar brings warmth that vinyl and metal cannot replicate, but that beauty carries a 5- to 7-year stain cycle to keep fading and warping in check. Rain and sun will push the wood toward decay regardless, and the maintenance never truly stops. The tradeoff is flexibility: cedar allows easy modification after building, so adding a hook for a lantern or bracing for a hanging planter takes an afternoon with basic tools.
Vinyl skips the staining entirely, which sounds like freedom until you see what a decade of direct sun does to it. UV brittleness sets in around year ten, and the material offers no warning before it cracks. Worse, vinyl structures do not take well to aftermarket changes; the hollow profiles and snap-together joints leave little solid material to screw into.
Powder-coated aluminum costs more upfront, and the difference stings at checkout. My neighbor’s install hit year eight last spring with zero visible wear: no chalking, no rust bloom at the joints, no sag in the beams. The powder coat acts as both paint and armor. Like vinyl, aluminum resists later modification; the engineered channels and factory-welded corners are built to stay as designed.
Shade, Ventilation, and Where to Stand
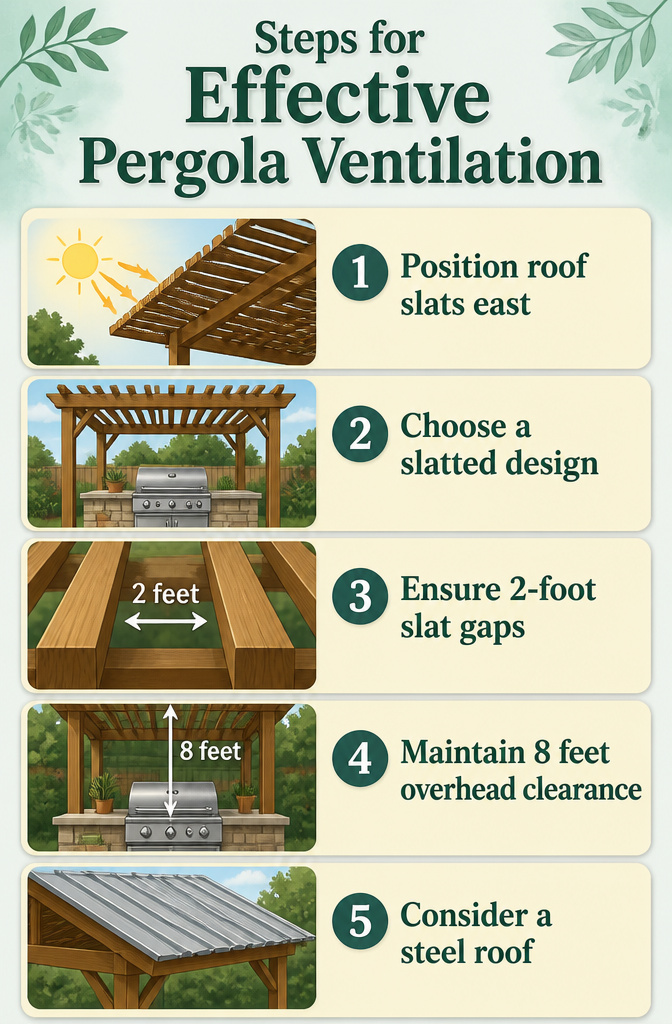
Morning sun hits a pergola from the east at a low angle, so a slatted roof aimed that direction buys you cool hours before noon. By three in the afternoon, the same slats turn useless if the western light pours straight through the gaps. My first roof was solid corrugated metal over the grill station, and standing under it in July felt like leaning into a hair dryer. The smoke had nowhere to rise, so it banked down and hung at chest height until I walked out just to breathe.
That fall, I pulled the metal sheets and reran the rafters with a 2-foot gap between each slat, measured from center to center. The heat shredded itself in the open run; the smoke finally had an exit. I also keep 8 feet of clearance from the grill surface to anything overhead, a margin that reads generous until you flare up a batch of chicken thighs and watch the tongues of flame reach for the rafters.
A steel roof helps to reduce heat transfer by up to 20 degrees, making grilling outside more comfortable and enjoyable.
— Bob Vila
The catch is that same roof traps what you are trying to escape. For charcoal, the math changes again; the ember load and the grease load together make solid coverage a risk I would not take.
Layout: Sun, Wind, and the Walk to the Sink
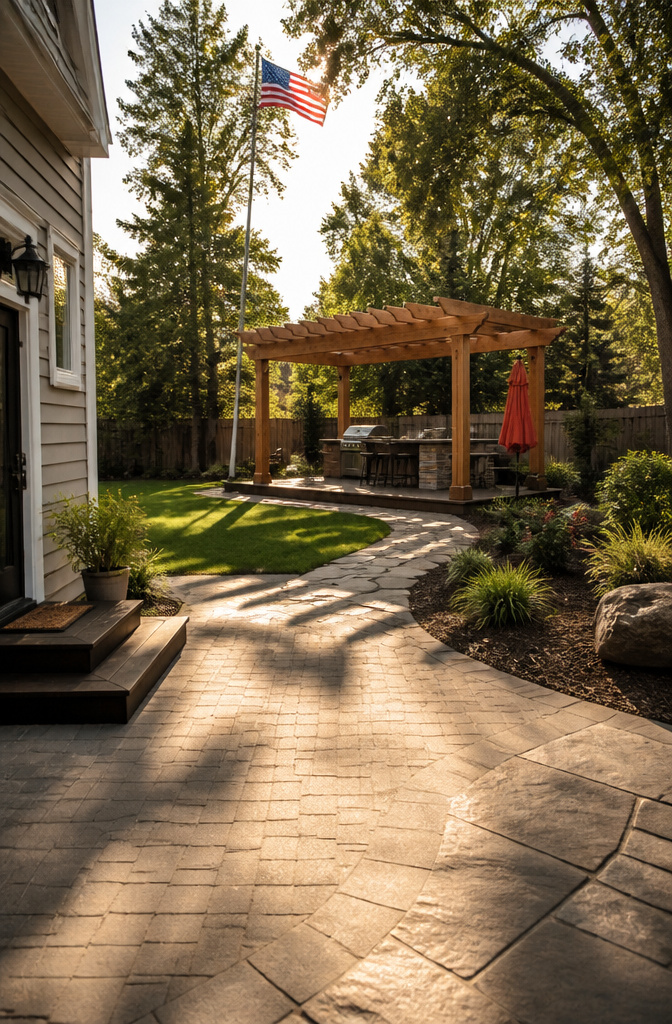
The pergola sits 22 feet from the back door, a distance I settled on after a summer of too many trips and one winter of smoke drifting through the kitchen window. That gap means two runs for ice or tongs feels normal, not annoying, and the grill plume rises and disperses before it reaches the house.
Wind direction mattered more than I expected. I stuck a flag on a ten-foot pole and watched it for three weekends before pouring footings. The prevailing breeze here carries smoke southeast, away from both the back door and where people actually sit. Without that check, I would have cooked in my own exhaust half the time.
Winter sun was the mistake I did not catch. By late November the sun sits low enough to blast straight under the rafters at 4:30 p.m., right into the cook’s eyes. A foot more overhang on the west side, or shifting the whole frame three feet north, would have fixed it. Now I angle a patio umbrella there from November through February, which looks as awkward as it sounds.
DIY Kits and What Arrives in the Truck
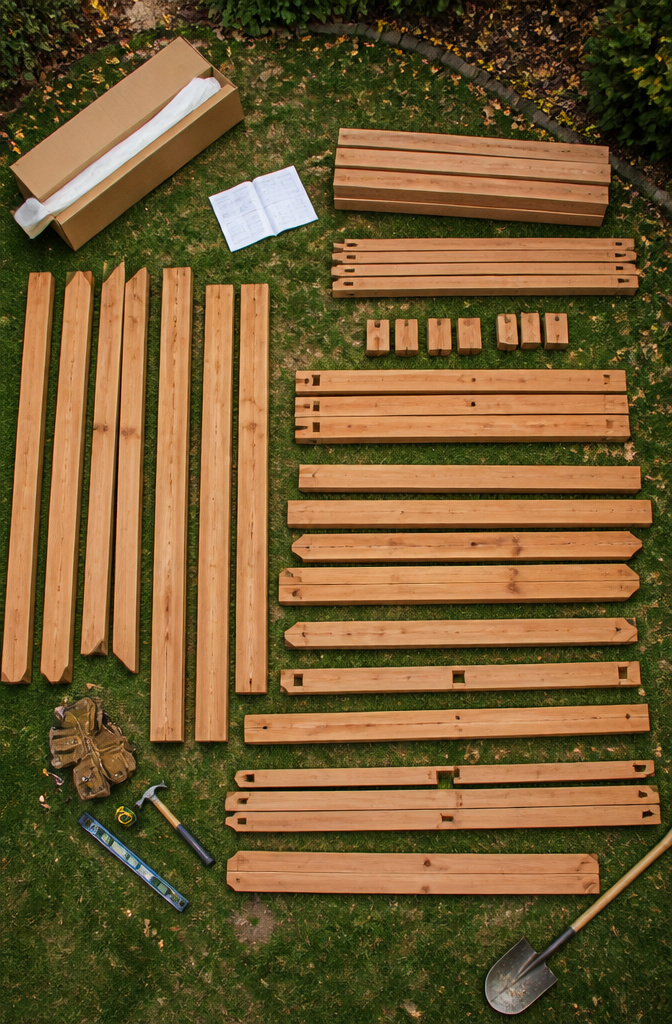
Pre-cut pergola kits promise a shortcut, and in some ways they deliver. The 12×12 cedar kit I ordered arrived with every hole pre-drilled and every beam stamped with a code that matched the assembly sheet, which meant two of us had the frame up in about six hours. What the truck did not bring was anything to anchor it: no footings, no brackets for bolting to an existing patio, and no note about checking for square corners until the posts were already leaning. Stain before assembly was printed on the inside flap of the packing list, which I found after half the pieces were laid across my lawn and the afternoon was fading. Most kits assume flat ground and right angles, so budget a day for grading or shimming before the build even starts. Between the stain I had to buy, the concrete for footings, and the lag bolts the kit left out, the hidden costs ran close to a third of the kit price itself.
Frequently Asked Questions
How do I choose the right location for my outdoor kitchen pergola?
Set the pergola about 22 feet from your back door so trips for ice or tools feel normal, not annoying, and grill smoke rises and disperses before reaching the house. Check wind direction with a flag on a ten-foot pole over several weekends so you are not cooking in your own exhaust. Watch how the low winter sun hits the cooking zone at 4:30 p.m.; a foot more overhang on the west side or shifting the frame a few feet north keeps the glare out of the cook’s eyes.
What materials are commonly used for outdoor kitchen pergolas?
Cedar, vinyl, and metal are the three main choices. Cedar needs staining every five to seven years but lets you modify the frame easily later with basic tools. Vinyl skips the staining but turns brittle around year ten and does not take well to aftermarket changes. Powder-coated aluminum costs more upfront but shows zero visible wear at year eight and resists rust, though its engineered channels are built to stay as designed.
What are some lighting options for my outdoor kitchen pergola?
String lights at two heights work best: one strand along the beam edges overhead for ambient wash and a lower loop at about seven feet to light faces without glare. Recessed LED strips tucked into the beams keep clean lines in modern designs while putting light where you need it. Run a 20-amp circuit before the concrete cures so you are not trenching through finished patio later.
Is it cheaper to build your own outdoor kitchen pergola?
DIY kits with pre-cut materials and stamped assembly codes can have the frame up in about six hours with two people, but the hidden costs run close to a third of the kit price. You will still need stain, concrete for footings, and lag bolts the kit leaves out, plus a day for grading or shimming before the build starts if your ground is not perfectly flat. Factor in whether you own the tools or will be buying or renting them as well.