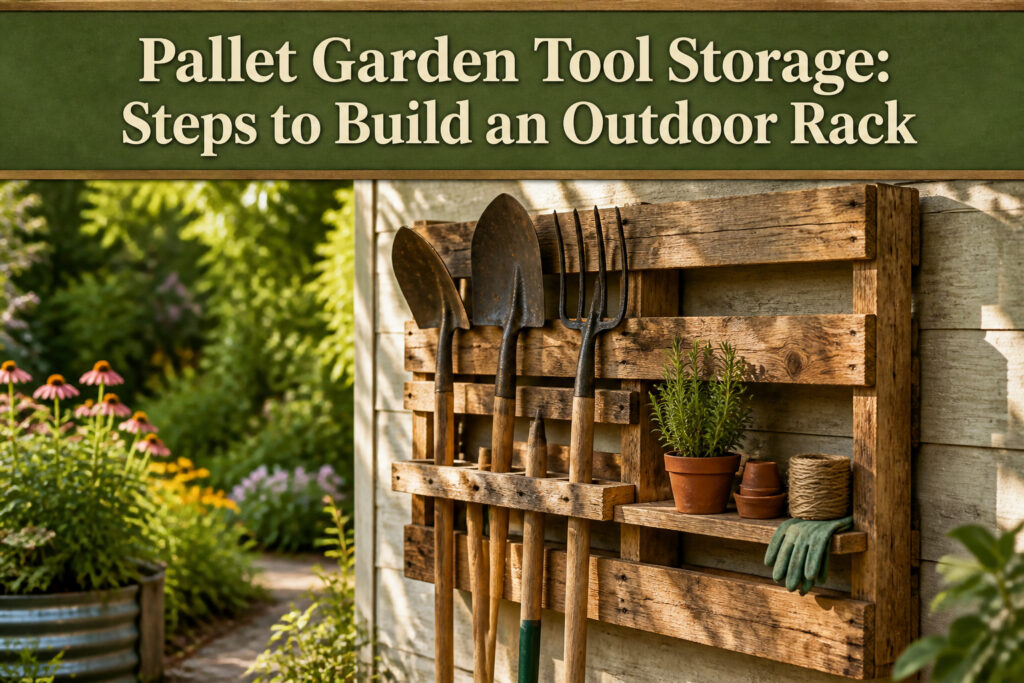
A pallet garden tool storage rack is a wall-mounted or freestanding organizer built from reclaimed shipping pallets, with slats that grip long-handled tools and added shelves or dowels for smaller gear. The catch is that not every pallet is safe to use: only heat-treated boards marked "HT" belong near soil and vegetables, since chemically treated alternatives can leach into your garden. The whole build runs about four hours, and half of that is sanding and inspection work most guides skip.
1. Select a Suitable Pallet
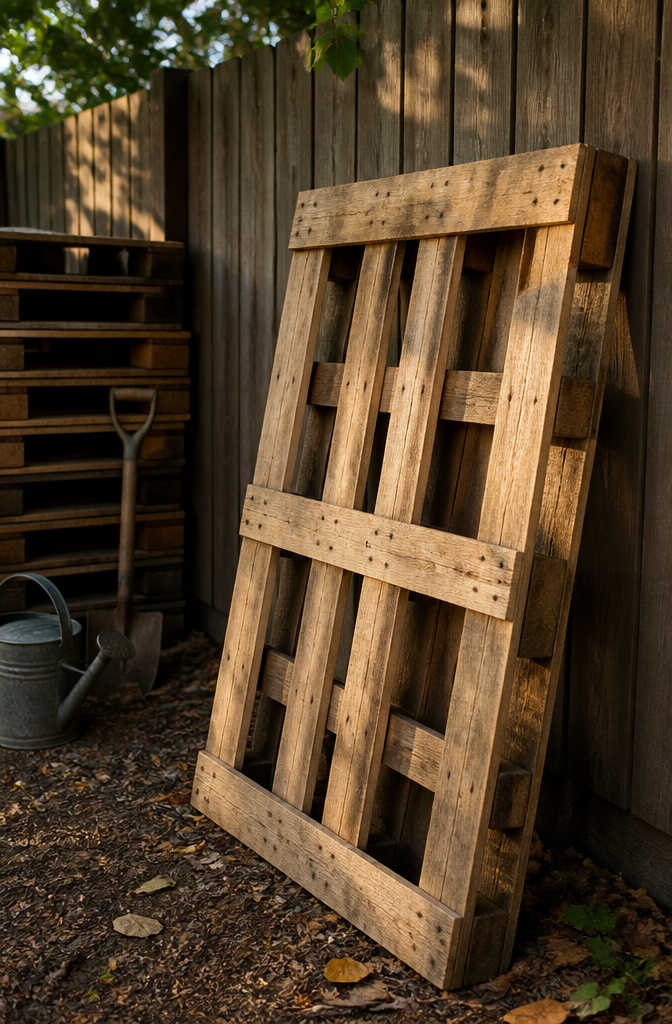
A pallet that looks fine from the truck bed can fall apart once you start prying boards free, so the inspection matters more than the price. Look for the "HT" stamp burned into one of the blocks or stringers; that heat-treatment mark means the wood was baked to kill pests rather than soaked in chemicals you do not want leaching near your vegetables and soil. I skip anything marked "MB" or anything with a chemical smell that lingers after a rain.
Solid slats should feel rigid underfoot when you step on the edge, and the nail heads should sit flush without rust bleeding through. A few cracks in the deck boards are workable if they run between nails, but split stringers are where the rack will fail when you load it with shovels and rakes. Free pallets stack up behind garden centers, hardware stores, and appliance shops if you ask during delivery days, and local marketplace listings move fast on Friday afternoons when businesses clear weekend space.
2. Prepare the Pallet
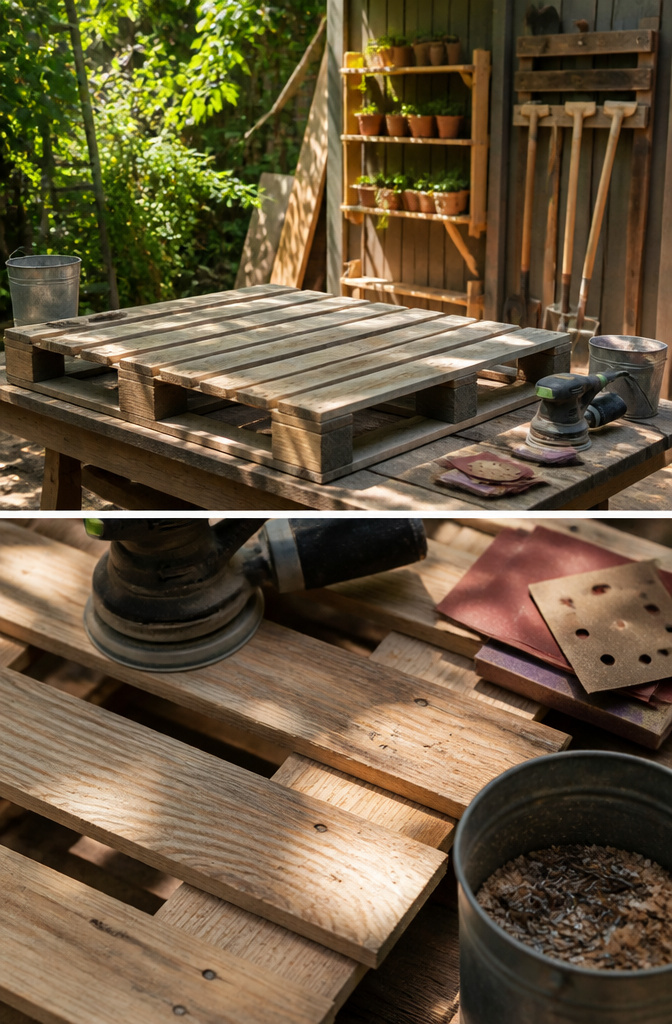
A pallet fresh off the stack looks ready to use, but the surface is usually hiding nails, splinters, and loose boards that will catch on gloves or worse once you start cutting. Pressure washing strips the weathered color I usually want to keep, so for outdoor projects I sand as-is and knock off only the rough spots. An orbital sander with a medium-grit disc takes care of the flat faces; hand sanding works the corners where the boards meet. The whole cleaning and sanding step runs about 2 hours of the 4-hour total build, and it is not the place to rush. Every nail head that sits proud, every splinter that catches the light, gets pulled or sanded flush before I pick up a saw. Loose slats get a quick tack with a hammer so they do not shift during the cuts. The goal is a surface you can run your palm across without thinking, because once the rack is mounted and loaded with tools, those same rough spots become the ones that snag sleeves and draw blood.
3. Cut Boards for Shelves
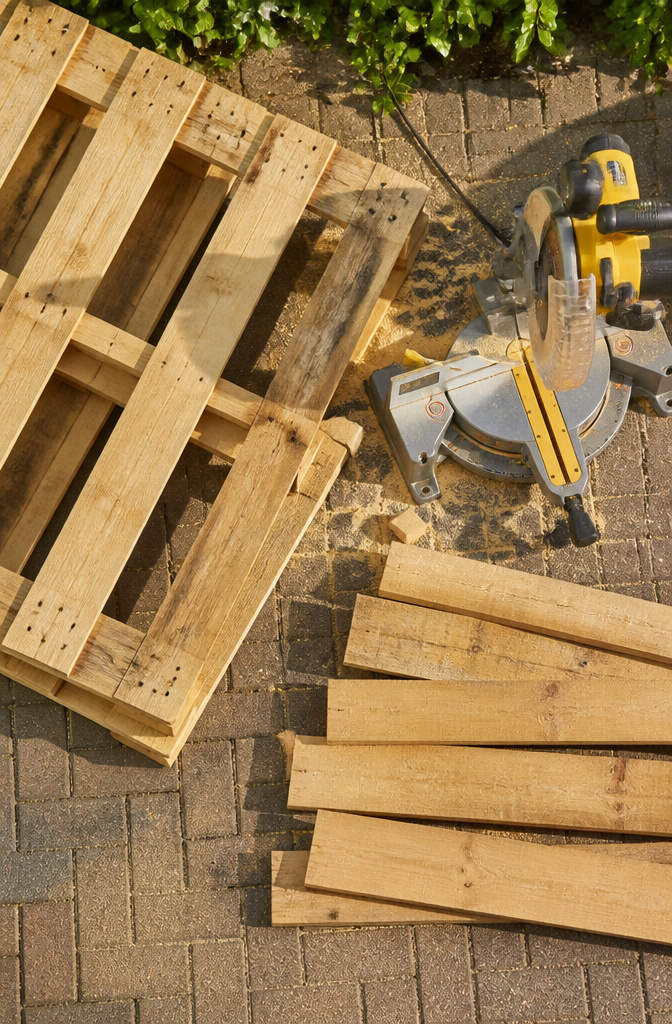
Not every pallet needs extra shelves. The spaced boards already hold long-handled tools fine, and hooks or dowels can handle pruners and gloves. But smaller items, pots, seed packets, and the odd trowel that never seems to have a home, those slip through gaps or clutter the floor unless you add flat surfaces.
I measure the width of each open section on the right side plus the top, then cut boards to fit. A miter saw with a slider function handles the deeper cuts cleanly, and a jigsaw works for any notching around existing nails you would rather not pull. Clamps matter more here than in most steps. The back boards of the pallet, spaced wider, become natural shelf supports, so the new wood only needs to sit level and flush. Glue helps if the load stays light, screws into a support rail do the rest.
The scrap wood can come from the same pallet, or from another you found curb-side. Either way, this is where the rack stops being a stick-up for rakes and starts acting like a proper organizer.
4. Position the Pallet
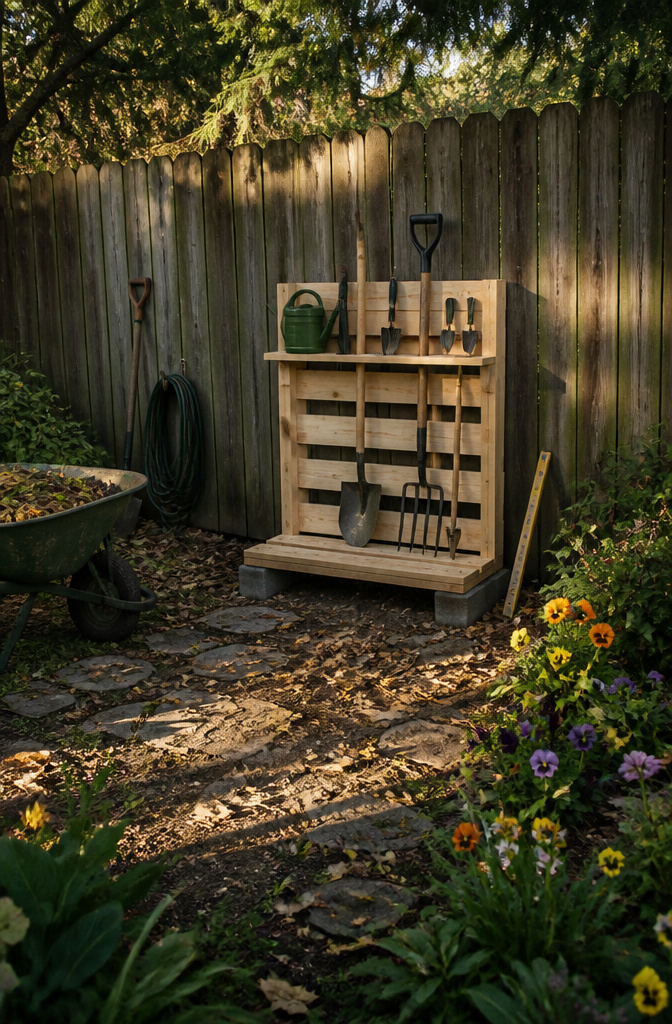
A pallet left flat on the ground collects water, and the bottom boards rot faster than you’d expect. Cinder blocks or a couple of buckets underneath lift it a few inches up, which is enough to keep leaves and standing water from pooling underneath. That gap also buys you time when the fence or shed behind it needs stain.
The wall or fence itself probably isn’t plumb, so the pallet won’t look straight just because it sits flush. A construction level across the top helps you spot the tilt before you drive anything permanent. One source mentioned the fence behind her pallets was off enough that the finished rack still looked wonky from a distance, even after she spent real time leveling the blocks. Check for plumb on the pallet itself, not just the surface behind it, or your tools will hang crooked even if the rack is solid.
For a setup you can move later, metal U-posts hammered in front of the pallet push it back against the fence without screws through the wood. Wire ties through the pallet and around both the posts and the fence pickets hold it in place. If you are screwing directly into a shed wall, hit the studs behind the siding and three framing nails or screws will do it; the pallet is not heavy, and neither are the hand tools going into it.
5. Secure the Pallet
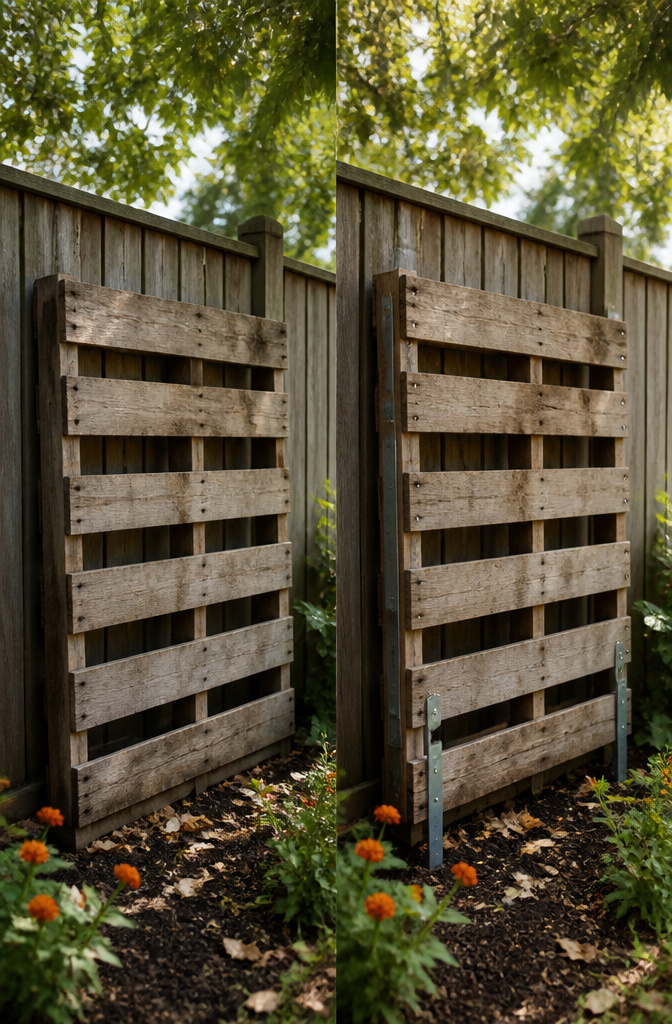
A pallet mounted flat against a wall takes far less space than a freestanding rack, but it needs the right hardware and something solid behind the surface. Framing nails driven into studs work if you have a shed or house wall with accessible framing; three nails held the one I read about, since the pallet itself is light and only garden tools load it. Heavy-duty screws are the safer bet if you are unsure where the studs sit. A cordless drill drives them fast, and you will want it anyway for the rest of this build.
Freestanding stability means U-posts pounded into the ground and the pallet fixed to them. This eats more yard space and needs level ground, but it keeps siding intact and lets you move the rack later. One approach I saw removes a few top boards to create tool slots, then reattaches those boards as feet at the bottom, turning the pallet into its own stand.
Either way, keep the bottom slat a few inches off the ground. Leaves and runoff collect against anything sitting at grade, and rot starts fast there.
6. Add Hooks or Dowels
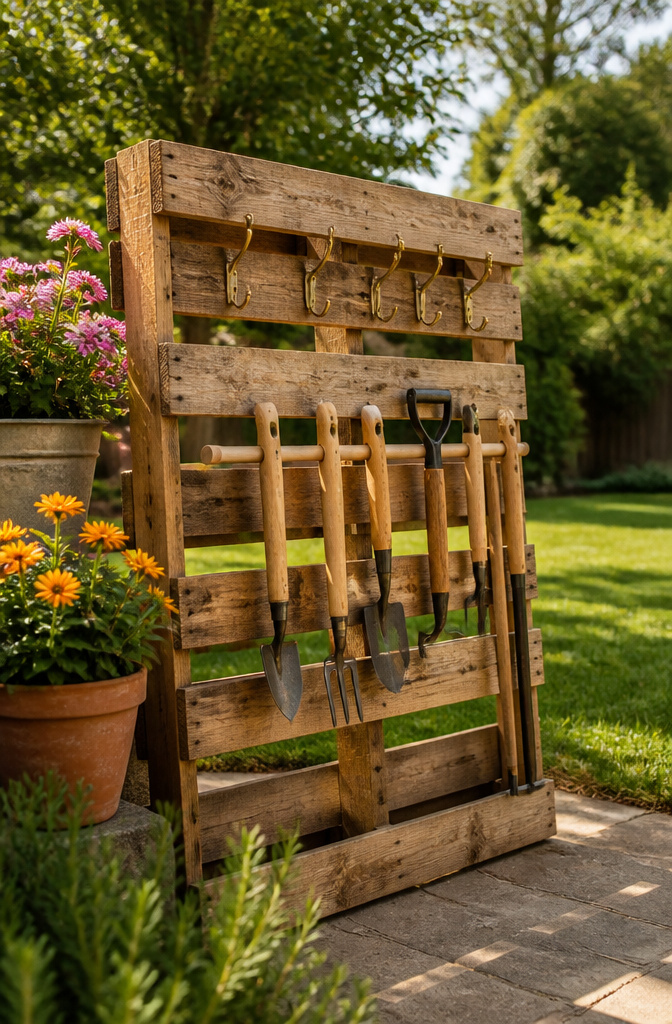
The long-handled tools already have a home between the pallet’s slats, but trowels, pruners, and gloves tend to slide through or pile up on the ground. A few dowels or hooks turn that same pallet into storage for the smaller gear you actually touch every day.
I drilled holes straight through the front face of the pallet, just above where the slats leave gaps, and hammered in short dowels with a bit of wood glue. A 3/8-inch dowel, maybe six inches long, gives enough shoulder to hang a trowel or a pair of pruners by their handles. Gloves dry faster draped over the dowel than stuffed in a bucket.
If dowels feel like too much cutting and gluing, screw-in hooks on the side rails work almost as well. The sources split on this: one route keeps everything flush and rustic, the other lets you move hooks around when you buy a new tool. For a weekend build with a drill and a hammer already in hand, dowels win on permanence; hooks win if your tool collection still changes every season.
7. Finish the Pallet
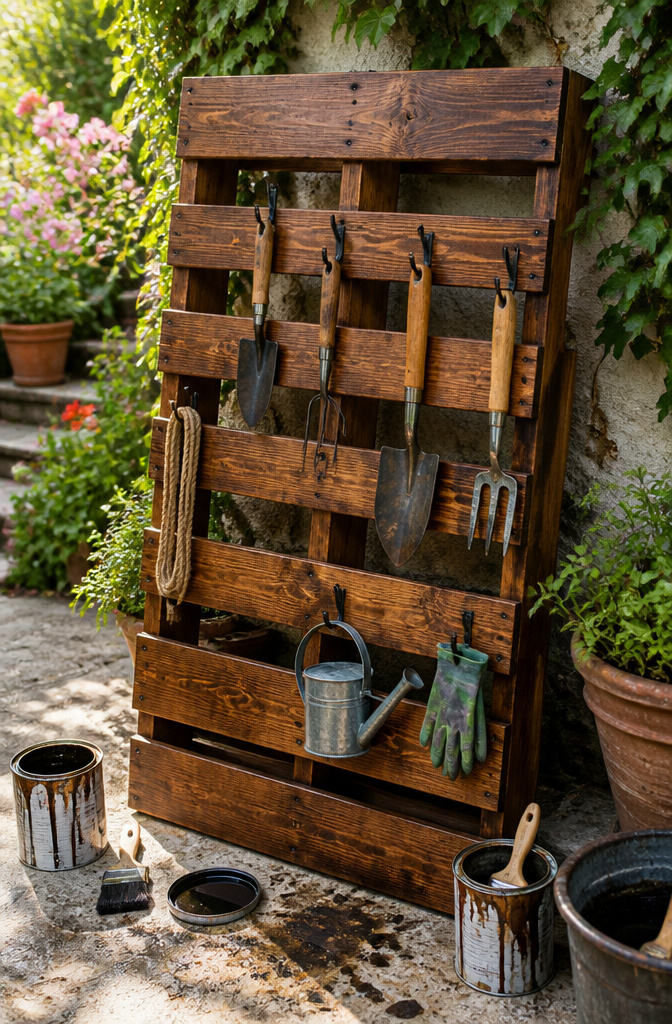
A coat of stain or paint buys the pallet another few years outside. The wood will shrink and expand through the seasons, and bare pine or oak turns gray and splinters faster than most people expect. I pried a few slats off before brushing anything on, which made the back surface easier to reach and left me a cleaner edge to fasten against a wall later.
Behr All in One Wood Stain and Sealer is what I reach for on anything that sits outside. It goes on like paint, so one bucket handles both color and protection, and a single quart usually covers a pallet with enough left for touch-ups. Matching it to an existing fence or shed keeps the rack from looking like an afterthought. Two coats are plenty; let it cure overnight if the weather allows, though a few hours works in a pinch. The sealer does not make the wood bulletproof, but it slows the moisture cycle that warps boards and loosens nails.
Pallet Design Options
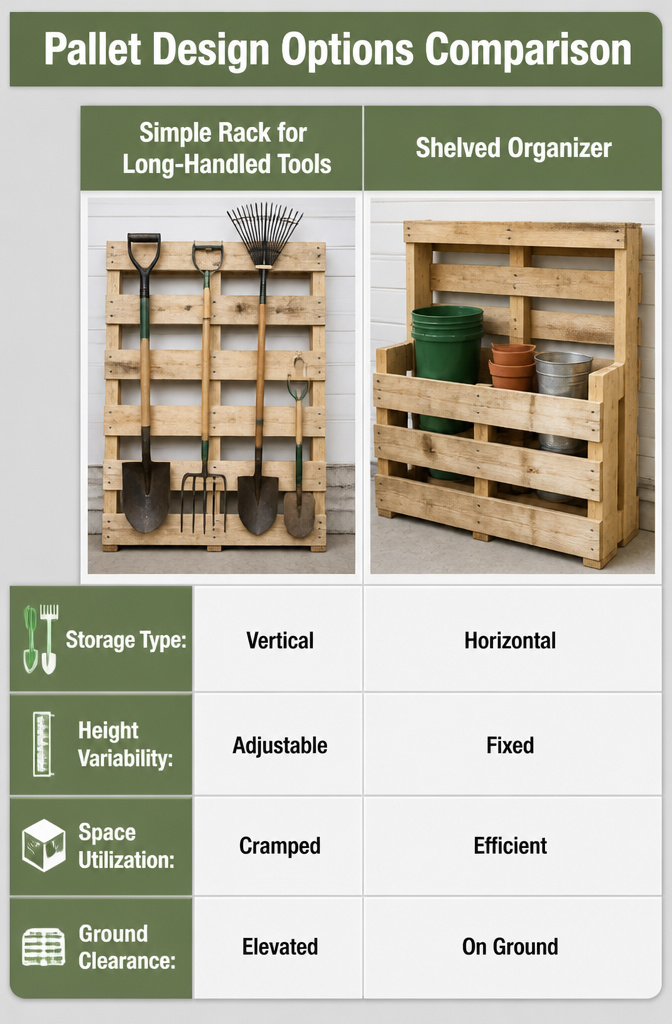
Before you pick up a saw, it helps to know which pallet layout matches your actual clutter. A single pallet stood upright with the slats running horizontal makes a simple rack for long-handled tools; the spaces between slats hold shovels and rakes at staggered heights if you remove or trim a few boards to fit 3-foot, 4-foot, and 5-foot handles together. Add a second pallet cut to three-quarter height in front, tie them together with 2×4 scraps, and the gap between them swallows five-gallon buckets or pots for a shelved organizer without cutting actual shelves. For hand tools, drill holes for dowels to mount pruners directly through the slats, or screw hooks into the sides and front for trowels and gloves. The fourth option is less about storage and more about survival: resting the whole unit on a second pallet or on cinder blocks lifts it off the ground and buys you time against rot, especially if you are leaving it outside year-round and only bringing tools in for winter.
Tool Organization Tips
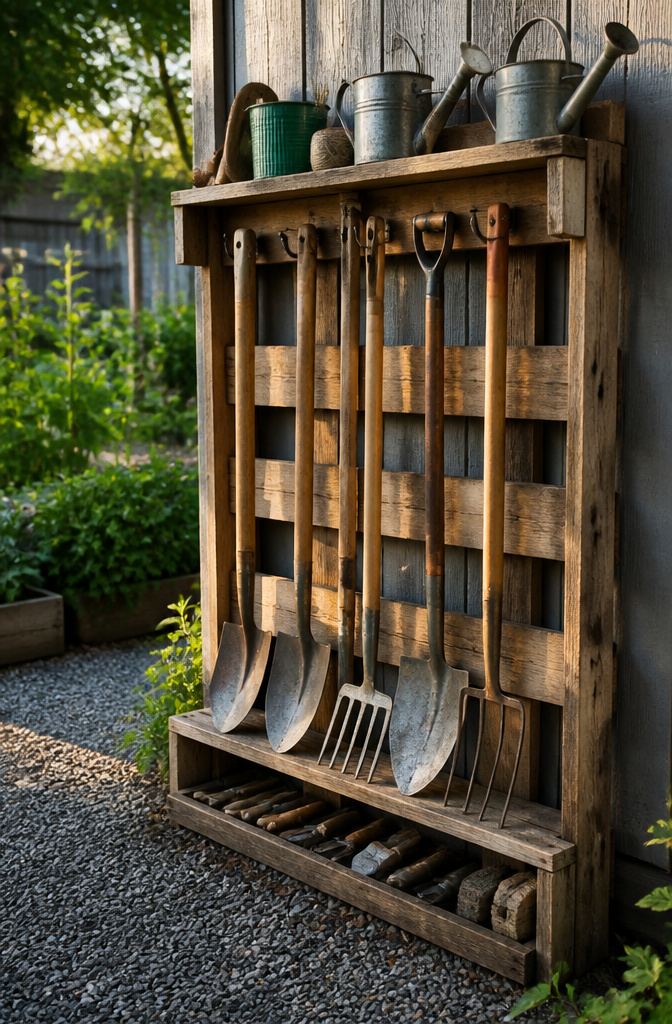
A pile of garden tools in the corner of a shed or garage turns a quick task into a hunt. Rakes tangle with shovels, handles crack under the weight of something else, and the thing you need is always at the back. Keeping each tool in a designated spot saves the ten minutes of rummaging that used to start every gardening session, and it keeps edges from dulling where they knock against metal.
The real payoff comes from grouping by use. Long-handled tools belong on the pallet’s open face where they hang clear of the ground; smaller hand tools sit on a lower shelf or in a bucket nearby. Watering cans and odd shapes go on the wide top surface. Once the habit sets in, you stop thinking about where things live and just reach. That speed matters most during the season when you are in and out of the yard half a dozen times a weekend, and it matters just as much when rain starts and you need everything stowed in under two minutes.
Cost and Free Materials
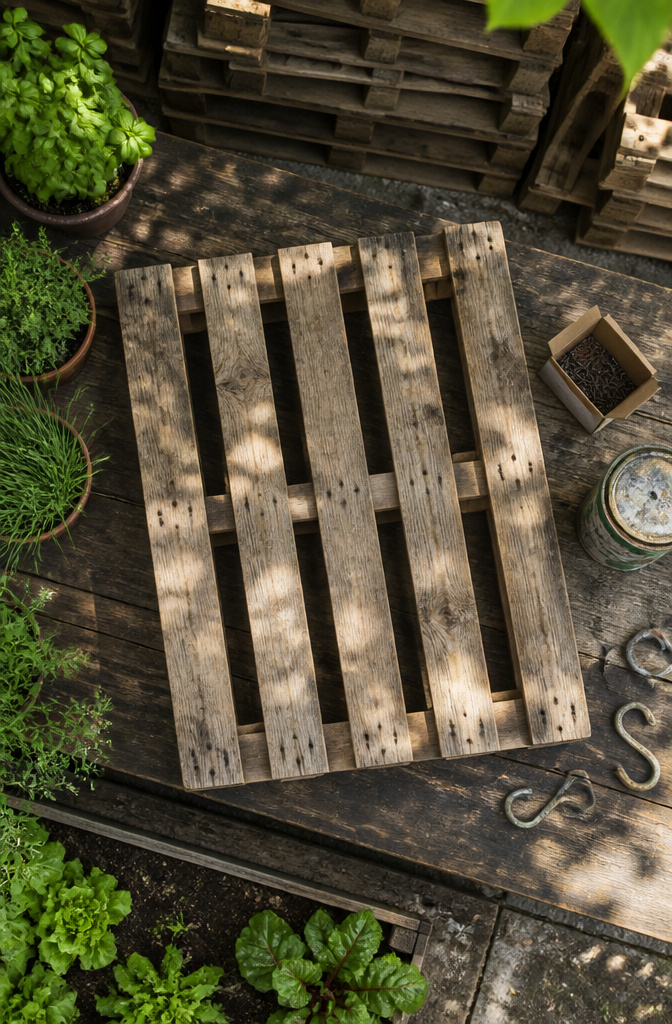
Most pallets come free if you know where to look. Local hardware stores, garden centers, and small warehouses stack them behind the building for anyone willing to haul them away. Online marketplaces like Craigslist or Facebook often list them under "free" with pickup required, and the supply stays steady because businesses pay to dispose of pallets otherwise. The only real expense lands on screws and hooks, which run somewhere in the single digits to low double digits depending on how many tools you are hanging. A box of exterior screws and a handful of heavy-duty S-hooks or screw-in hooks finish the job without pushing the project past the cost of a takeout dinner. Skip the pressure-treated lumber and metal brackets some guides suggest, since the pallet frame already holds the structure together and weatherproofing comes later in the build. The whole rack stays well inside a weekend-project budget, leaving room in the annual project fund for whatever the garden throws at you next.
Weatherproofing and Durability
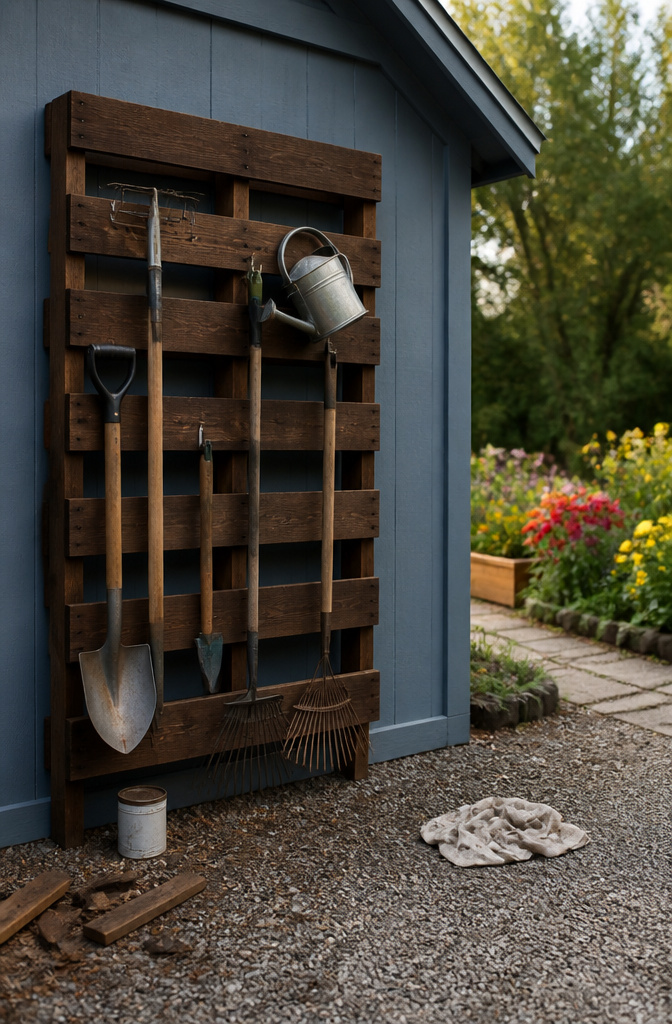
Raw pallet wood left outside turns gray, warps, and splits within a season or two. A coat of stain and a weatherproofing sealant buys you years instead of months. I used the same Behr All in One Wood Stain and Sealer I had on hand from another outdoor project, and matching the shed color made the rack disappear against the wall rather than shout for attention.
Before you brush anything on, flip the pallet and check the stamp. Heat-treated pallets are marked HT; those are the ones you want outside. Chemically treated pallets carry an MB stamp, and that treatment does not belong in garden soil or near tools you handle with bare hands. If the stamp is worn off or missing, find another pallet.
Sealer needs time to cure. Overnight is ideal, though a few hours will do if the weather holds. Re-staining every two or three seasons, or whenever the wood starts to look thirsty, keeps rot and splintering from creeping in. The half hour of maintenance is what separates a rack that lasts from one that leans and cracks by autumn.
Customization and Drainage
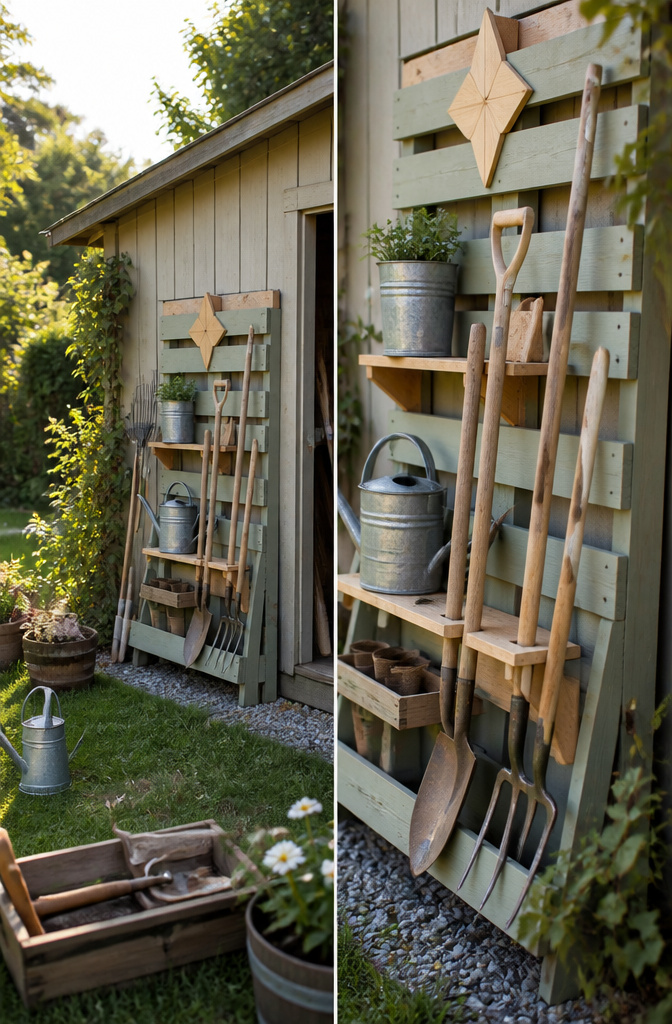
Optional touches are where this project stops being purely practical and starts looking like something you meant to build. A coat of paint in a color that matches the shed or fence turns the pallet from scrap wood into deliberate garden architecture. I have seen people cut small shapes from leftover boards and tack them on as corner brackets; it takes ten minutes and the rack suddenly has a personality. Shelves can sit at different heights to hold pots or a watering can, though I would keep them shallow. Deep shelves on an outdoor rack collect leaves faster than they collect anything useful.
Drainage matters more than the decorative stuff. A solid base traps rainwater, and wet pallets rot from the bottom up in a season or two. Laying a bed of gravel or broken pottery shards underneath the rack lets water escape instead of pooling. Some builders screw a piece of hardware cloth across the bottom frame so soil and leaves fall through while the structure stays ventilated. Either approach adds maybe half an hour and a few dollars to the build. Without it, you are relying on the pallet’s own gaps, which are rarely spaced well enough to actually dry the wood.
Tools You Need
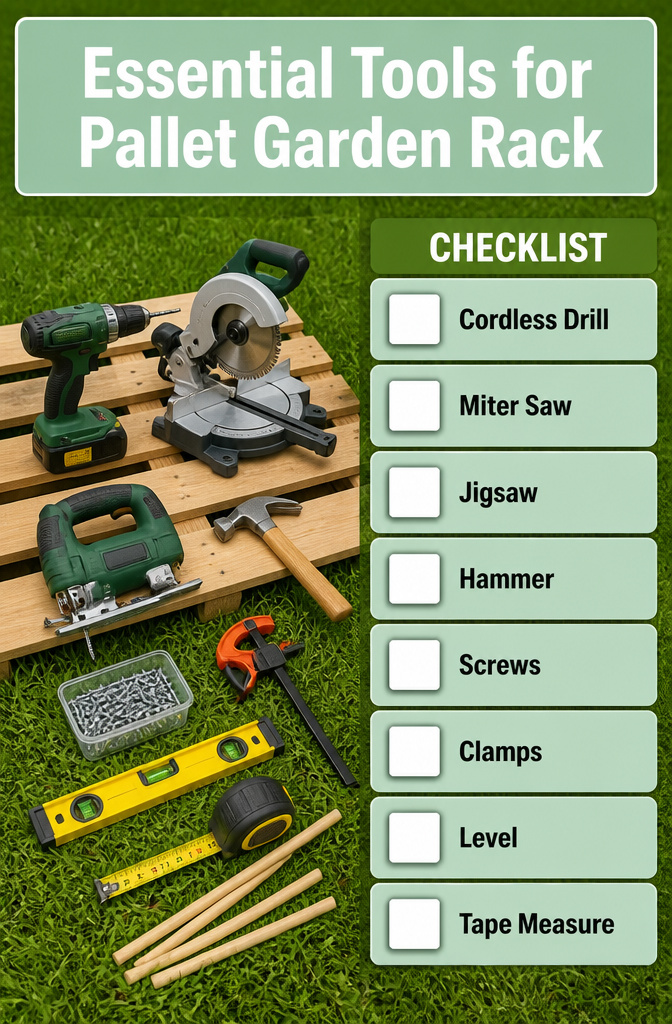
A cordless drill, miter saw, and jigsaw handle most of the cutting and fastening for this project. The miter saw squares off the pallet ends cleanly, while the jigsaw reaches the spots between stringers where a circular blade won’t fit. A hammer helps with the inevitable stubborn nails that don’t want to let go of their boards.
Beyond the power tools, a few basics keep the work straight:
- Screws for reattaching boards once you’ve cut them to length
- Clamps to hold feet or supports in place while you drill
- A level, because a rack that leans in the garage leans worse once tools load it down
- A tape measure, which every guide assumes you own but few bother to list
Dowel rods are worth adding if you have them on hand. They slip in beside smaller tools to keep handles from sliding sideways. The sources that skip them end up with rakes that fan out like a dropped handful of sticks every time you bump the rack.
Frequently Asked Questions
How do I make a pallet tool rack?
Start with a heat-treated pallet marked HT, then sand it clean and decide whether to mount it on a wall or fence or convert it to a freestanding unit by removing top boards and reattaching them as feet at the bottom. Add shelves cut to fit the open sections for smaller items, and drill holes for dowels or screw in hooks to hold trowels, pruners, and gloves. Finish with stain or sealer to protect the wood from weather.
What tools do I need for a pallet storage project?
You need a miter saw with a slider, a jigsaw, a cordless drill, a hammer, and an orbital sander with medium-grit discs. Grab clamps, a level, a tape measure, exterior screws, and either dowel rods or screw-in hooks depending on how you want to hang smaller tools.
How do I weatherproof my pallet storage?
Brush on a stain-and-sealer combo, such as Behr All in One Wood Stain and Sealer, after sanding the pallet smooth and checking for the HT stamp to confirm the wood was heat-treated rather than chemically treated. Two coats are enough; let it cure overnight if possible, and plan to re-stain every two or three seasons before the wood starts looking thirsty.