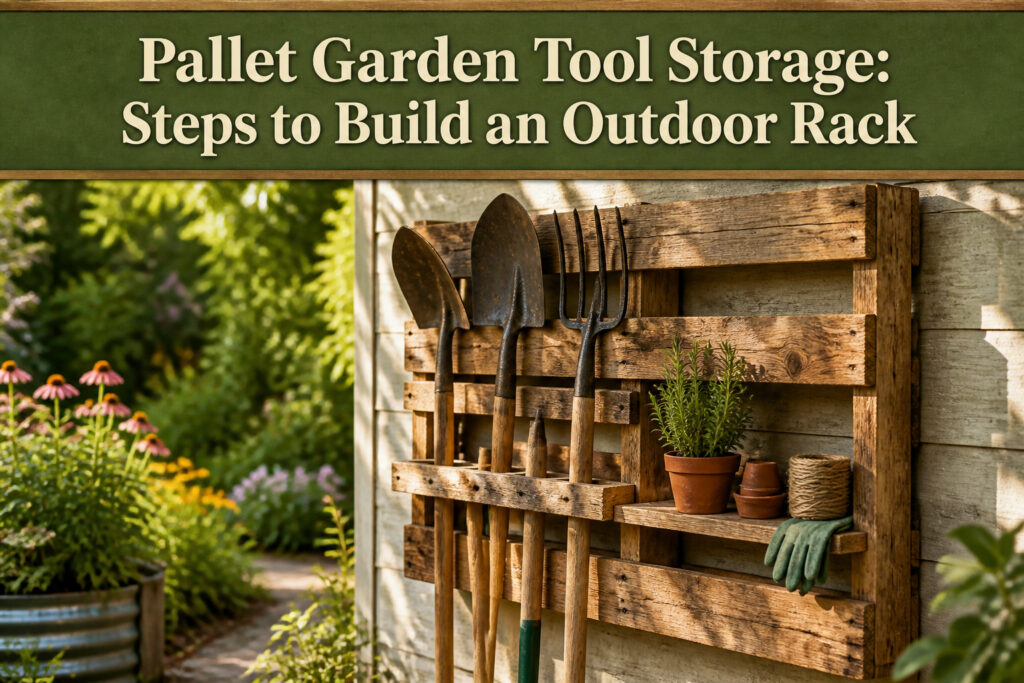
A pallet garden tool storage rack is a wall-mounted or freestanding organizer built from reclaimed shipping pallets, with slats that grip long-handled tools and added shelves or dowels for smaller gear. The catch is that not every pallet is safe to use: only heat-treated boards marked "HT" belong near soil and vegetables, since chemically treated alternatives can leach into your garden. The whole build runs about four hours, and half of that is sanding and inspection work most guides skip.
1. Select a Suitable Pallet
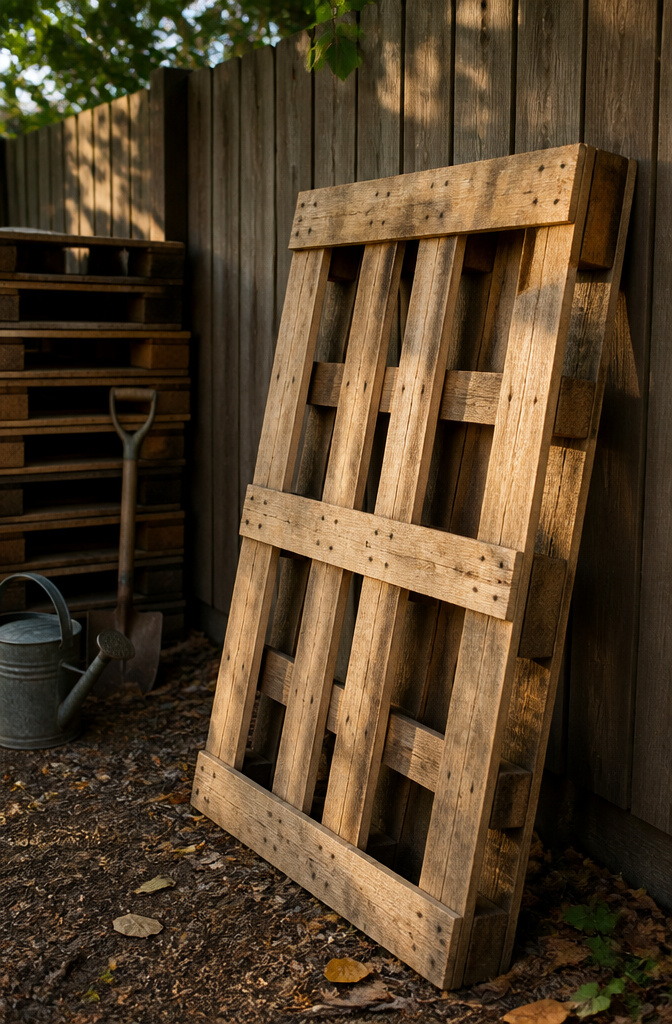
A pallet that looks fine from the truck bed can fall apart once you start prying boards free, so the inspection matters more than the price. Look for the "HT" stamp burned into one of the blocks or stringers; that heat-treatment mark means the wood was baked to kill pests rather than soaked in chemicals you do not want leaching near your vegetables and soil. I skip anything marked "MB" or anything with a chemical smell that lingers after a rain.
Solid slats should feel rigid underfoot when you step on the edge, and the nail heads should sit flush without rust bleeding through. A few cracks in the deck boards are workable if they run between nails, but split stringers are where the rack will fail when you load it with shovels and rakes. Free pallets stack up behind garden centers, hardware stores, and appliance shops if you ask during delivery days, and local marketplace listings move fast on Friday afternoons when businesses clear weekend space.

Optimal 2-Way Entry Design: Allows forklifts and pallet jacks to load/unload from 2 side, speeding up warehouse operations and reducing handling time.

OPTIMAL 4-WAY ENTRY DESIGN: Allows forklifts and pallet jacks to access the pallet from all four sides, improving loading and unloading efficiency in warehouses, stockrooms, and storage areas.

Optimal 2-Way Entry Design: Allows forklifts and pallet jacks to load/unload from 2 side, speeding up warehouse operations and reducing handling time.
2. Prepare the Pallet
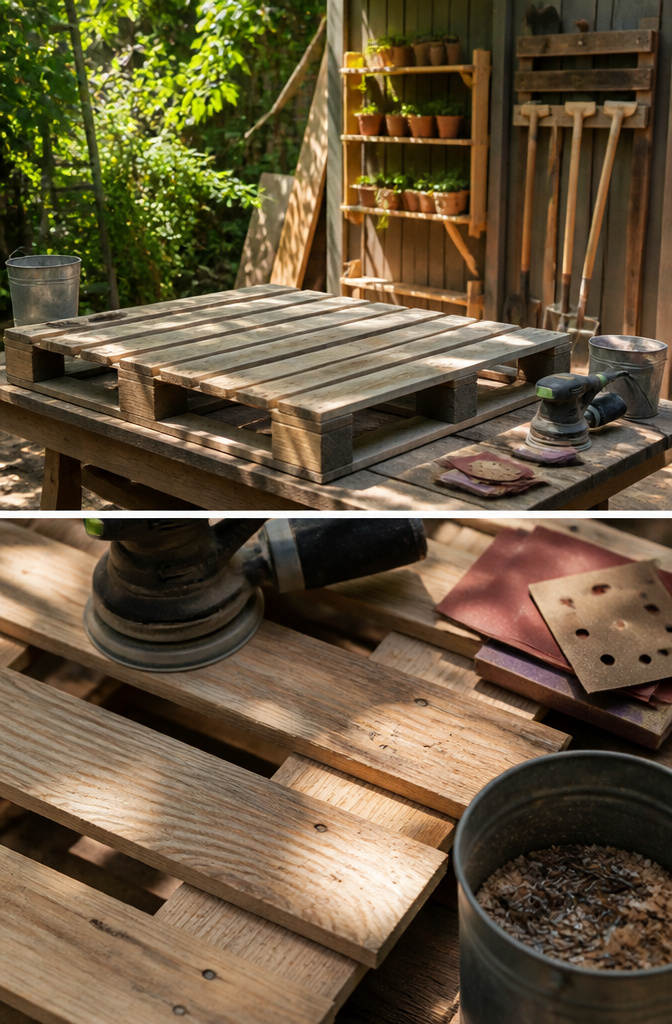
A pallet fresh off the stack looks ready to use, but the surface is usually hiding nails, splinters, and loose boards that will catch on gloves or worse once you start cutting. Pressure washing strips the weathered color I usually want to keep, so for outdoor projects I sand as-is and knock off only the rough spots. An orbital sander with a medium-grit disc takes care of the flat faces; hand sanding works the corners where the boards meet. The whole cleaning and sanding step runs about 2 hours of the 4-hour total build, and it is not the place to rush. Every nail head that sits proud, every splinter that catches the light, gets pulled or sanded flush before I pick up a saw. Loose slats get a quick tack with a hammer so they do not shift during the cuts. The goal is a surface you can run your palm across without thinking, because once the rack is mounted and loaded with tools, those same rough spots become the ones that snag sleeves and draw blood.

Generous Storage Capacity: The garden tool storage is equipped with 35 square slots, which are suitable for I-handle tools such as shovel and rake; garden tool rack equipped with 11 hooks, it is easy to hang accessories such as water pipes, pruning shears, axes, etc

Corner Friendly Trianglar Tool Rack-Make the most of unused corners with this space-saving garden tool organizer. Its compact triangular design fits snugly into tight spaces, keeping tools neatly stored and within easy reach while freeing up floor space
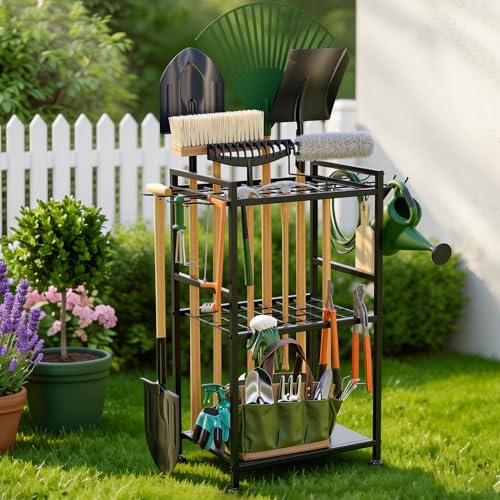
1. 【All-In-One High Density Storage】 Maximize your storage space with this high-capacity garden tool rack. It occupies only 16"×12" compact space yet can hold more than 35 tools. Equipped with 4 side slots and 5 hanging hooks, it easily stores 10 D-grip tools like pruning shears, garden trowels, short shovels and garden hoses. Ideal for tidying up messy spaces perfectly for gardening enthusiasts.
3. Cut Boards for Shelves
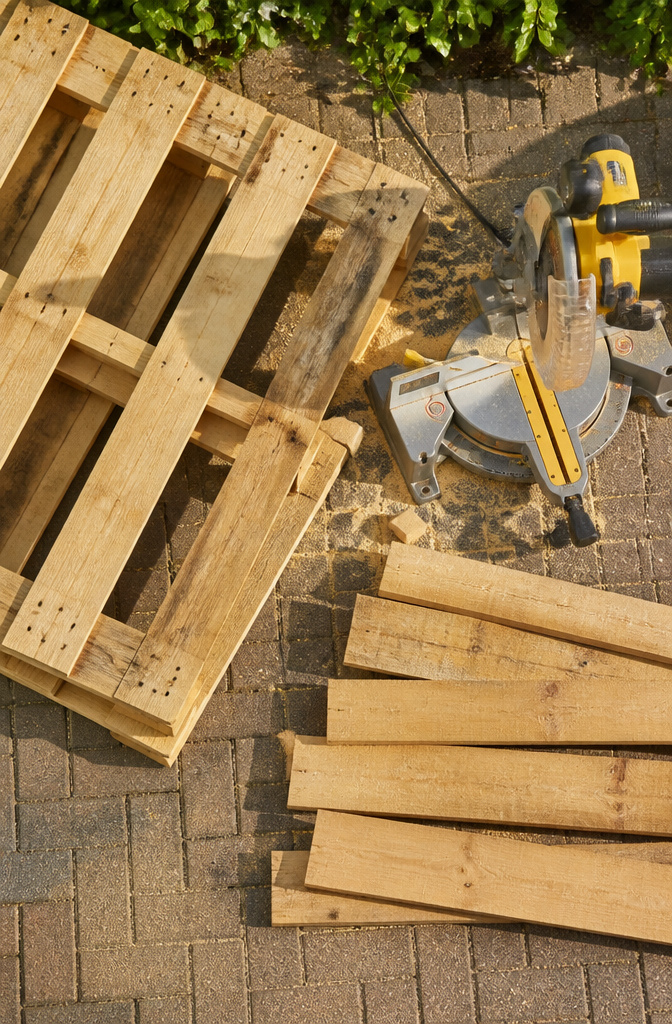
Not every pallet needs extra shelves. The spaced boards already hold long-handled tools fine, and hooks or dowels can handle pruners and gloves. But smaller items, pots, seed packets, and the odd trowel that never seems to have a home, those slip through gaps or clutter the floor unless you add flat surfaces.
I measure the width of each open section on the right side plus the top, then cut boards to fit. A miter saw with a slider function handles the deeper cuts cleanly, and a jigsaw works for any notching around existing nails you would rather not pull. Clamps matter more here than in most steps. The back boards of the pallet, spaced wider, become natural shelf supports, so the new wood only needs to sit level and flush. Glue helps if the load stays light, screws into a support rail do the rest.
The scrap wood can come from the same pallet, or from another you found curb-side. Either way, this is where the rack stops being a stick-up for rakes and starts acting like a proper organizer.

HEAVY-DUTY GARAGE TOOL ORGANIZER: Revolutionize your garage with this wall-mounted storage hero! Designed to hold shovels, brooms, power tools, and more, it can support up to an impressive 300 lbs.

OPTIMIZE YOUR SPACE: garden tool organizer compact design helps you maximize space. Hang tools and equipment to free up valuable floor space in garages, sheds, gardens, and more
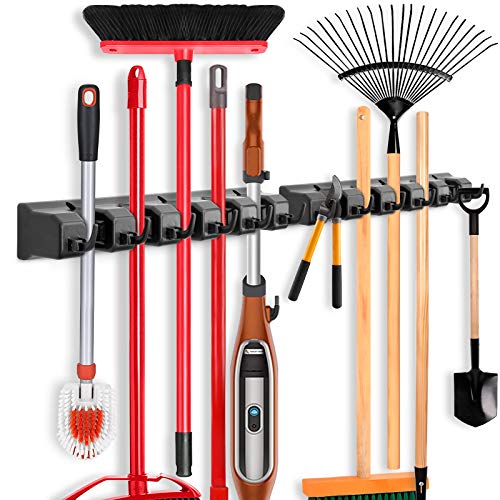
Tidy Your Home: 5 ball slots and 6 hooks design, organize your annoying cleaning tools within small space
4. Position the Pallet
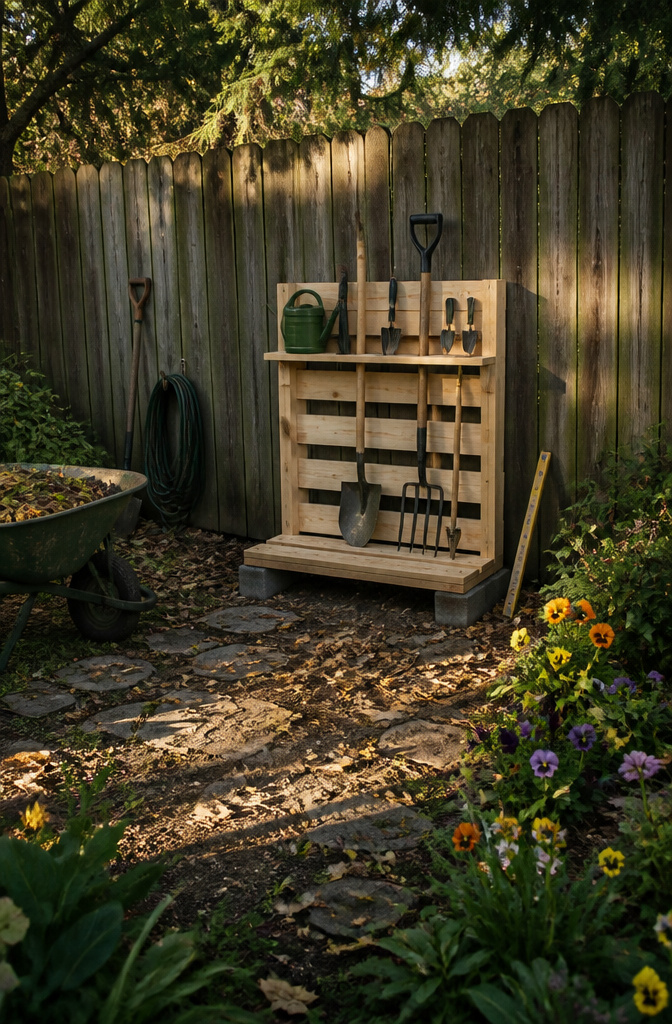
A pallet left flat on the ground collects water, and the bottom boards rot faster than you’d expect. Cinder blocks or a couple of buckets underneath lift it a few inches up, which is enough to keep leaves and standing water from pooling underneath. That gap also buys you time when the fence or shed behind it needs stain.
The wall or fence itself probably isn’t plumb, so the pallet won’t look straight just because it sits flush. A construction level across the top helps you spot the tilt before you drive anything permanent. One source mentioned the fence behind her pallets was off enough that the finished rack still looked wonky from a distance, even after she spent real time leveling the blocks. Check for plumb on the pallet itself, not just the surface behind it, or your tools will hang crooked even if the rack is solid.
For a setup you can move later, metal U-posts hammered in front of the pallet push it back against the fence without screws through the wood. Wire ties through the pallet and around both the posts and the fence pickets hold it in place. If you are screwing directly into a shed wall, hit the studs behind the siding and three framing nails or screws will do it; the pallet is not heavy, and neither are the hand tools going into it.

【Heavy Duty Design】 Reinforced solid metal slatwall tool holder with a black protective finish helps resist rust, corrosion, and everyday wear. Supports up to 40 lbs.

DURABLE WOODEN CRATE STORAGE CADDY - Our tool caddy is built to last, with a premium hardwood frame and a drawer with dovetail joints for a construction you can count on, whether you use this wood crate as a craft storage box or in your workshop.

Solid & Heavy-Duty Construction: The heavy-duty Thickened reinforced designed garage tool rack, Tested to hold 40 lbs, it keeps tools organized, secure, and ready for use. Engineered with a single-piece cutting process, this rack offers industrial-grade durability for garage and workshop storage. The cool look and compact design of power tool organization and storage rack make it an excellent choice for all design schemes.
5. Secure the Pallet
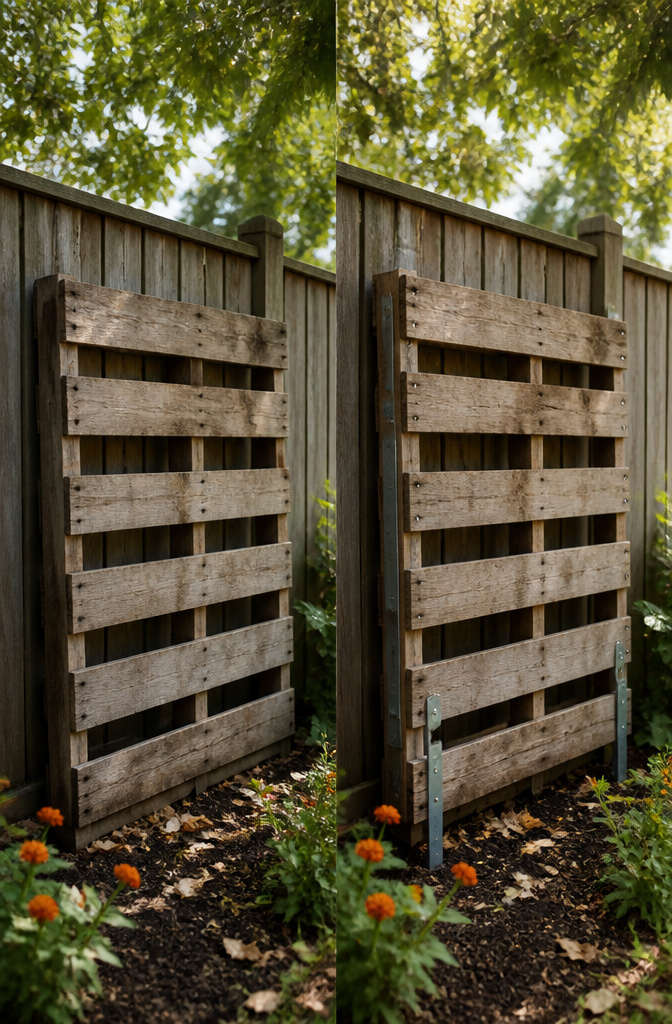
A pallet mounted flat against a wall takes far less space than a freestanding rack, but it needs the right hardware and something solid behind the surface. Framing nails driven into studs work if you have a shed or house wall with accessible framing; three nails held the one I read about, since the pallet itself is light and only garden tools load it. Heavy-duty screws are the safer bet if you are unsure where the studs sit. A cordless drill drives them fast, and you will want it anyway for the rest of this build.
Freestanding stability means U-posts pounded into the ground and the pallet fixed to them. This eats more yard space and needs level ground, but it keeps siding intact and lets you move the rack later. One approach I saw removes a few top boards to create tool slots, then reattaches those boards as feet at the bottom, turning the pallet into its own stand.
Either way, keep the bottom slat a few inches off the ground. Leaves and runoff collect against anything sitting at grade, and rot starts fast there.

💪Material - The mop holder is made of high quality stainless steel, Much strong and sturdy than plastic holder. Build to resist daily scratches, corrosion and tarnishing. Allowing it to remain looking its best for longer.

Durable Material: Our heavy duty garage hooks are crafted from solid steel, reinforced with a triple-layer coating for extraordinary weight capacity, ensuring your items are securely stored and organized without the worry of bending or breaking.

【Premium Materials】Garden hose holder wall mount made of tough metal, rustproof and thickened, durability and last long. Ideal choice for outdoor hose storage.
6. Add Hooks or Dowels
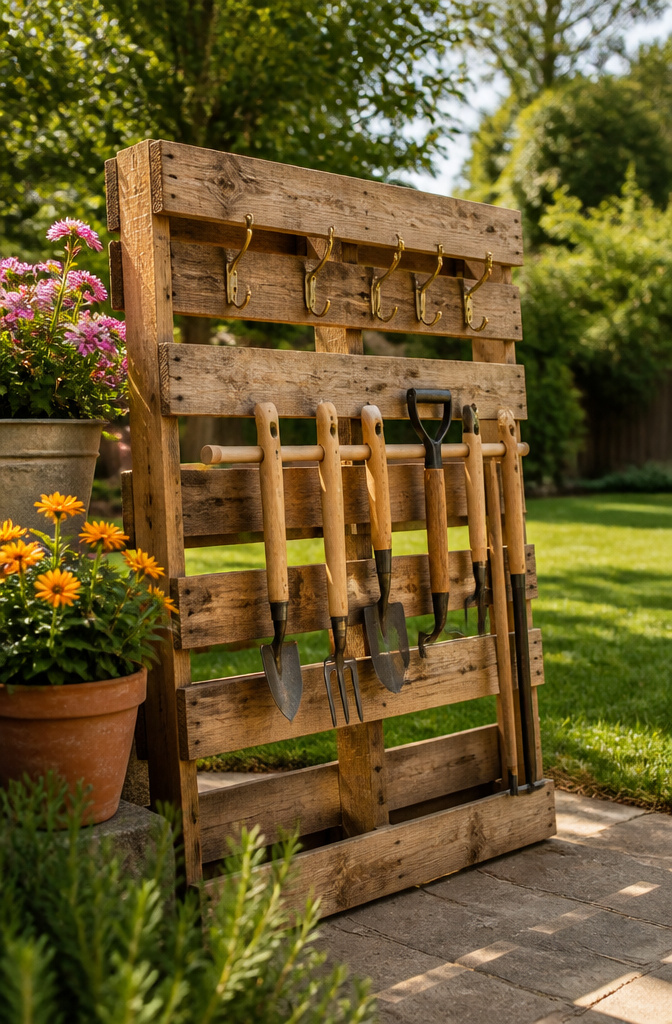
The long-handled tools already have a home between the pallet’s slats, but trowels, pruners, and gloves tend to slide through or pile up on the ground. A few dowels or hooks turn that same pallet into storage for the smaller gear you actually touch every day.
I drilled holes straight through the front face of the pallet, just above where the slats leave gaps, and hammered in short dowels with a bit of wood glue. A 3/8-inch dowel, maybe six inches long, gives enough shoulder to hang a trowel or a pair of pruners by their handles. Gloves dry faster draped over the dowel than stuffed in a bucket.
If dowels feel like too much cutting and gluing, screw-in hooks on the side rails work almost as well. The sources split on this: one route keeps everything flush and rustic, the other lets you move hooks around when you buy a new tool. For a weekend build with a drill and a hammer already in hand, dowels win on permanence; hooks win if your tool collection still changes every season.

HEAVY-DUTY SOLID WOOD - Built from premium-quality solid wood for outstanding strength and durability. Designed to support heavy loads in warehouses, factories, distribution centers, and shipping operations.

BULK RECLAIMED WOOD: Real reclaimed and recycled pallet wood, natural wood boards from pallets adds a beautiful, rustic accent to your home or walls in your office. Available in quantities for a single large project or many smaller projects.
Optimal 2-Way Entry Design: Allows forklifts and pallet jacks to load/unload from 2 side, speeding up warehouse operations and reducing handling time.
7. Finish the Pallet
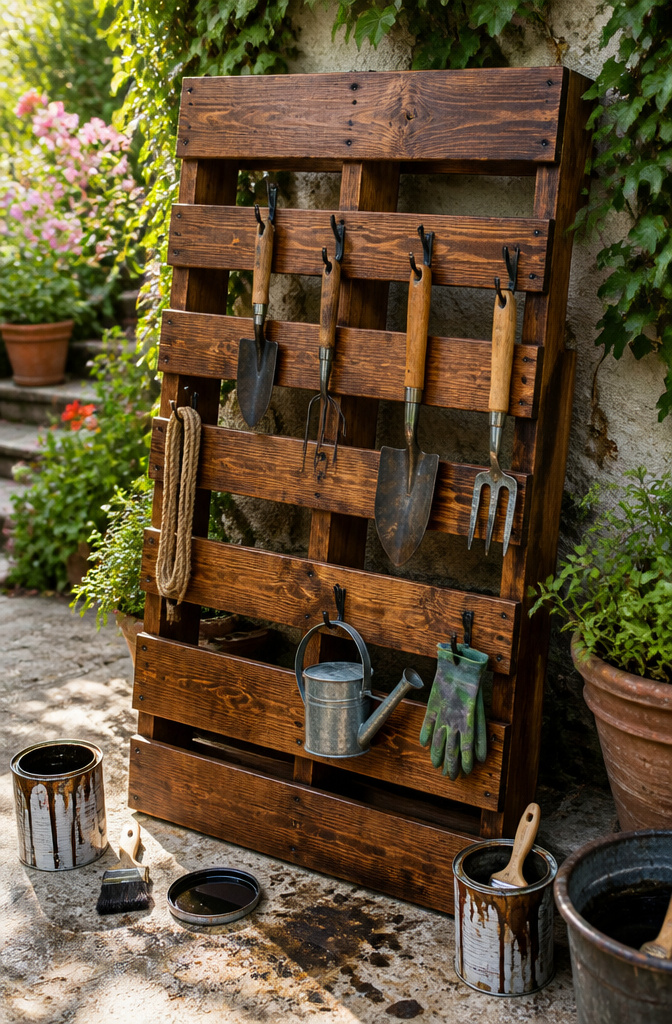
A coat of stain or paint buys the pallet another few years outside. The wood will shrink and expand through the seasons, and bare pine or oak turns gray and splinters faster than most people expect. I pried a few slats off before brushing anything on, which made the back surface easier to reach and left me a cleaner edge to fasten against a wall later.
Behr All in One Wood Stain and Sealer is what I reach for on anything that sits outside. It goes on like paint, so one bucket handles both color and protection, and a single quart usually covers a pallet with enough left for touch-ups. Matching it to an existing fence or shed keeps the rack from looking like an afterthought. Two coats are plenty; let it cure overnight if the weather allows, though a few hours works in a pinch. The sealer does not make the wood bulletproof, but it slows the moisture cycle that warps boards and loosens nails.

【Smart Garden Tool Holder】: As a smart tool storage and tools organizer, Sttoraboks garden tool holder features 35 tool slots, delivering generous capacity within a compact footprint. Unique storage holes are engineered to accommodate various tool types and sizes, from gardening and lawn equipment to cleaning supplies. Height-adjustable feet ensure stability even on uneven ground. This yard tool organizer for garage simplifies tool classification, keeping your workspace neat and efficient.

【Buy with Confidence】GIOTORENT tool organizer can be used for many years with confidence and are guaranteed to be stable and sturdy. Top Customer Service:We will offer 7/24 service. If you have any questions, please feel free to contact us

Multifunctional Organization: Say hello to our garden tool organizer with 10 tool slots, purpose-built for gardening tools, keeping all your essential tools in perfect order. It's the go-to choice for both home gardening enthusiasts and professional gardeners!
Pallet Design Options
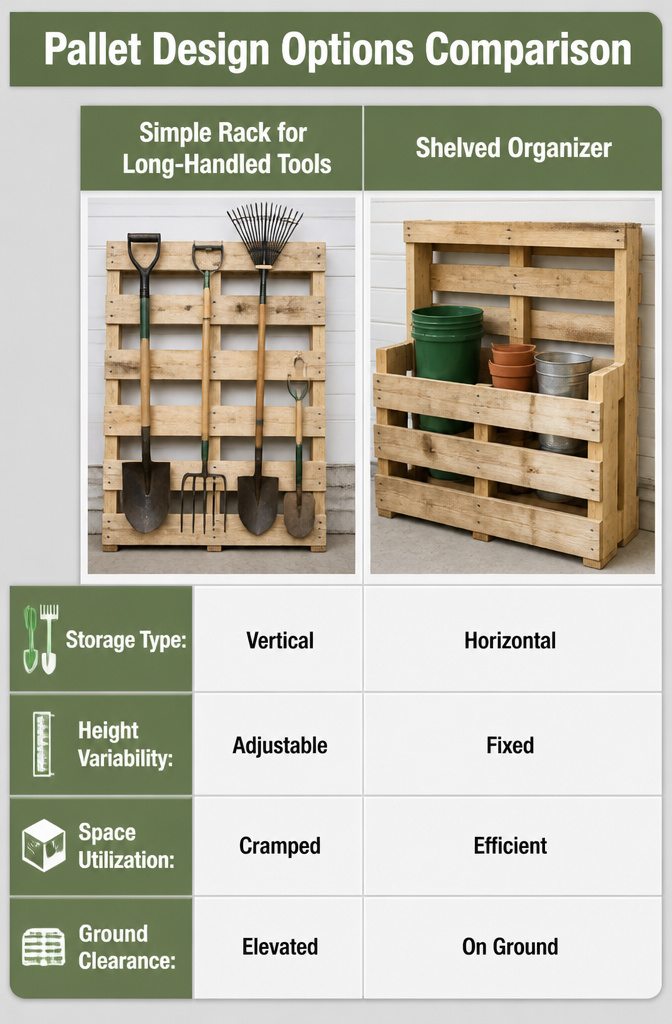
Before you pick up a saw, it helps to know which pallet layout matches your actual clutter. A single pallet stood upright with the slats running horizontal makes a simple rack for long-handled tools; the spaces between slats hold shovels and rakes at staggered heights if you remove or trim a few boards to fit 3-foot, 4-foot, and 5-foot handles together. Add a second pallet cut to three-quarter height in front, tie them together with 2×4 scraps, and the gap between them swallows five-gallon buckets or pots for a shelved organizer without cutting actual shelves. For hand tools, drill holes for dowels to mount pruners directly through the slats, or screw hooks into the sides and front for trowels and gloves. The fourth option is less about storage and more about survival: resting the whole unit on a second pallet or on cinder blocks lifts it off the ground and buys you time against rot, especially if you are leaving it outside year-round and only bringing tools in for winter.

ALL-METAL DURABILITY - Built entirely from iron, this garden tool organizer boasts exceptional strength and stability. Unlike typical ABS hooks, our heavy-duty garage storage solution withstands the weight of shovels, rakes, and more without bending or breaking.

All Metal Material: Our garden tool organizer, both backboard and hooks are made of iron, which makes it more durable and solid.And its load-bearing capacity far exceeds other usual ABS material tool hooks. It is deal for various tools like shovel, rakes, bikes, broom, mop, trust that what you get is what you see,any dissatisfaction please contact our customer service team

【Upgraded Heavy-Duty Material】LBT garden tool storage rack has thickened the hanging board to prevent deformation and firmly fix it to the wall. The diameter of each hook is 9 millimeters, and thicker hooks can withstand greater weight. All hook and hanging plate welding points have been upgraded, and the welding point stability has been increased by 50%, making them more solid.
Tool Organization Tips
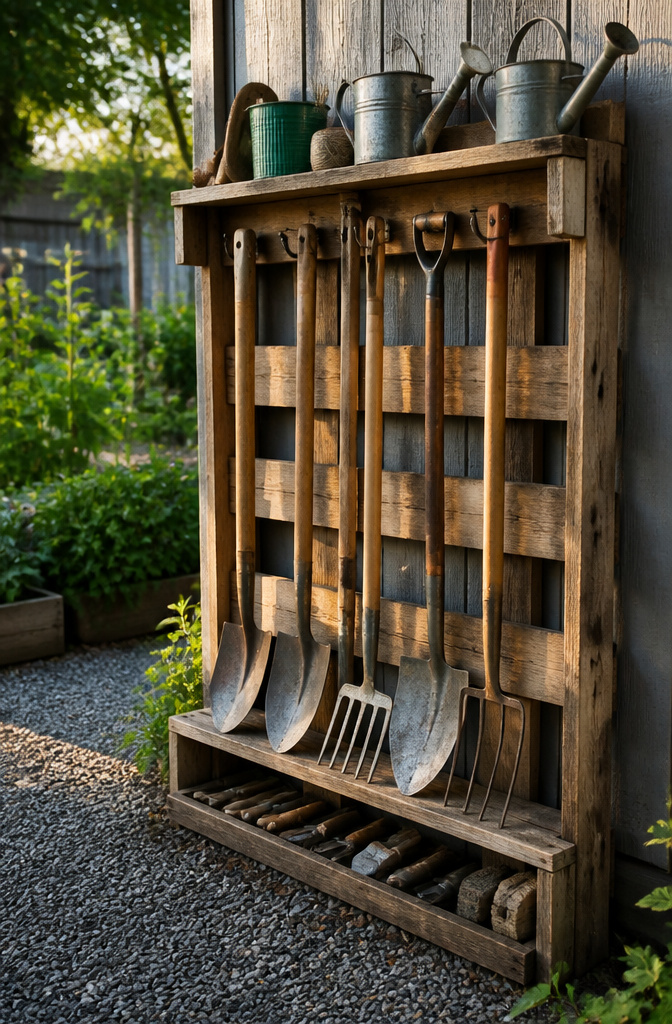
A pile of garden tools in the corner of a shed or garage turns a quick task into a hunt. Rakes tangle with shovels, handles crack under the weight of something else, and the thing you need is always at the back. Keeping each tool in a designated spot saves the ten minutes of rummaging that used to start every gardening session, and it keeps edges from dulling where they knock against metal.
The real payoff comes from grouping by use. Long-handled tools belong on the pallet’s open face where they hang clear of the ground; smaller hand tools sit on a lower shelf or in a bucket nearby. Watering cans and odd shapes go on the wide top surface. Once the habit sets in, you stop thinking about where things live and just reach. That speed matters most during the season when you are in and out of the yard half a dozen times a weekend, and it matters just as much when rain starts and you need everything stowed in under two minutes.

【Heavy-Duty Tool Rack】Engineered with a single-piece cutting process, this rack offers industrial-grade durability for garage and workshop storage. Tested to hold 40 lbs, it keeps tools organized, secure, and ready for use—perfect for DIYers and professionals alike.

Fit for Various Tools: designed with your tools in mind, the slatwall screwdriver holders come in 3 different styles, a 12 hook style measuring 7.5 x 1.77 inches, and a 6 ring and 4 ring styles both measuring 9 x 2.17 inches, catering specifically to diverse tool sizes and types, 6 pieces total

FOUR STYLES OF TOOL RACKS: The slatwall tool hangers are designed with your tools in mind and come in 4 different styles with varying numbers of rings; they hold screwdrivers, pliers, and other everyday items, and are perfect for hanging lightweight items and frequently used tools to save time and space.
Cost and Free Materials
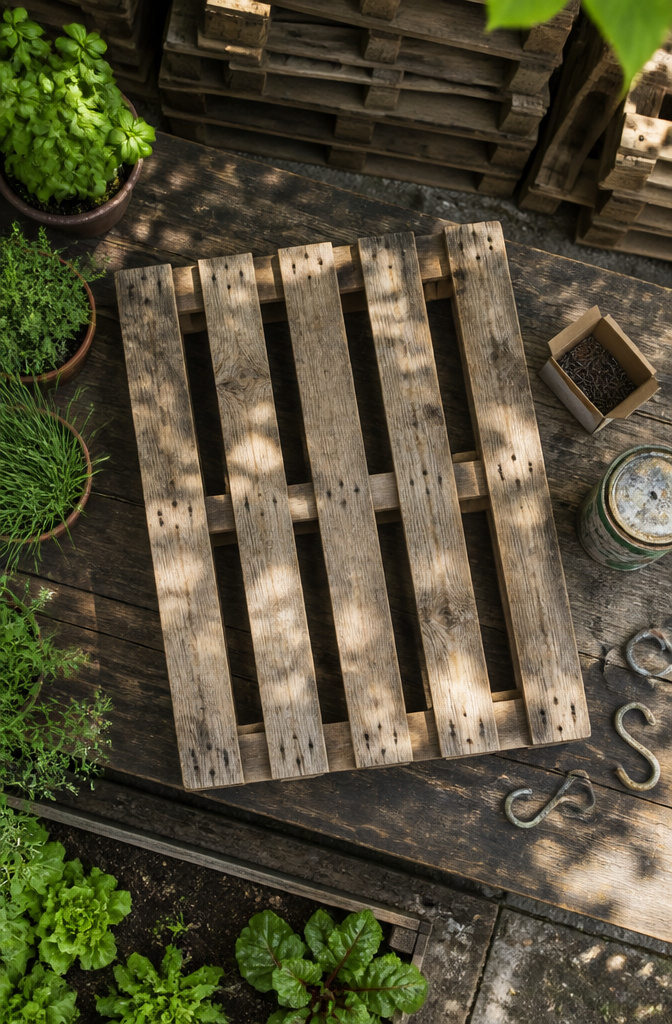
Most pallets come free if you know where to look. Local hardware stores, garden centers, and small warehouses stack them behind the building for anyone willing to haul them away. Online marketplaces like Craigslist or Facebook often list them under "free" with pickup required, and the supply stays steady because businesses pay to dispose of pallets otherwise. The only real expense lands on screws and hooks, which run somewhere in the single digits to low double digits depending on how many tools you are hanging. A box of exterior screws and a handful of heavy-duty S-hooks or screw-in hooks finish the job without pushing the project past the cost of a takeout dinner. Skip the pressure-treated lumber and metal brackets some guides suggest, since the pallet frame already holds the structure together and weatherproofing comes later in the build. The whole rack stays well inside a weekend-project budget, leaving room in the annual project fund for whatever the garden throws at you next.

Heavy-Duty Hooks: Six 2.8 inch U shaped wall mounted garage hooks, The tubular double bar hooks design makes the garage utility storage hooks more stable than regular single tong hooks.

Versatile Wall Storage System: Upgrade your 48-inch garage storage with this heavy-duty wall-mounted tool rack for flexible storage layouts and extra free floor space. Ideal for garages, gardens, sheds and workshops, it provides abundant hanging space for all long-handled tools

Heavy-Duty Hooks: Twelve 2.8 inch U shaped wall mounted garage hooks, The tubular double bar hooks design makes the garage utility storage hooks more stable than regular single tong hooks.
Weatherproofing and Durability
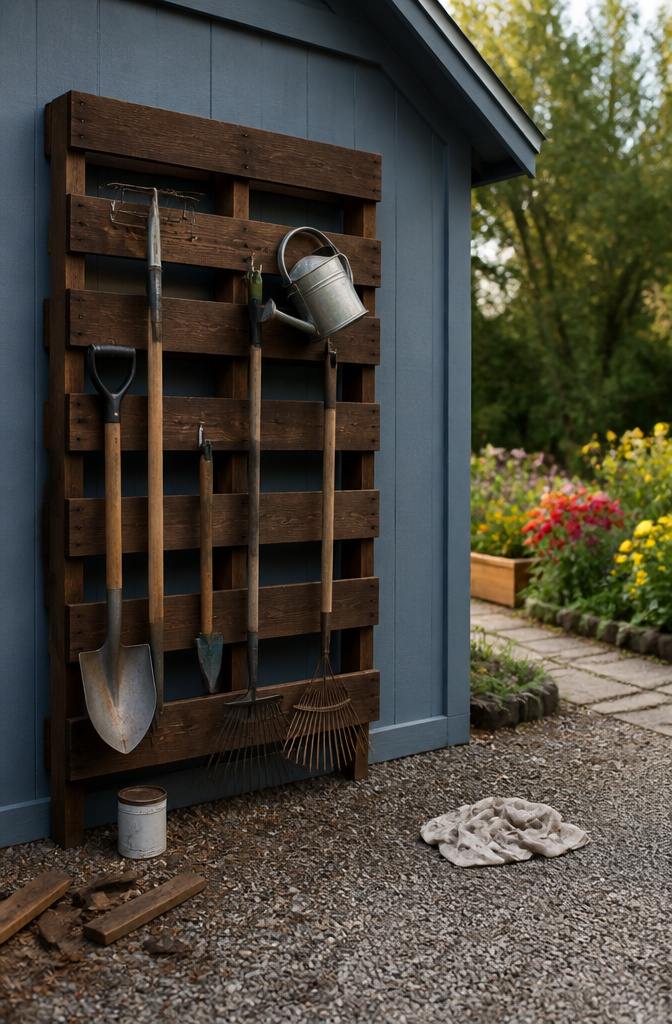
Raw pallet wood left outside turns gray, warps, and splits within a season or two. A coat of stain and a weatherproofing sealant buys you years instead of months. I used the same Behr All in One Wood Stain and Sealer I had on hand from another outdoor project, and matching the shed color made the rack disappear against the wall rather than shout for attention.
Before you brush anything on, flip the pallet and check the stamp. Heat-treated pallets are marked HT; those are the ones you want outside. Chemically treated pallets carry an MB stamp, and that treatment does not belong in garden soil or near tools you handle with bare hands. If the stamp is worn off or missing, find another pallet.
Sealer needs time to cure. Overnight is ideal, though a few hours will do if the weather holds. Re-staining every two or three seasons, or whenever the wood starts to look thirsty, keeps rot and splintering from creeping in. The half hour of maintenance is what separates a rack that lasts from one that leans and cracks by autumn.
Customization and Drainage
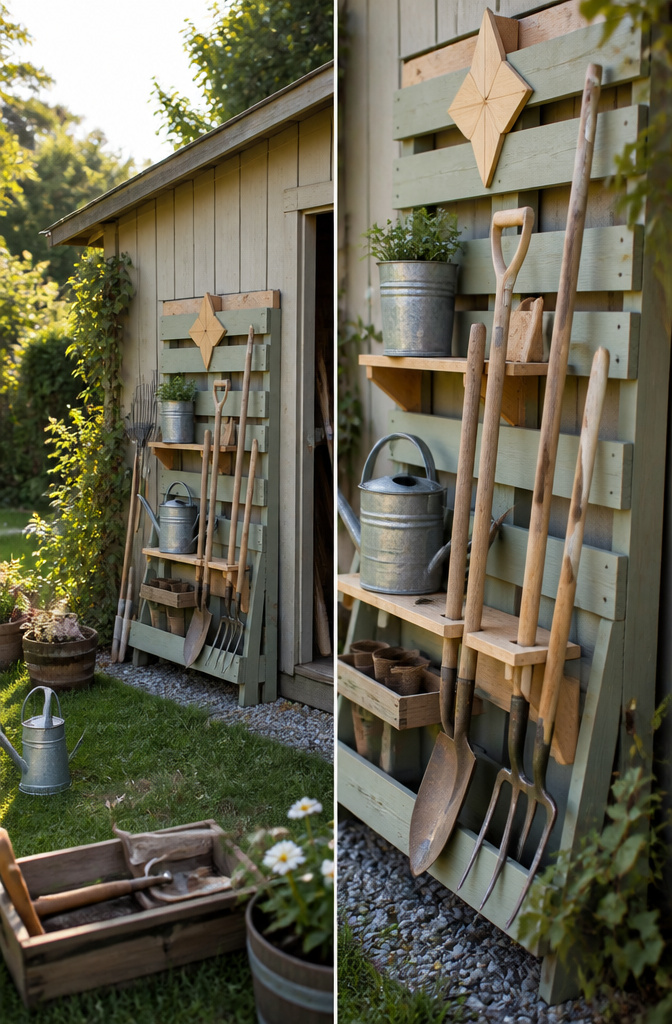
Optional touches are where this project stops being purely practical and starts looking like something you meant to build. A coat of paint in a color that matches the shed or fence turns the pallet from scrap wood into deliberate garden architecture. I have seen people cut small shapes from leftover boards and tack them on as corner brackets; it takes ten minutes and the rack suddenly has a personality. Shelves can sit at different heights to hold pots or a watering can, though I would keep them shallow. Deep shelves on an outdoor rack collect leaves faster than they collect anything useful.
Drainage matters more than the decorative stuff. A solid base traps rainwater, and wet pallets rot from the bottom up in a season or two. Laying a bed of gravel or broken pottery shards underneath the rack lets water escape instead of pooling. Some builders screw a piece of hardware cloth across the bottom frame so soil and leaves fall through while the structure stays ventilated. Either approach adds maybe half an hour and a few dollars to the build. Without it, you are relying on the pallet’s own gaps, which are rarely spaced well enough to actually dry the wood.
Tools You Need
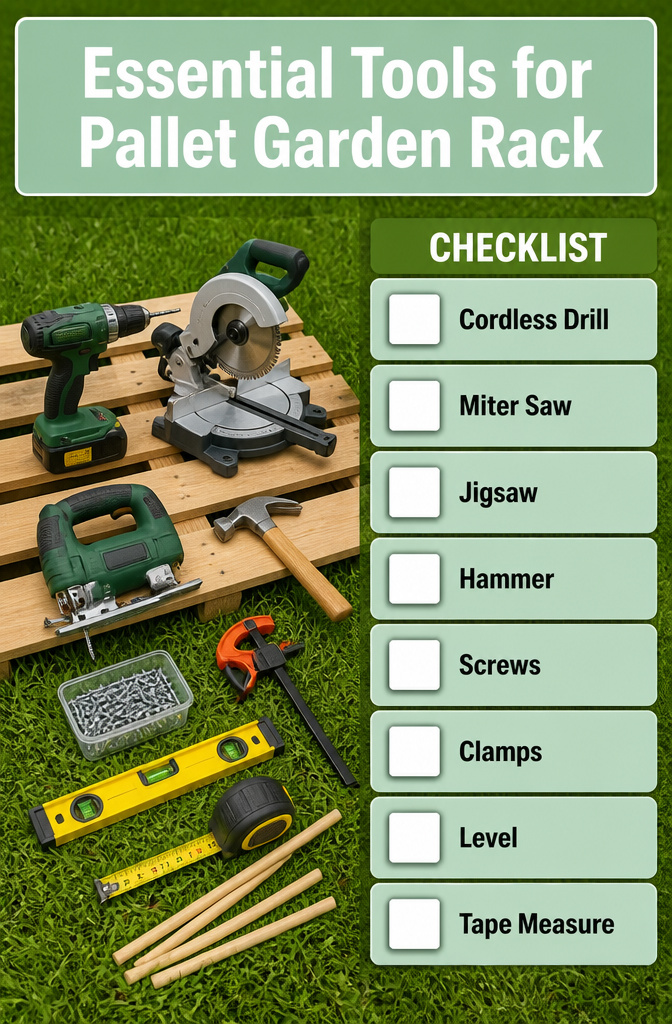
A cordless drill, miter saw, and jigsaw handle most of the cutting and fastening for this project. The miter saw squares off the pallet ends cleanly, while the jigsaw reaches the spots between stringers where a circular blade won’t fit. A hammer helps with the inevitable stubborn nails that don’t want to let go of their boards.
Beyond the power tools, a few basics keep the work straight:
- Screws for reattaching boards once you’ve cut them to length
- Clamps to hold feet or supports in place while you drill
- A level, because a rack that leans in the garage leans worse once tools load it down
- A tape measure, which every guide assumes you own but few bother to list
Dowel rods are worth adding if you have them on hand. They slip in beside smaller tools to keep handles from sliding sideways. The sources that skip them end up with rakes that fan out like a dropped handful of sticks every time you bump the rack.
Frequently Asked Questions
How do I make a pallet tool rack?
Start with a heat-treated pallet marked HT, then sand it clean and decide whether to mount it on a wall or fence or convert it to a freestanding unit by removing top boards and reattaching them as feet at the bottom. Add shelves cut to fit the open sections for smaller items, and drill holes for dowels or screw in hooks to hold trowels, pruners, and gloves. Finish with stain or sealer to protect the wood from weather.
What tools do I need for a pallet storage project?
You need a miter saw with a slider, a jigsaw, a cordless drill, a hammer, and an orbital sander with medium-grit discs. Grab clamps, a level, a tape measure, exterior screws, and either dowel rods or screw-in hooks depending on how you want to hang smaller tools.
How do I weatherproof my pallet storage?
Brush on a stain-and-sealer combo, such as Behr All in One Wood Stain and Sealer, after sanding the pallet smooth and checking for the HT stamp to confirm the wood was heat-treated rather than chemically treated. Two coats are enough; let it cure overnight if possible, and plan to re-stain every two or three seasons before the wood starts looking thirsty.