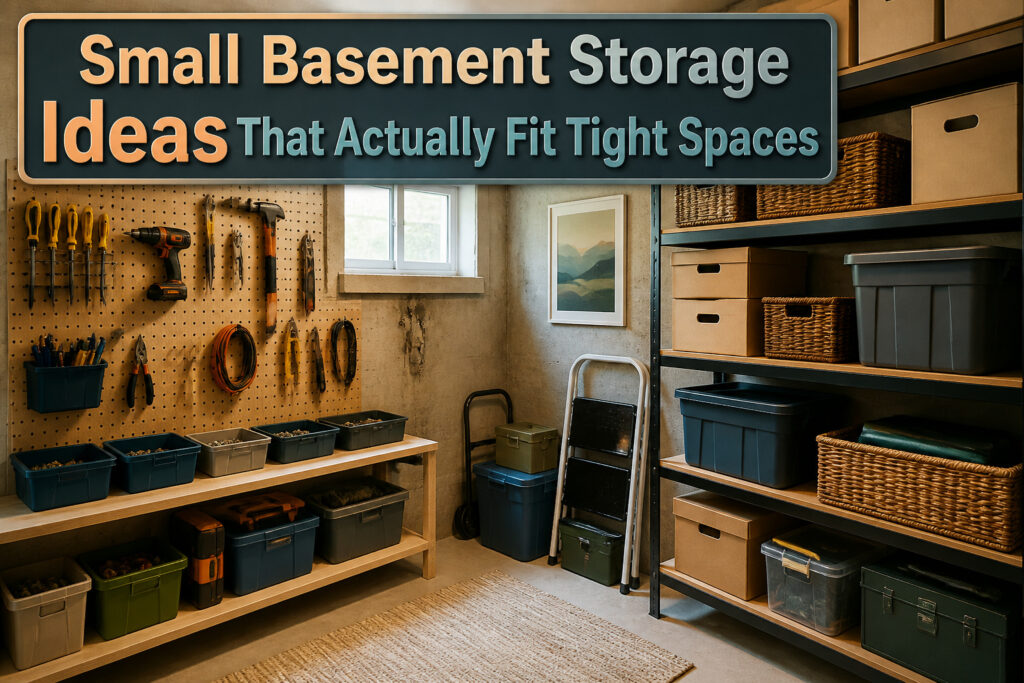
Small basement storage ideas run from a Saturday-morning pegboard install to full built-ins that eat a weekend and twice the budget. What picks one over another is whether your concrete breathes damp or stays dry year-round, because the same humidity that warps a plywood bench lid will rust unsealed angle iron on a ceiling rack. I learned that after finding my impact driver on the concrete and watching paint bubble on pine studs I pressed against a basement wall.
1. Pegboard Storage
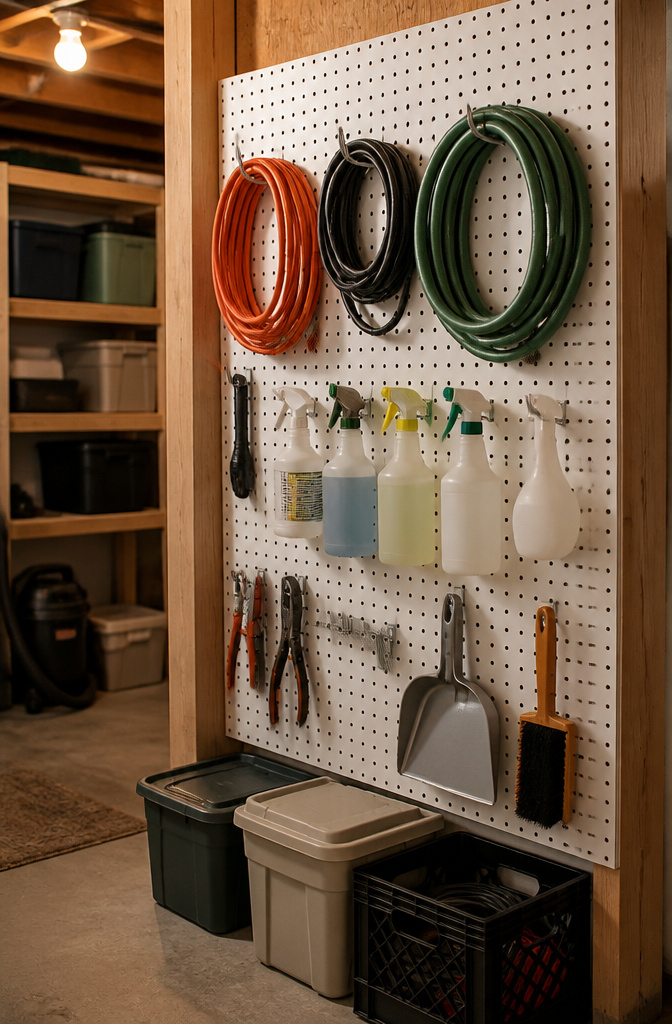
A pegboard wall turns any basement stud bay into vertical storage without eating the floor space you barely have. The standard 4 x 8-foot sheet fits between most stud layouts, and at about 20 pounds per square foot when mounted to blocking, it holds more than a closet’s worth of gear.
Hooks are where the system lives or dies. Straight hooks work for extension cords and garden tools in the off-season; angled J-hooks keep spray bottles and dustpans from tipping; locking pegs with a rear lip are the only thing that keeps a heavy drill from walking off the board every time you bump it. I learned that last one after finding my impact driver on the concrete one too many times.
For cleaning supplies and lighter seasonal gear, the 1/4-inch pegboard from the hardware store is fine. Tools need the 1/8-inch hardboard or metal pegboard; the holes wallow out otherwise, and hooks start dropping through after a year of grabbing and replacing. I ran a strip of 1 x 4 pine behind the top edge of my last board, screwed to studs, so the sheet itself never carries the load. The whole setup cost less than a single prefab cabinet and took a Saturday morning, most of which was sorting which hooks actually matched what I owned.
2. Custom Shelving and Cabinets
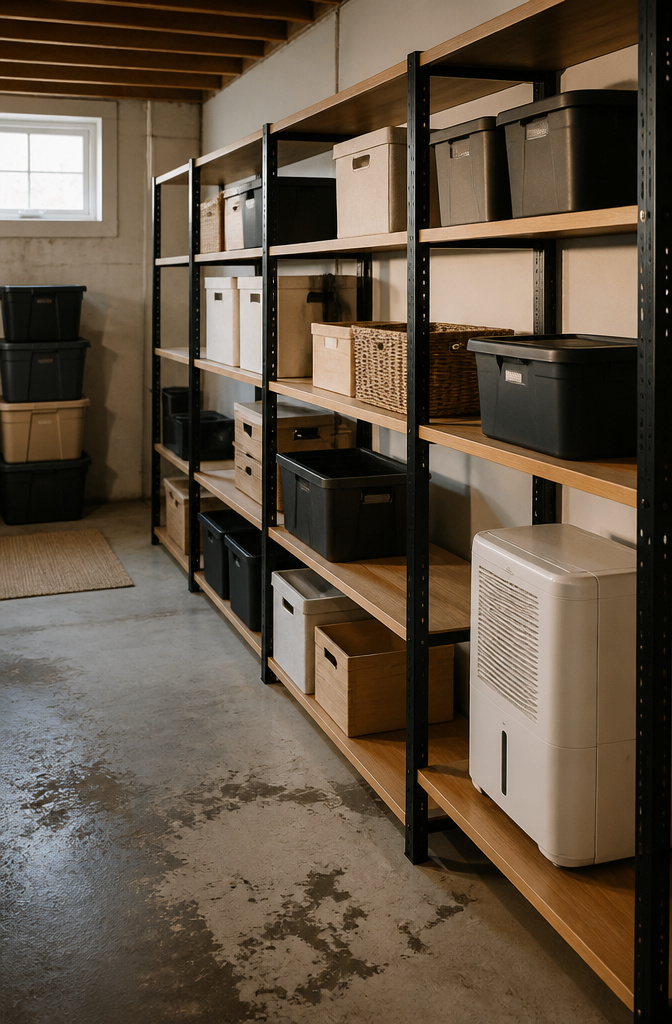
Built-ins look permanent and feel satisfying, but they fight you the moment your storage needs shift. I learned this after boxing myself in with fixed plywood cabinets that held our camping gear beautifully until we bought a kayak and had nowhere tall to put it.
Modular steel shelving with 750 lb capacity per shelf solves that problem without looking like a warehouse. I went with Gladiator Shelving for the main wall because the tracks let me move shelves up or down in two-inch increments. Last month I dropped a shelf to fit a dehumidifier underneath; ten minutes, no tools.
The humidity question matters more in basements than people admit. Metal shelving stays easy to clean and won’t degrade if you hit it with rust-proofing spray once a year. Wood needs a waterproofing sealant, or skip the plywood and use OSB with the waterproofed stamp already on it. I paid more for the steel upfront than I would have for lumber, but the rearranging has already paid me back twice.
3. Under-Stair Storage
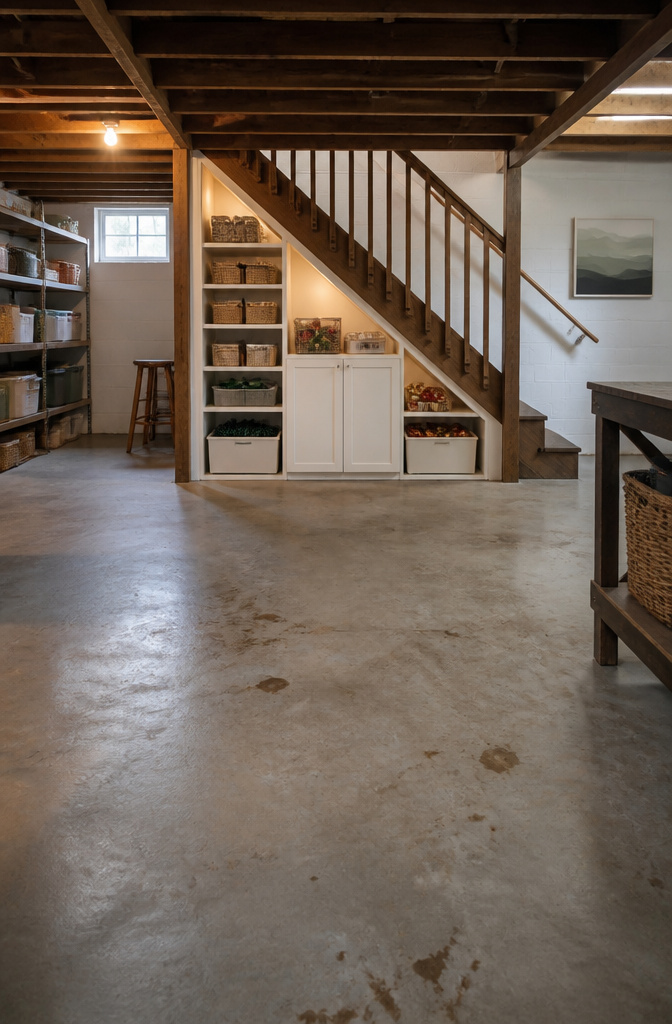
The triangular void beneath basement stairs is dead space until you frame it into something useful, and that framing is where most people stall. The back wall sits against concrete, which means the studs need a pressure-treated bottom plate and a gap for air to move, or the seasonal items you store there will pick up a musty smell by October. I learned that the hard way with a first attempt that went straight to standard pine; the paint bubbled within a year.
Leave the back wall open to the air, or seal it fully behind closed doors — the half-measure of a partial back panel traps moisture against whatever sits deepest.
For what goes inside, the shape dictates the answer. The narrow point at the bottom fits pull-out bins for holiday lights and tree stands. The mid-height stretch holds enclosed cabinets where I keep the camping gear I do not want to see every day. The tall top shelf, awkward to reach, is where the artificial tree lives eleven months a year. What I skip entirely: anything that rusts or warps fast, like the dehumidifier reservoir I tried tucking there once, or any paper that matters. The concrete still breathes, even with a dehumidifier running nearby, and that back corner runs a few degrees cooler than the rest of the basement.
A simple IKEA KALLAX unit can slide into the wider section if you do not want to build frames, though it leaves gaps at the slanted ceiling you will need to box in or ignore.
4. Rolling Storage Carts
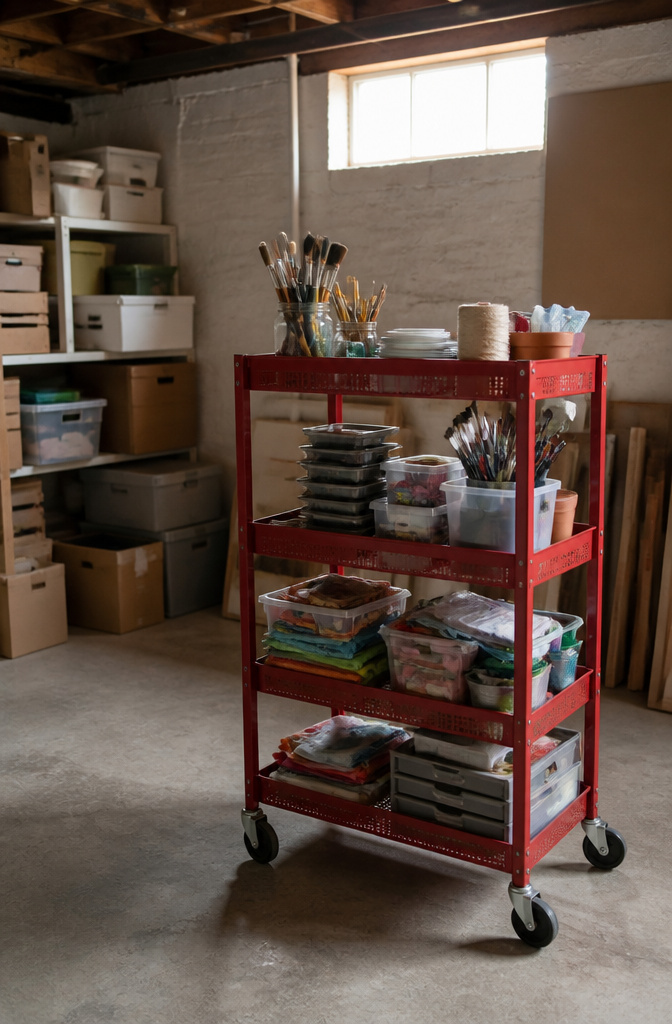
A rolling cart lives or dies by its wheels. In my basement, the concrete slab has a gentle crown near the drain and a few patched spots where the previous owner cut in a sump pit. Hard plastic casters chatter and catch on every transition; rubber-tread wheels with a swivel plate roll over the same seams without waking anyone upstairs. I learned that the hard way with a three-tier metal cart that now lives in the garage, replaced by a two-shelf utility version with 4-inch rubber wheels.
Size matters more than shelf count. A cart 18 inches wide and 30 inches long fits the standard 32-inch path between my furnace and the wall; anything deeper blocks access to the water shutoff. For craft supplies, the trolley approach the classroom carts used works better than deep bins. Flat trays let you see the top layer of a project in progress, and the open sides mean you grab the glue gun without unstacking anything. I keep one tray for active glue-ups, another for sandpaper and finishing rags, and the bottom for bulk stock.
Mobility helps when you work in zones. Wheeling the cart to the bench, then rolling it back into the corner keeps the floor clear for the next project. It becomes a hindrance once you store anything with weight. A cart loaded with paint cans or power tools develops a wobble that steers itself; for that, a fixed shelf or a bin on the floor wins. The same trolley that carries seedling trays to the garden in spring works in the basement all winter, but only if you commit to swapping the load, not stacking both seasons at once.
5. Waterproof Bins
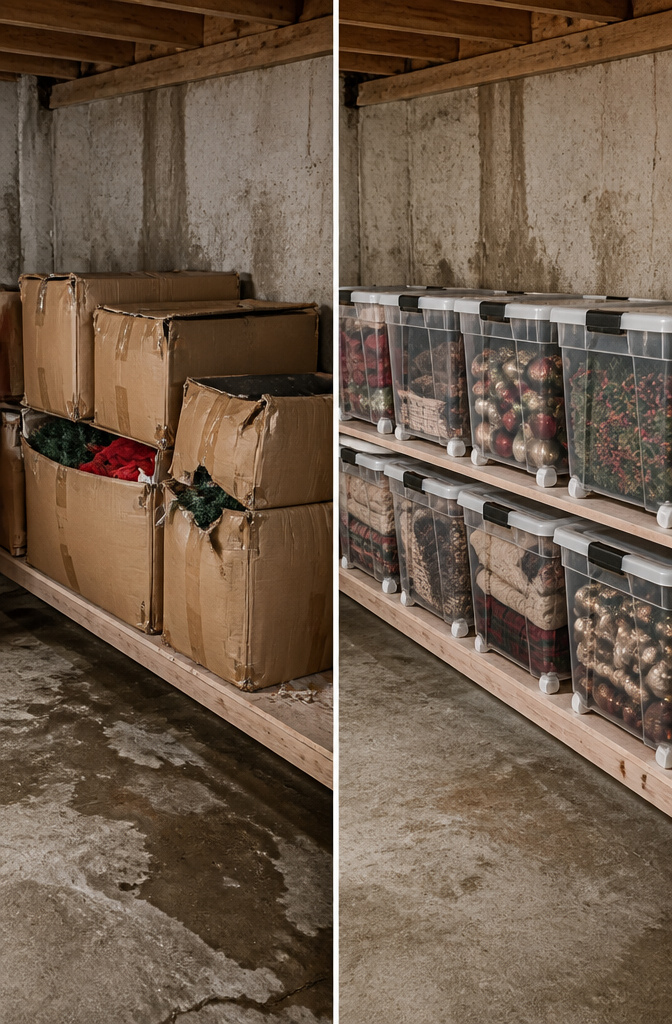
Moisture is the first thing to beat in a basement, and Weathertight Totes are the only bins I trust for anything that matters. The word gets thrown around loosely, but "weathertight" here means a gasketed lid and multiple latches that pull it down tight enough to keep water and fabric-damaging pests out. I check the seal by pressing the lid at each latch; if it rocks or clicks, the gasket is not seated. A tote that failed me had a warped lid from sitting in summer heat. It still latched, but a quarter-inch gap let dampness in over three months and mildewed a quilt.
The 103-quart size with wheels stacks two high on a standard 18-inch shelf depth without wasted space. Clear sides beat opaque every time; you spot contents without unlatching. Labels go on the narrow end, not the lid, because you read them at eye level while the stack stays put. I use adhesive labels with a coat of clear packing tape over them; humidity peels paper otherwise.
Bins win over open shelving when you have seasonal items, anything textile, or a finished basement that still gets musty. The upfront cost runs higher than a wire rack, but replacing water-damaged storage pays for the tote twice over.
6. Multi-Purpose Furniture
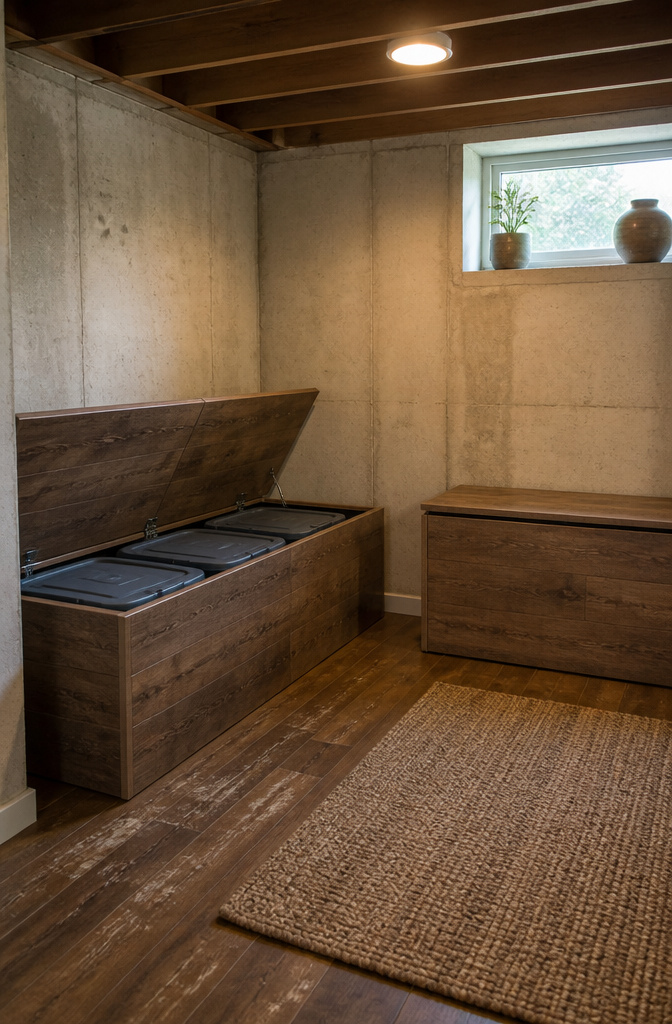
A bench with a hinged lid turns the dead zone beside your water heater into seating that pays rent. I built one from a pair of IKEA BROR legs and a plywood box skinned with leftover laminate flooring, and the cavity underneath swallowed three Rubbermaid bins of holiday lights without adding a single inch to the footprint. The laminate facing was the move that mattered; raw plywood in a basement drinks moisture and swells until the lid jams.
Ottomans are trickier. The cheap ones with cardboard bottoms sag within a season down there. What held up was a 30-gallon deck box from Suncast, repurposed as a window seat under the half egress window. It is plastic, not pretty, but it stays square through humidity swings and the lock keeps the mice out of the spare bedding.
The real math is cubic feet per square foot of floor lost. My bench gained roughly six cubic feet for two square feet of footprint. The deck box does better: four cubic feet for one square foot, because it stacks taller than furniture norms allow. In a small basement, that ratio is the whole decision.
7. Ceiling-Mounted Racks
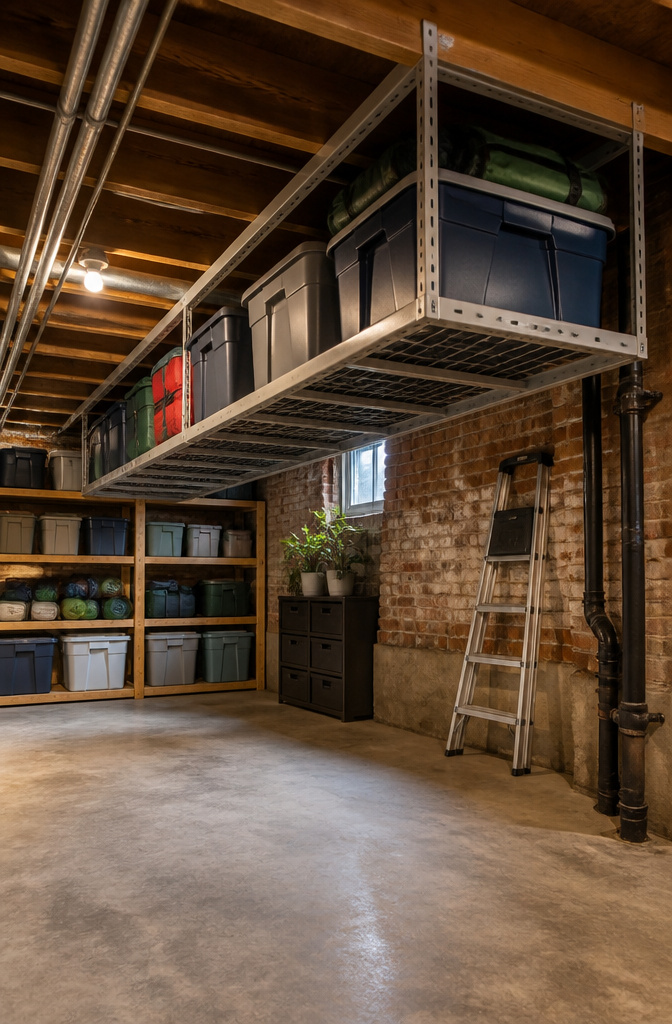
Ceiling-mounted racks turn the dead zone between your head and the joists into storage for the things you touch maybe twice a year. Holiday bins, camping gear, the spare window AC unit. The trick is reading your basement’s bones before you buy hardware. Older houses rarely hit modern joist spacing evenly, so measure three bays and expect the fourth to surprise you. I learned that after a rack hung fine on two joists and hung crooked on the third because a century of settling had drifted things half an inch.
Lag bolts into solid joist meat beat toggle bolts through old plaster any day. Weight wants to sit directly under the fasteners, not out on the corners where the rack frame starts to torque. I load the center heavy and keep the edges light, same as packing a canoe.
What goes up there stays up there. The ladder climb means I think hard before I hoist something, and I have regretted the trip more than once for a bin I needed in March that I convinced myself was an October item. Twice a year I walk the racks with a flashlight, checking for rust on the hardware and any bow in the angle iron. Takes ten minutes and has caught two loose bolts before they became a midnight crash.
8. Built-In Storage
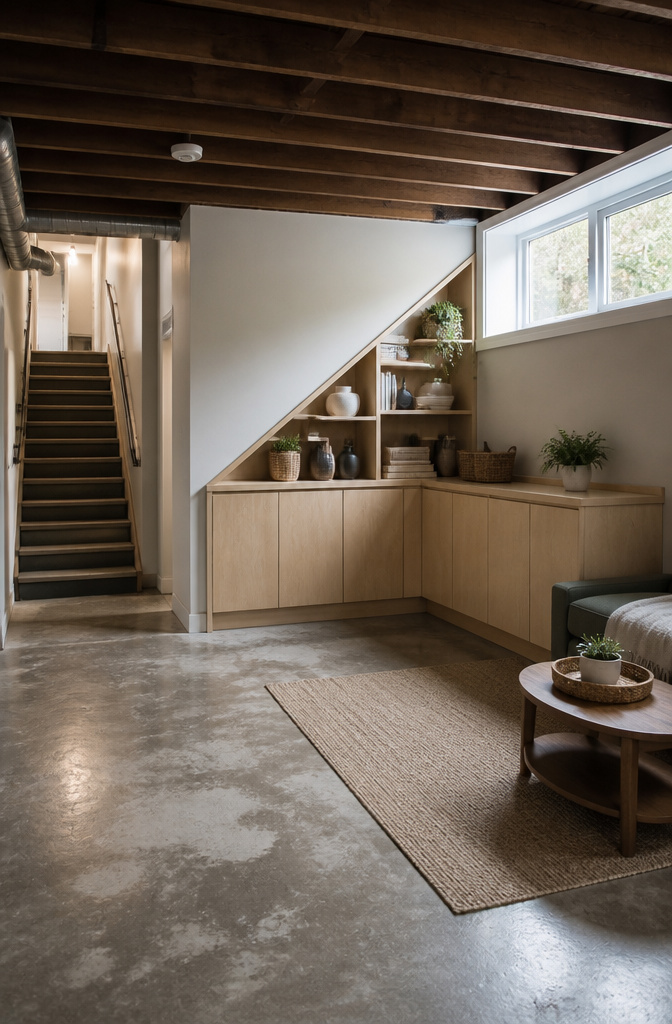
Built-in cabinetry turns the dead space inside a knee wall or bulkhead into storage that actually looks finished, not like a basement afterthought. I used ¾-inch plywood for the carcasses and MDF for the doors, which paints smooth without the grain telegraphing through. The materials ran me about $180 for a six-foot run, not counting hardware.
The catch is moisture. Basements breathe damp air, and raw plywood edges drink it up. I brushed on two coats of waterproofing sealant, paying attention to the end grain where water wicks in fastest. Some builders skip this and plan to swap cabinets in ten years; I would rather not build twice.
OSB is another option if you find the waterproofed stamp, though I stuck with plywood for the cleaner edges around door hinges. Either way, seal it before installation, not after, because the back side against the wall never gets another chance.
The finished look comes from keeping the face frames tight to the drywall and running baseboard across the toe kicks so the cabinets read as built into the house, not parked in it. That continuity is what separates storage from clutter.
9. Stackable Storage Bins
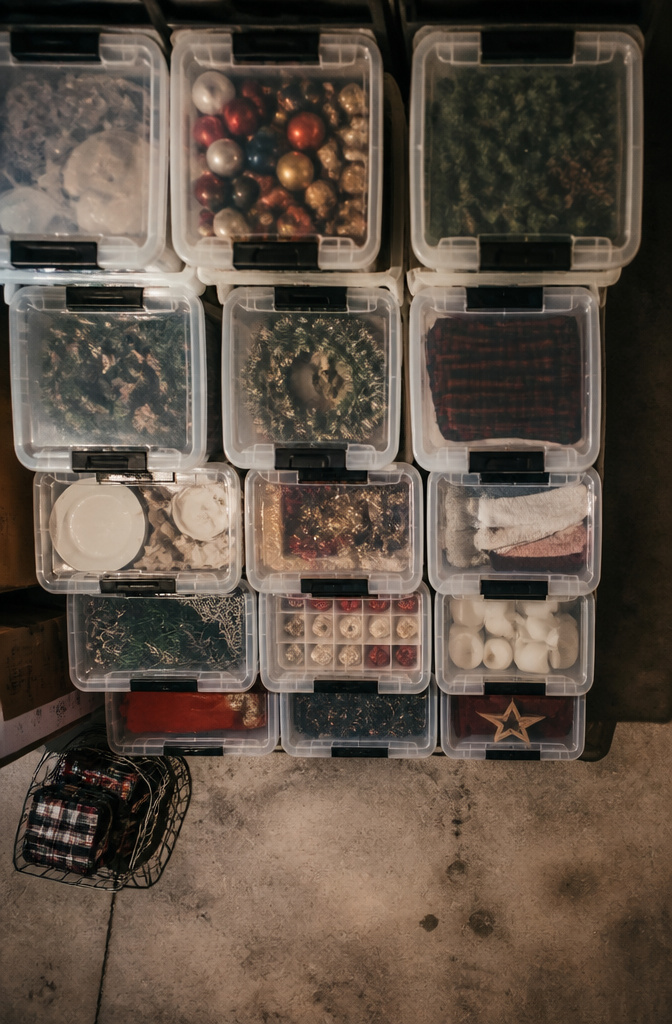
Stackable bins with interlocking lids turn a narrow basement wall into vertical storage without shelving. The ones I keep coming back to are the Sterilite 27-quart and the Iris Weathertight, though the Iris costs nearly double and the seal matters less in a dry basement than the modularity. Clear sides beat opaque every time; you spot the Christmas lights or the spare paint roller without unstacking four bins to check the bottom one.
The instability point hits around five or six high on concrete. Past that, the slight wobble in the interlock becomes a real lean, especially if the floor has the usual basement slope toward a drain. I stop at four and leave headroom for a half-bin of whatever category I access most.
Labeling lives on the short side facing out, not the lid. Lids get buried; sides stay visible even when you are squeezing past the water heater. A strip of masking tape and a Sharpie lasts about two seasons before the humidity curls it. Switching to a label maker with laminate tape fixed that, though the tape itself costs more than the bin some months. Four high, clear sides, label the short face is the rule that has kept my own stacks from becoming archaeology.
Decluttering Before You Organize
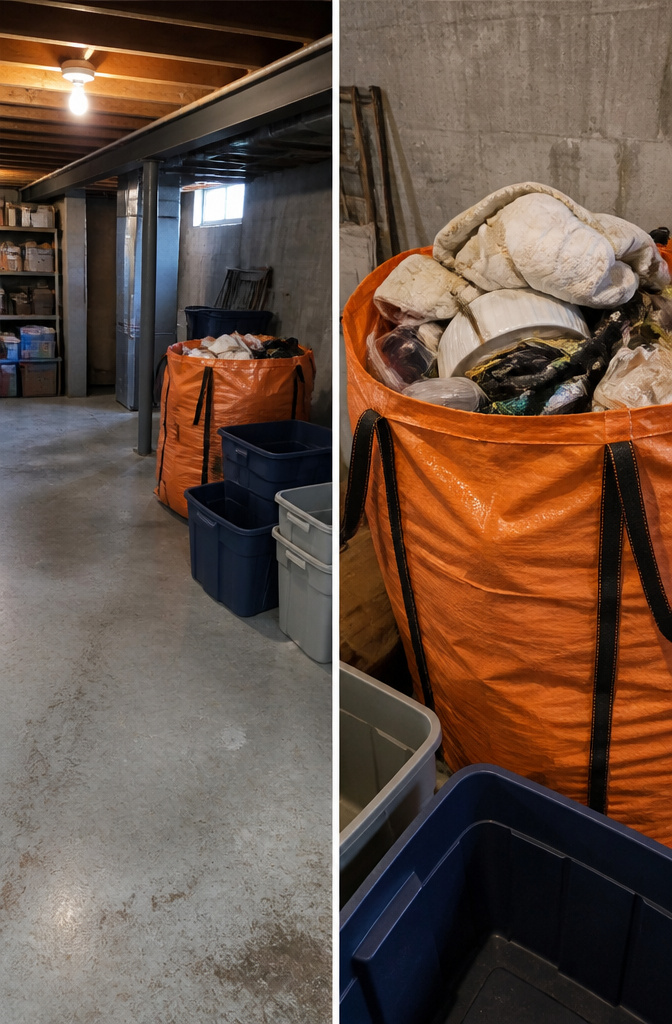
Every basement storage project I have ever finished started with the same mistake: skipping the purge and buying bins for stuff I should have thrown out. The last time I redid my own basement, I filled a Bagster Bag with broken holiday decorations, dried paint cans, and three boxes of cords for electronics I no longer owned. The bag sat in the driveway until pickup, and seeing it there made the cost real in a way a dumpster rental would not have.
Now my rule is simple: if I have not touched it in two years and it costs under $40 to replace, it goes to donation or trash. That threshold eliminates most of the "just in case" clutter that basements collect. I apply it category by category: old sports gear, duplicate tools, outgrown kids’ stuff, anything with a layer of dust that tells its own story.
Storage dollars spent on kept junk are dollars thrown away. A $12 bin holding a $3 item you will never use is not organization; it is relocation. The basement feels larger with less in it, and the shelving you install afterward actually fits what remains.
Labeling That Lasts
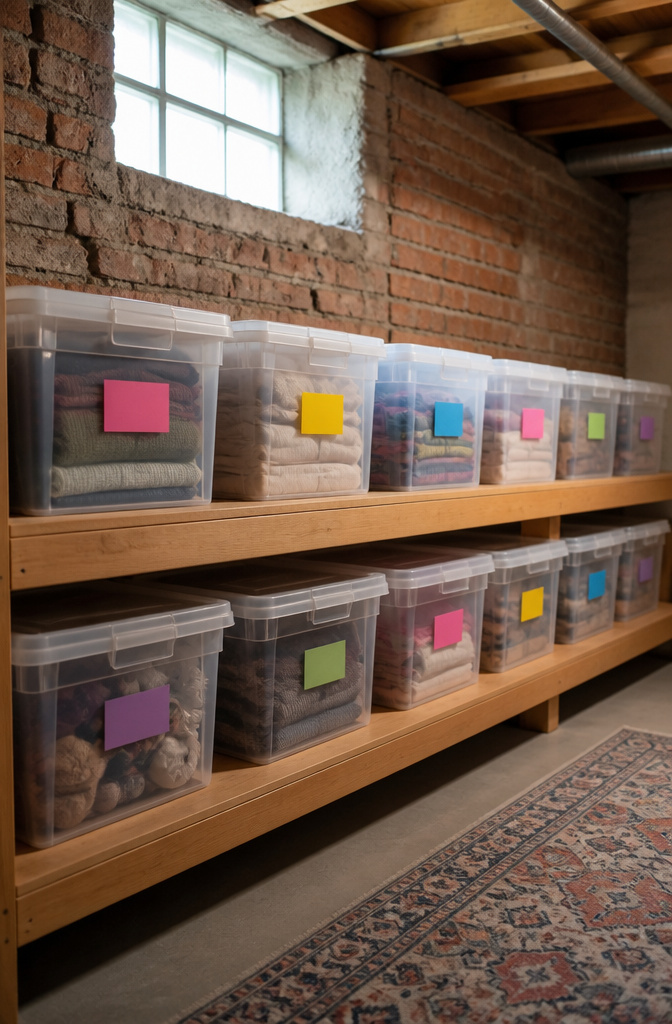
Paper labels in a basement last about as long as a snowball in July. I tried them first, the neat printed kind with the little borders, and watched them curl and fuzz into unreadable gray lumps within a single humid season. The adhesive backing turned to slime that stuck to fingers but not to plastic.
Grease pencil on masking tape is what survived. The tape goes on the bin, not the lid, since lids swap around when you are in a hurry. Marks stay legible through condensation cycles that wipe out Sharpie, and when a category changes, the tape peels clean without the gummy residue that duct tape leaves behind. A label gun with embossed tape works too, if you already own one, but the refill cost is hard to justify for a basement system.
Labels only save time if the zone behind them holds. A bin marked "holiday" that slowly absorbs camping gear and spare paint becomes a liar, and you will stand in front of it every December wondering where the lights went. I redraw the lines each spring: one shelf for decorations, one for tools, and anything that drifts gets evicted or re-marked that same weekend. The tape is cheap. Re-labeling is cheaper than the hour lost guessing.
Moisture Control
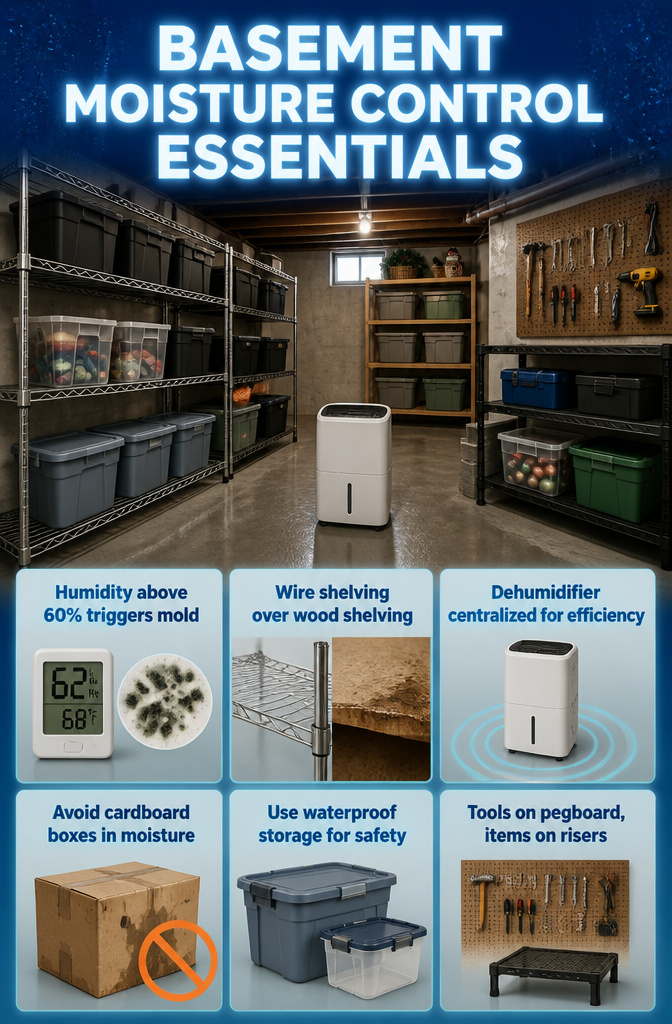
Basements sit below grade, so moisture is the first thing that ruins storage no matter how good the bins are. I keep a cheap hygrometer down there and watch for relative humidity above 60%, which is where mold wakes up and metal starts sweating.
Wire shelving handles this better than wood. Metal cleans with a rag, and a can of rust-proofing spray makes it hold up year after year. Wood needs a waterproofing sealant, or you can skip the hassle and buy oriented strand board stamped waterproof at the store. I went with wire because I could cut it to the odd lengths our foundation walls dictated, and air moves through it instead of trapping damp against the wall.
Dehumidifier placement matters more than the model. Mine sits in the center of the open floor, not tucked in a corner where it only dries six square feet. After I sealed the concrete with a penetrating sealer, the unit ran about half as often and the musty smell left for good.
Even with all that, some items do not belong down there. Cardboard boxes absorb moisture even in finished basements with decent ventilation. Wicker and canvas baskets are fine for toys or craft supplies if the space is finished and dry, but I would not trust them in an unfinished corner. Seasonal clothing in plastic tubs with lids, tools on pegboard, holiday decor on risers or pallets: those survive. Paper records, fabric furniture, and anything that sours in damp air stay upstairs.
Zoning the Basement
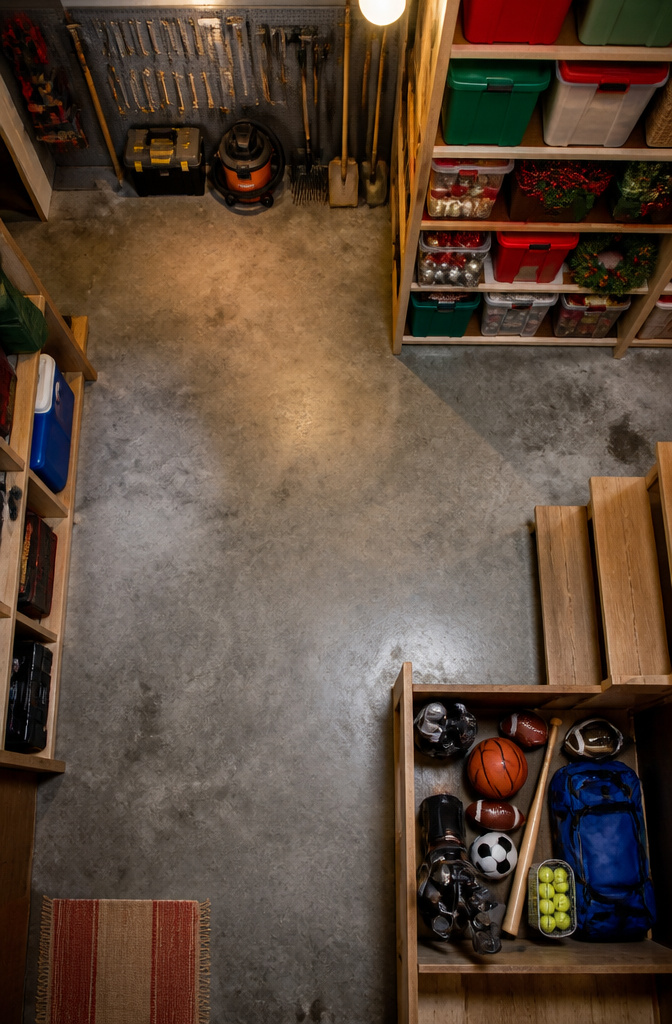
The first thing that disappears in a small basement is any sense of where one category ends and another begins. I have four zones down there: tools against the north wall, seasonal decor on the Gladiator shelving under the sunroom, sports gear near the stairs, and household overflow in the middle. The boundaries are not tape on the floor. I use the support columns as dividers, and I keep the bins facing different directions so the tool wall reads vertically while the decor shelves read horizontally. That difference in orientation is enough to slow the eye down and keep the categories separate.
The slow merge is real. I broke my own rule last spring, setting a box of hand-me-downs on the sports shelf because the clothes bin was full. By August I had lost twenty minutes hunting for a soccer ball that had slid behind sweaters. Now I enforce a hard buffer: one empty shelf between zones, even if that shelf stays empty for months. The visual cue is the gap itself. An unfinished basement has enough chaos already; the empty space signals that the boundary still matters.
Frequently Asked Questions
What are some creative basement storage ideas?
Pegboard walls turn stud bays into vertical storage without using floor space, and modular steel shelving with adjustable tracks lets you reconfigure as needs change. Under-stair storage frames triangular voids into pull-out bins and cabinets, while rolling carts with rubber-tread wheels move supplies between work zones. Ceiling-mounted racks store seasonal items overhead, and multi-purpose furniture like storage benches gain cubic footage from every square foot of floor.
How do I organize an unfinished basement?
Start with heavy-duty shelving and waterproof bins, then group items by category and label each container. Set bins on pallets or risers to protect against surprise water, and add pegboards or wall hooks to keep tools off the floor and within reach. A dehumidifier in the center of the open floor, not tucked in a corner, keeps relative humidity below 60% where mold activates.
What should I use for basement storage?
Waterproof bins with gasketed lids and multiple latches protect against moisture and pests better than open shelving for anything textile or seasonal. Wire shelving handles humidity better than wood and cleans easily with annual rust-proofing spray. For furniture that stores, a deck box or bench with sealed surfaces gains cubic storage per square foot of floor lost, and modular steel shelving adjusts in two-inch increments without tools.